The Easiest No Bake Cheesecake with Fresh Berries
SHARE THIS RECIPE!

This is the perfect summer dessert recipe for easy entertaining when it’s too hot to cook because the only thing you need to bake is the crust and that only takes a few minutes. The filling is completely No-Bake.
I also love to make this in the springtime when berries are just coming into season here in California because it makes for such a beautiful Easter Dessert of Mother’s Day cake too!
For another rich and decadent cheesecake that is practically just as easy and so delicious too, try my Burnt Basque Cheesecake recipe.
Would you like to save this?
Why You’ll Love This:
- The filling comes together so quickly and easily!
- The decoration of the berries on top takes hardly any skill but looks so beautiful and makes a big impression!
- The crust is super simple especially if you use the pre-ground graham cracker crumbs.
- You can make it a day ahead and then decorate with the berries just before serving!
Watch a Video Demo of This Recipe Below!
Recipe Pairing Ideas:
- This is a great dessert for a brunch party since it’s not too sweet and incorporates so much fresh fruit. For your main course try my Easy Goat Cheese Egg Bake or my fantastic Breakfast Egg Souffle Casserole
- For starters try my Blueberry Lemon Scones (a fan favorite!) or my even easier Classic Blueberry Muffins
- Round out the brunch with my fantastic Smashed Potato recipe, a great potato side dish with the egg dishes
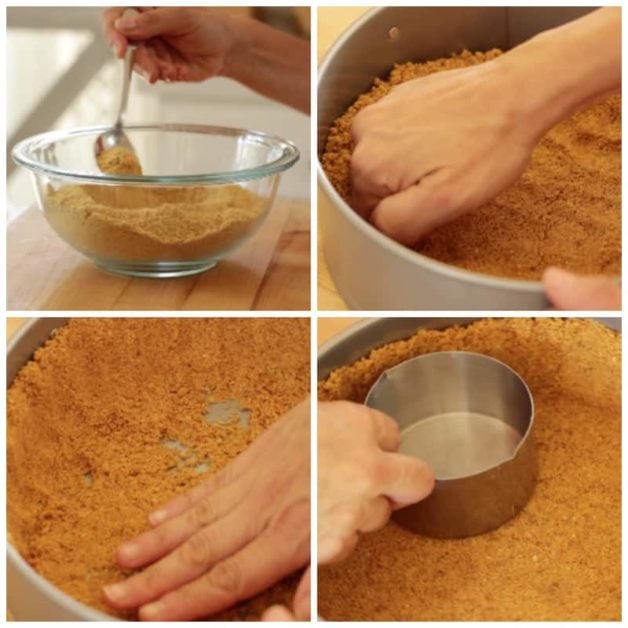
How do you make a graham cracker crust?
Here’s the other plus with the store-bought crumbs, you don’t have to drag out the food processor to make a quick cheesecake! Also, the fact that they are already ground makes them more uniform in size so they are also easier to fit into your tin.
The crust is this easy!
- Mix up the crumb mixture.
- Make a “fist-bump-type motion” to create a crumb wall up the side of the tin
- Assure your crumbs cover the bottom.
- Use a measuring cup to tighten up the edges so you get a nice tight crust.
- Bake et voila!
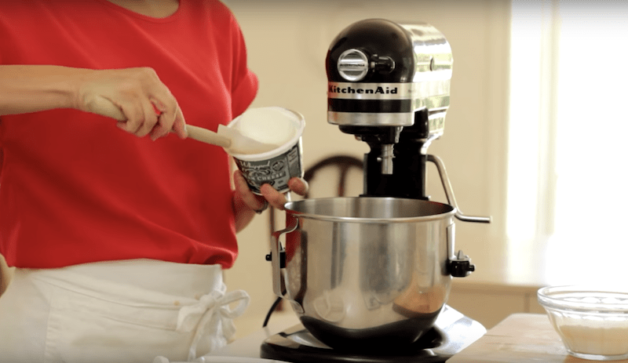
Making the No-Bake Filling
No-bake cheesecake is such an easy type of cheesecake to make! Because there’s no oven time, water baths, tin foil wrapping etc, and it comes out just as delicious!
You’ll start by whipping the cream cheese mixture in a stand mixer, or electric hand mixer. Then you’ll create a separate mixture of homemade whipped cream and combine the two together. And seriously that’s it!
Once it’s placed overnight in the fridge it will set to a cheesecake-like consistency without any baking.
No-Bake Cheesecakes are a little misleading because most of them still require you to bake the crust, but really that’s as hard as it gets!
Can You Put it In the Freezer to Set?
Well, if you’re really in a rush you could give it a “head start” there. But I personally wouldn’t finish it there because ice crystals will form and create an undesirable texture. If you want a nice smooth cheesecake, overnight in the refrigerator is the way to go.
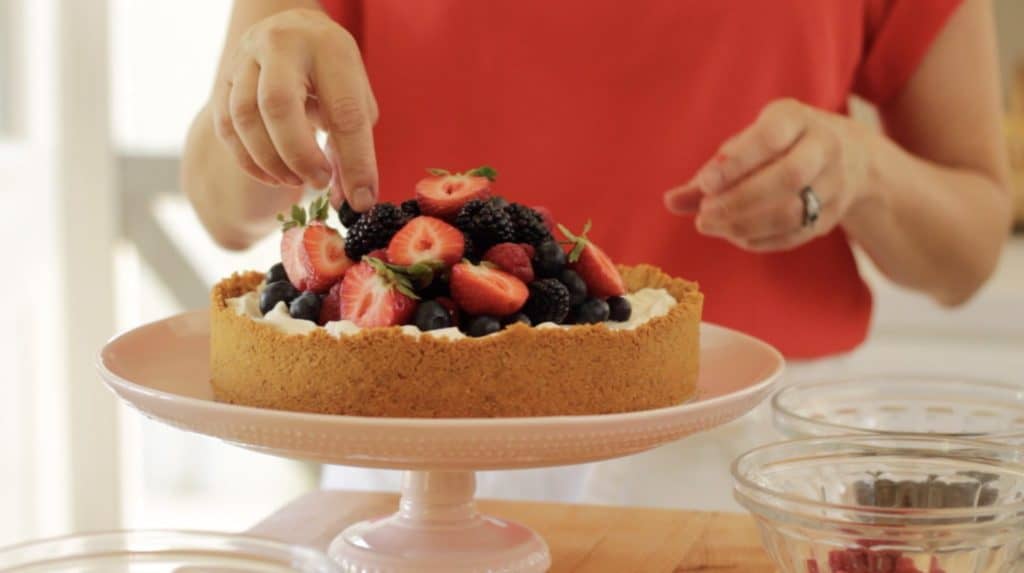
Decorating the Cake is Also Easy!
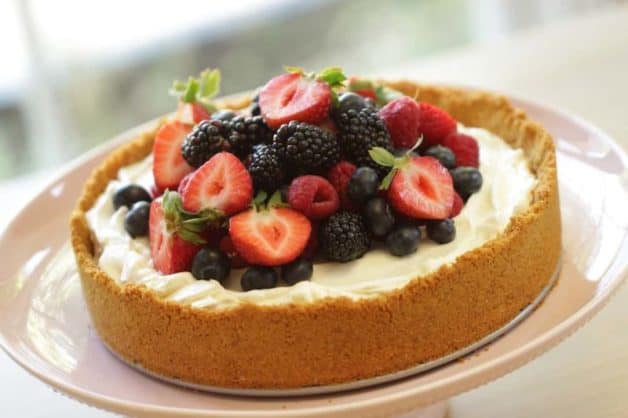
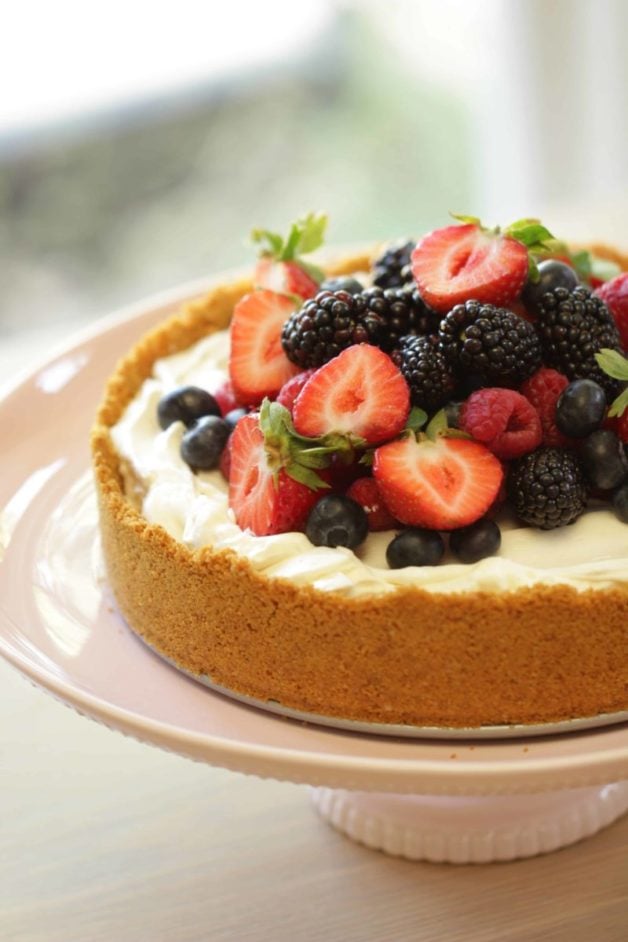
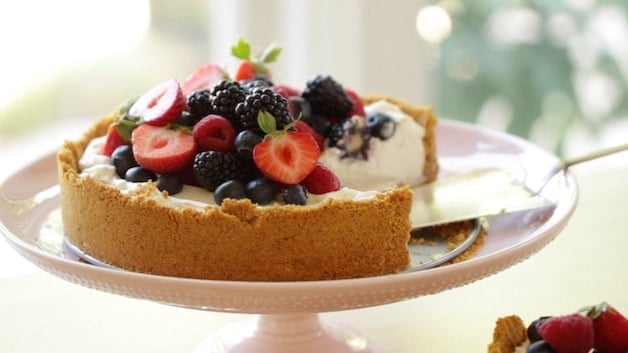
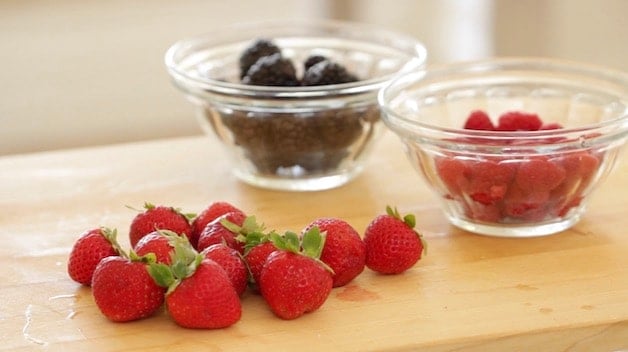
No need to drag out the pastry bags and pastry tips, this easy cheesecake gets its decoration from a rustic piling of fresh fruit. To keep it simple I use blackberries and raspberries and a few blueberries because they don’t need to be peeled or chopped. Just rinse them and pile them on!
The best part about this cake’s decoration is it really takes hardly any skill if you can pile on berries that are as hard as it gets! Its rustic “free form” design alleviates any need for perfection. Mother Nature has done all the work for you.
A Garden-Fresh Decoration
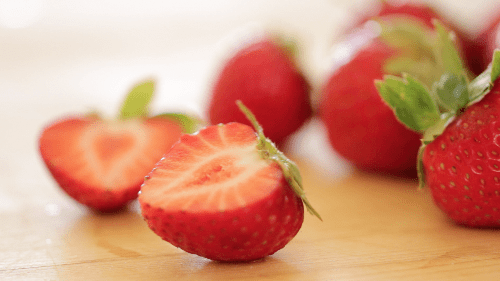
Then for some added decoration, I place a few strawberries around the fruit pile. My other tip is to use small strawberries, slice them in half, and then leave the green tops on. They look so rustic and “garden fresh” that way. It just adds to the whole charming nature of this dessert. And hey if you grow your own strawberries you would then have little stems and blossoms to decorate with and that would be, well, just crazy cute.
Make-Ahead Tips:
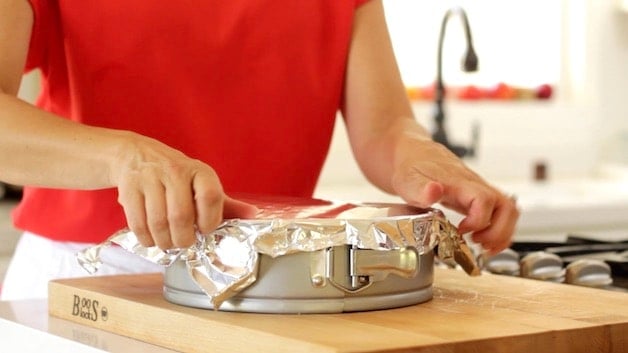
- Make the crust and the filling the day before serving
- Then cover tightly with foil and refrigerate overnight
- It will set up best that way and allow you to slice it easily
- Moments before serving top with the fruit.
How-To Store?
- Store the cheesecake in the refrigerator, covered.
- You could go as long as 4-5 days but I find it’s best when served within a 3-day window.
- The longer it sits in the fridge the greater the chance your cheesecake will dry out and the soggier your crust will become.
- Just be sure to wrap your cheesecake tightly in foil or plastic wrap when refrigerating it.
More Great Recipes!
- Key Lime Pie Cheesecake
- Salted Caramel Ice Cream
- Easy Strawberry Muffins
- One-Pot Chicken and Potatoes
If You Enjoyed This Recipe
Please leave a rating and review below!
This helps others discover and enjoy the recipe too!
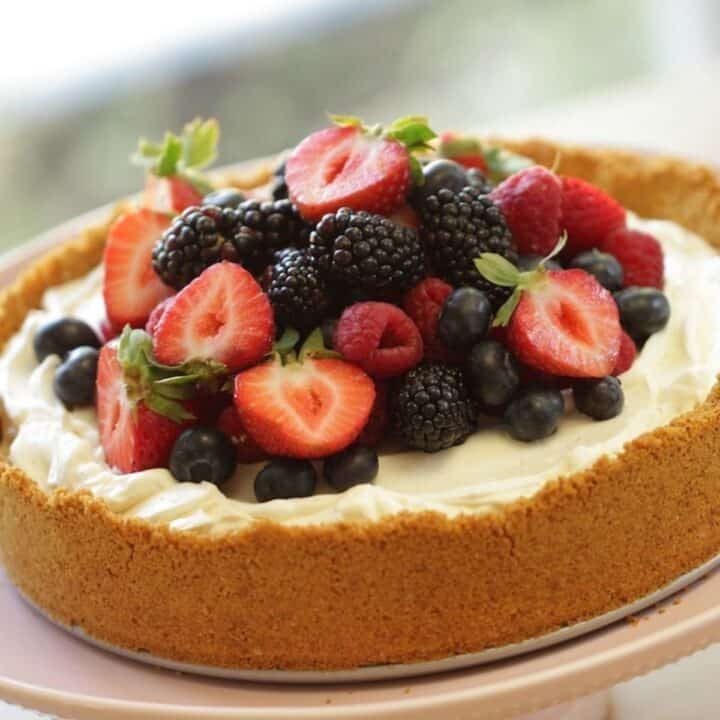
The Easiest No-Bake Cheesecake
This No-Bake Cheesecake topped with fresh berries is an easy and beautiful dessert for an easy dessert for summer entertaining! So delicious and beautiful!
Ingredients
For Crust:
- 2 Cups (475ml) Graham Cracker Crumbs
- 2 tsp (10 ml) sugar
- pinch of salt
- 6 tbsp (90 ml) melted butter
For Filling:
- 16 oz (460 g) cream cheese
- 1 cup (100g) powdered sugar
- 1 tsp (5 ml) vanilla
- 2 cups (480 ml) heavy cream
- ½ tsp (2.5ml) vanilla extract
- 1 tbsp (15 ml) powdered sugar
For Garnish:
- 1 cup (150g) blackberries
- 1 cup (150g) raspberries
- 1 cup (150g) small strawberries cut in half (I like to keep the green tops on because I think it looks rustic and pretty that way)
- 1 cup (150g) blueberries (for a quadruple berry cheesecake!)
Instructions
- In a large bowl combine graham cracker crumbs, sugar, salt. Whisk to combine. Add melted butter and whisk until damp and clumps together. If you find it’s still too dry add more melted butter in 1 tbsp increments.
- Pour crumbs into a 9 inch (23cm) cheesecake pan, pressing crumbs into the pan and working up the sides, pressing until a 2 inch crust is formed.
- Bake at 375F/(190C) for 6-7 minutes until golden brown. Set aside to cool.
- Then beat together the cream cheese and 1 cup of powdered sugar until combined. Add 1 tsp of vanilla and beat until combined. Remove the mixture in place in a large bowl.
- Then add the heavy cream, 1/2 tsp of vanilla, and 1 tbsp of powdered sugar into a bowl of an electric mixer. Whip cream mixture on high until stiff peaks form. Add cream cheese mixture, to whipped cream and whisk until combined.
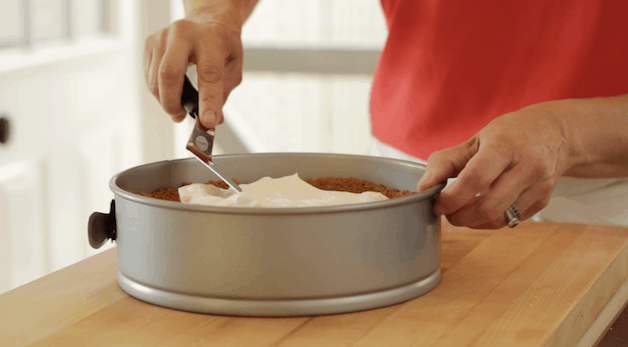
- Pour mixture into cooled crust and smooth with an offset spatula. Cover with foil. Place in the fridge for at least 2 hours to set up. But overnight will be even better! It will be firmer and more like a cheesecake consistency. At 2 hours it will be a bit more “mousse-like”. But really either is great!
- Then decorate with fresh berries in the center of the cake just before serving. Slice into wedges and serve!
Notes
save yourself some time and search out the already crushed graham cracker crumbs! Such a game changer!
Nutrition Information:
Yield: 8 Serving Size: 1Amount Per Serving: Calories: 331Total Fat: 30gSaturated Fat: 17gTrans Fat: 1gUnsaturated Fat: 9gCholesterol: 85mgSodium: 459mgCarbohydrates: 4gFiber: 0gSugar: 2gProtein: 13g

Have you ever experimented with adding a splash of balsamic vinegar to your berry cheesecake mixture for a unique and tangy twist?
No but that does sound quite delicious! 🙂
This is perfect. Follow the directions as Beth provides and you will not have any issue. This is a deliciously mild flavor — not too ‘cream-cheesey’ or too sweet — just right. I used the whipped cream cheese (softened) and it mixes beautifully. Waiting to hear how my family enjoys it when served!
Add in your video I noticed you use 2 cups of heavy whipping cream yet you only typed in 1 1/2 cups.
So sorry! That’s a typo, it just be 2 cups. Just fixed it! 🙂
When do you use the vanilla extract, listed in the “filling” ingredients? Looks yumm-o!
Sorry for the confusion, just rewrote that part of the recipe so it’s easier to follow 🙂
I always love no bake cake! Thanks!
Hi Beth, In the video it looks like you are using whipped cream cheese….but the printed recipe does not say that. It would seem the volume would be different. Which would be best?
Well, personally I prefer the whipped cream cheese, but you can make it with the brick cream cheese too. I had so many questions if users could just make it with the brick when I specified whipped that it made more sense to just say Cream Cheese since it really will work with either! Ha! Same quantity.Hope you enjoy!