Chocolate Peanut Butter Pie
SHARE THIS RECIPE!

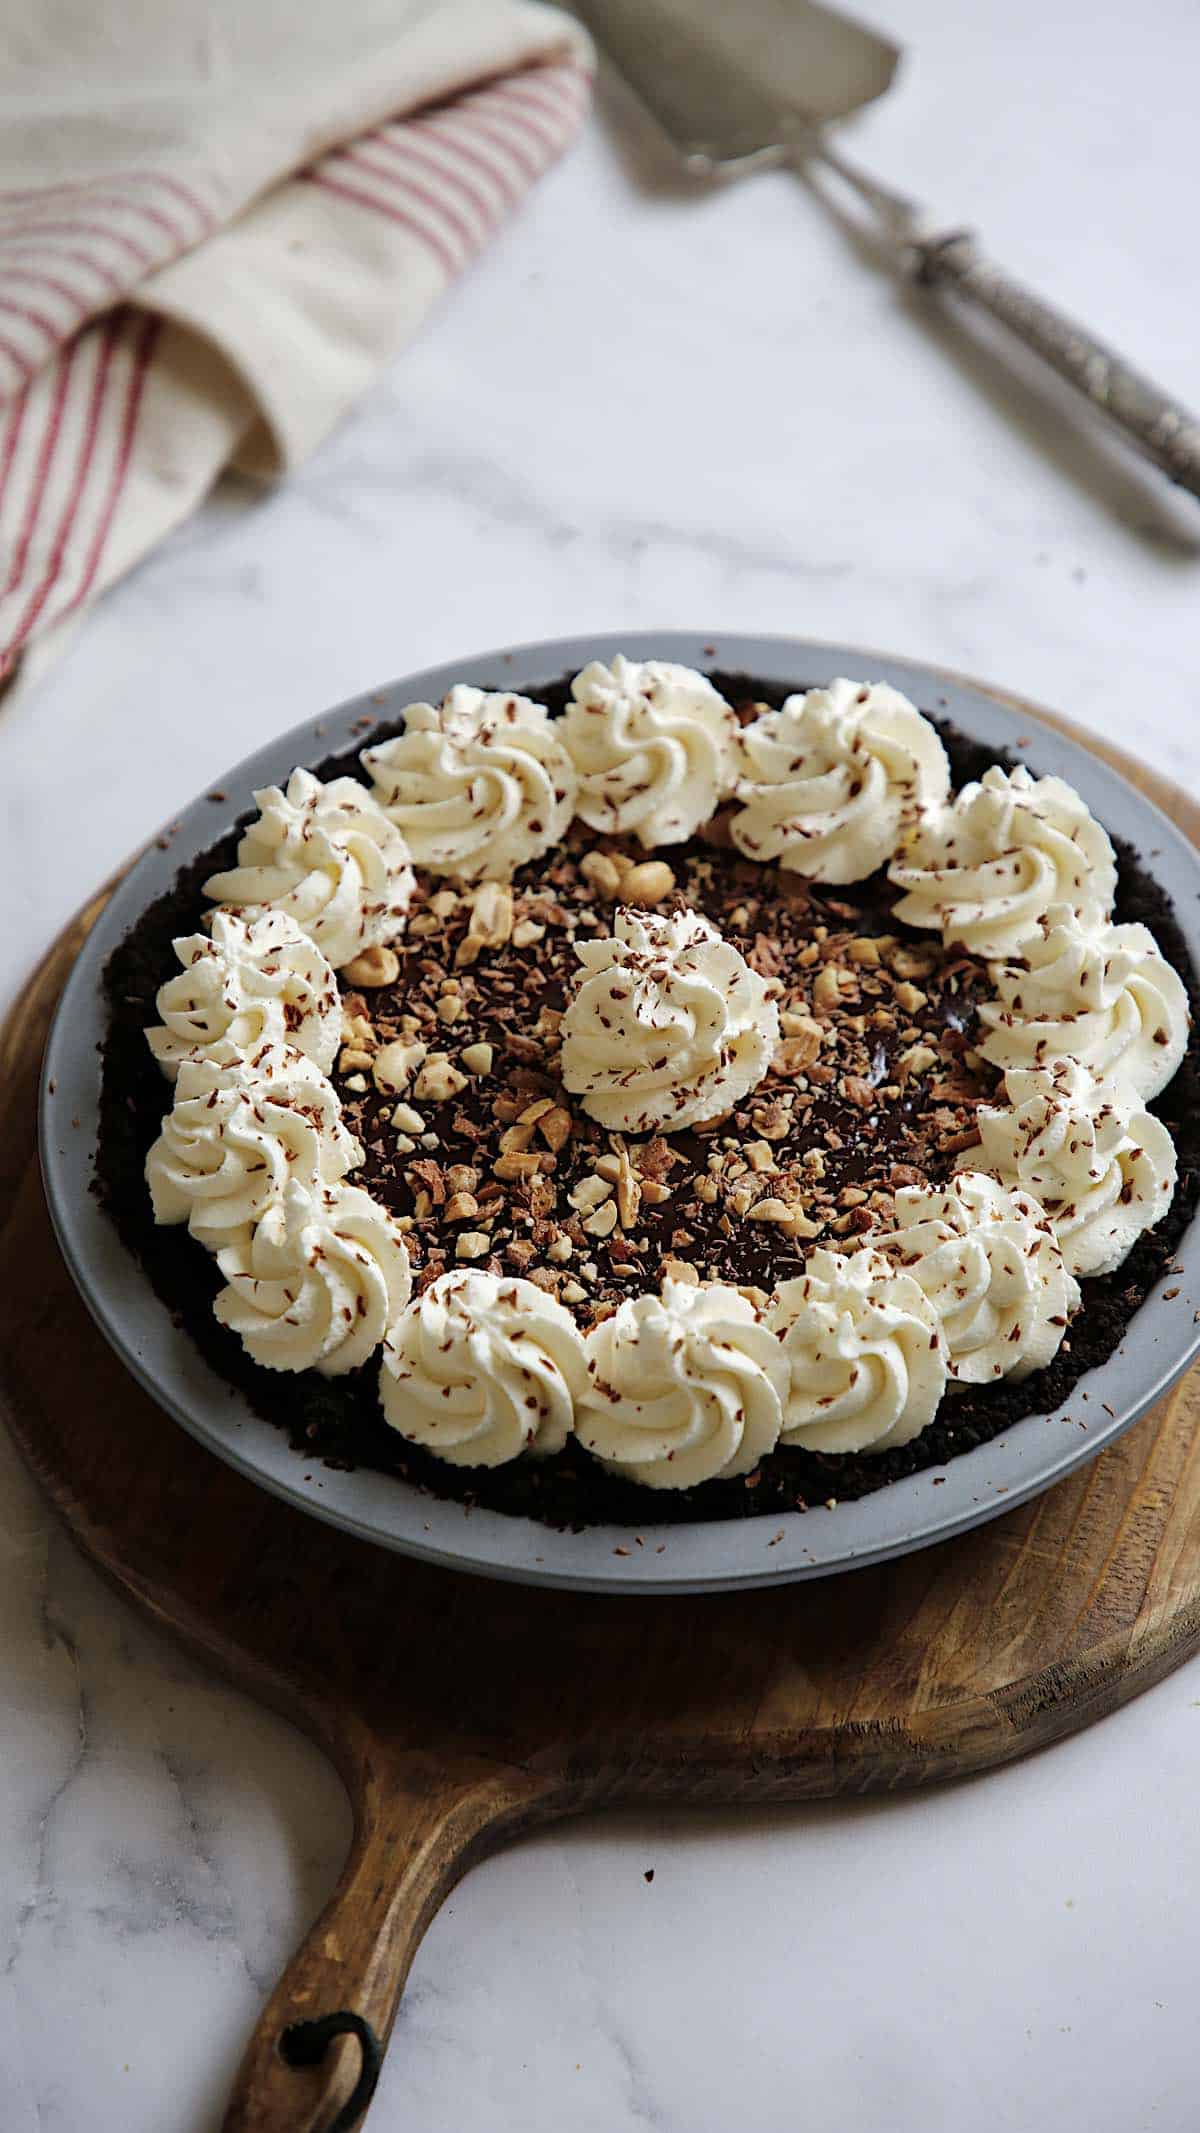
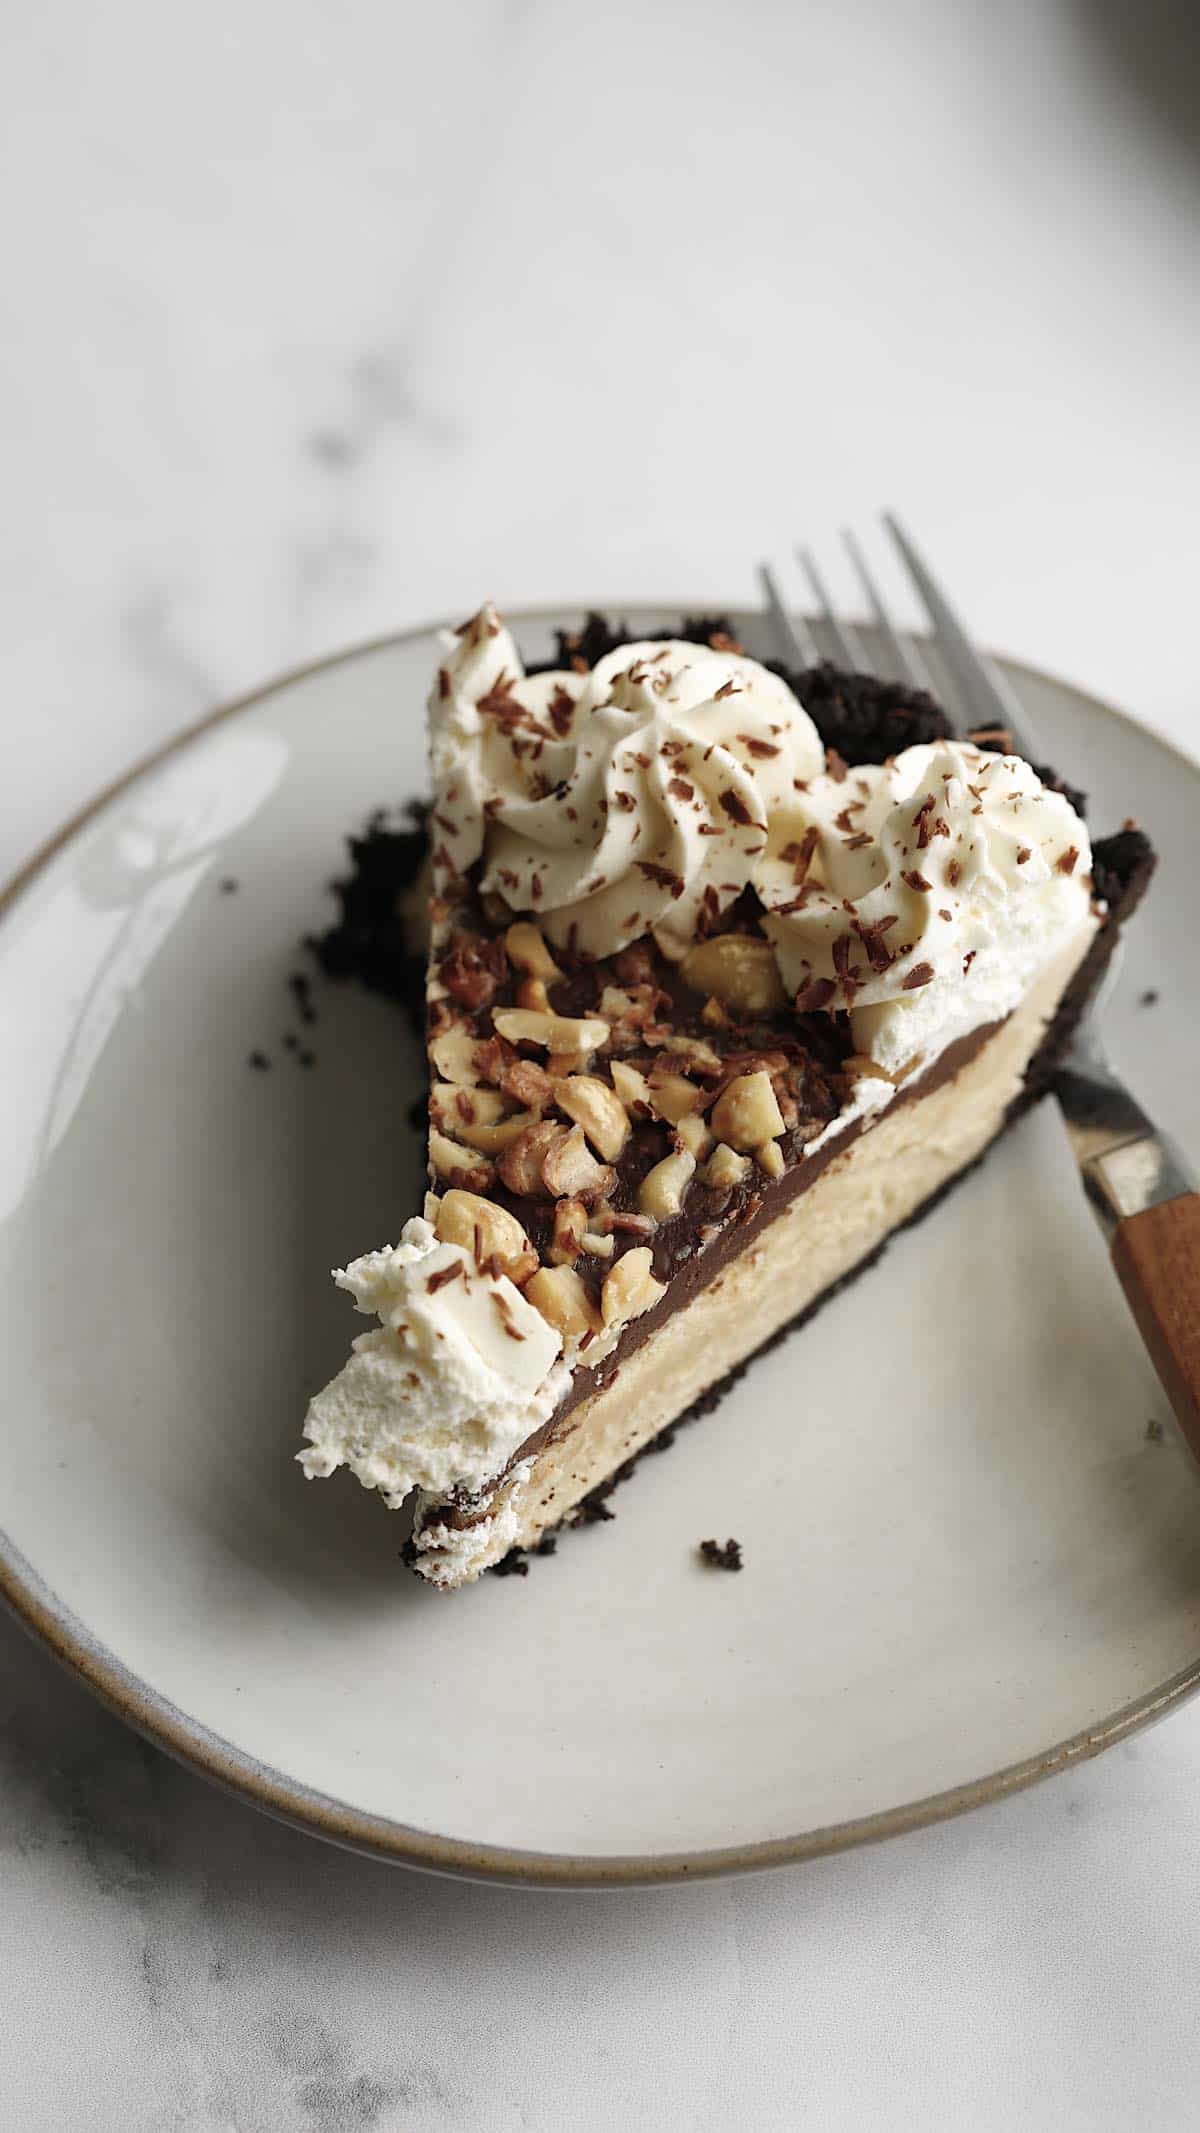
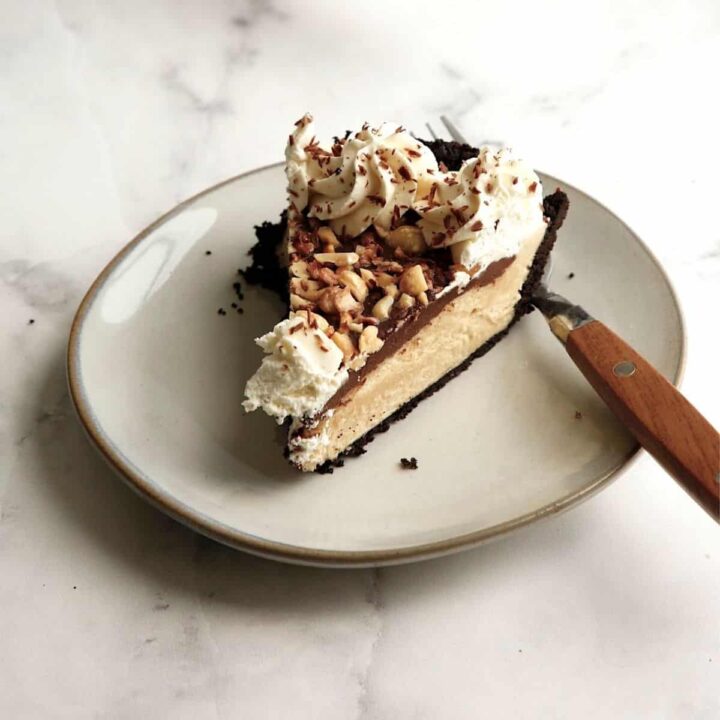
This Chocolate Peanut Butter Pie is a fantastic pie recipe for any special occasion. You’ll love the crumbly, chocolate cookie crust, the creamy no-bake filling, and of course the decadent chocolate ganache on top. It’s a delicious pie recipe that will have your guests thinking you pre-ordered it from a fancy pie shop! It’s that good!
For more fall dessert recipes with WOW factor try my French Apple Tart, Pecan Bars with Shortbread Crust, or my Spiced Pear Cake, all equally delicious!
Would you like to save this?
Why You’ll Love This:
- So easy to make, but so impressive to serve!
- It takes minimal ingredients, most of which you might already have on hand!
- A great make-ahead dessert recipe for holiday entertaining. All you have to do is slice and serve!
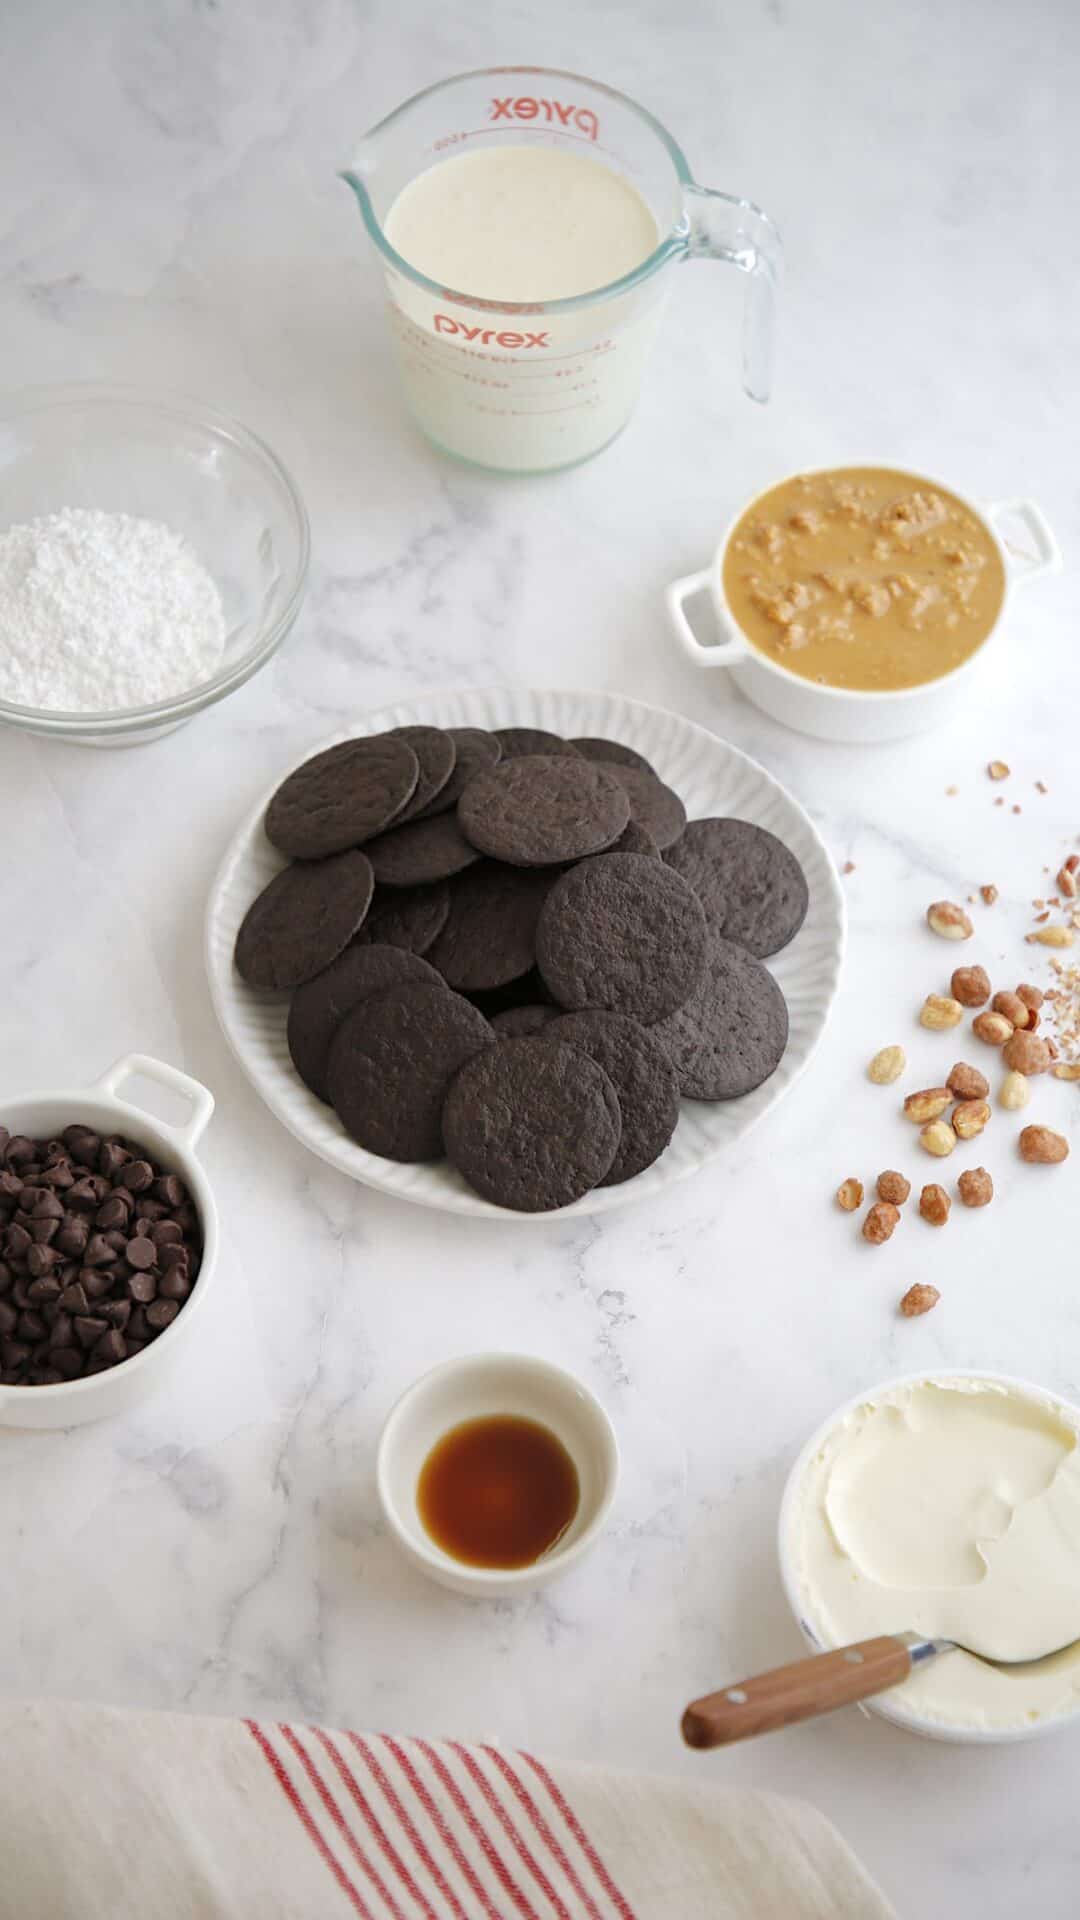
The Ingredients:
- Chocolate Wafers I love the flavor of the Famous Chocolate Wafers for a cookie crust. Nothing beats their chocolatey flavor. But if you can’t get those you can also use Oreos with the filling scraped out, which is a bit more work. But will work just as well.
- Peanut Butter There’s a lot to say here about how the type of peanut butter will affect this recipe. First, read the ingredients. The only ingredient in Peanut Butter should be peanuts. Plain and simple. You will get the best flavor this way. Stay away from any peanut butter that has palm oil or any sugars added to it. The oil will make the pie too hard, and the added sugar will make it too sweet.
- My favorite brand of peanut butter for this recipe is Santa Cruz. I like their Lightly Roasted Crunchy Peanut Butter best because of the lightly roasted peanuts which enhance the flavor and the crunchy peanuts. But if you are a smooth peanut butter type person, their Creamy Lightly Roasted Peanut Butter works great too. It’s also great when used in my Peanut Butter Cookie Recipe or my Peanut Butter Ice Cream Sauce too!
- Mascarpone Cheese Most Peanut Butter Pie recipes call for using cream cheese, but I prefer the mascarpone cheese because it doesn’t have the tang that cream cheese does and therefore gives you better peanut butter flavor. But if the cream cheese is all you have, you could absolutely use it, the same amount 8 oz.
- Powdered Sugar The powdered sugar will easily dissolve into the peanut butter and heavy cream, providing a nice smooth finish.
- Vanilla Extract will bump up the flavor of the peanut butter and add to its sweetness
- Heavy Cream For this recipe the heavy cream or heavy whipping cream, are interchangeable. Either one will work.
- Semi-Sweet Chocolate Chips The chocolate chips will be used for the ganache. You can use semi-sweet or dark chocolate chips are great too. If using dark chocolate seek out the Nestle Dark Chocolate Morsels. I think they have the best chocolate flavor! And you can also use them for my Ultimate Oatmeal Chocolate Chip Cookies.
- Buttered Toffee Peanuts These peanuts are the star of the show! I use the Buttered Toffee Peanuts on top of the pie, sprinkled across on the ganache, not only do they look pretty but the additional flavor and crunch they add to this pie is fantastic!
Step#1: Making the Chocolate Cookie Crust
- After pulsing the wafers and melted butter in the food processor, you’ll transfer the crumbs to a metal pie tin.
- I think the metal tins work best for pies with cookie crusts since they keep the bottoms nice and toasty.
- I also find them easier to slice into. This is the same crust recipe I use for my Decadent Chocolate Cream Pie—another great pie recipe to try!
- Push the crumbs up the sides of the pie tin first to create a crust, using the back of your hand in a fist-bumping motion (see video for visual demo)
- Then, tamp down the center of the crust with a measuring cup to flatten it out. Bake at 350°F for 10 minutes.

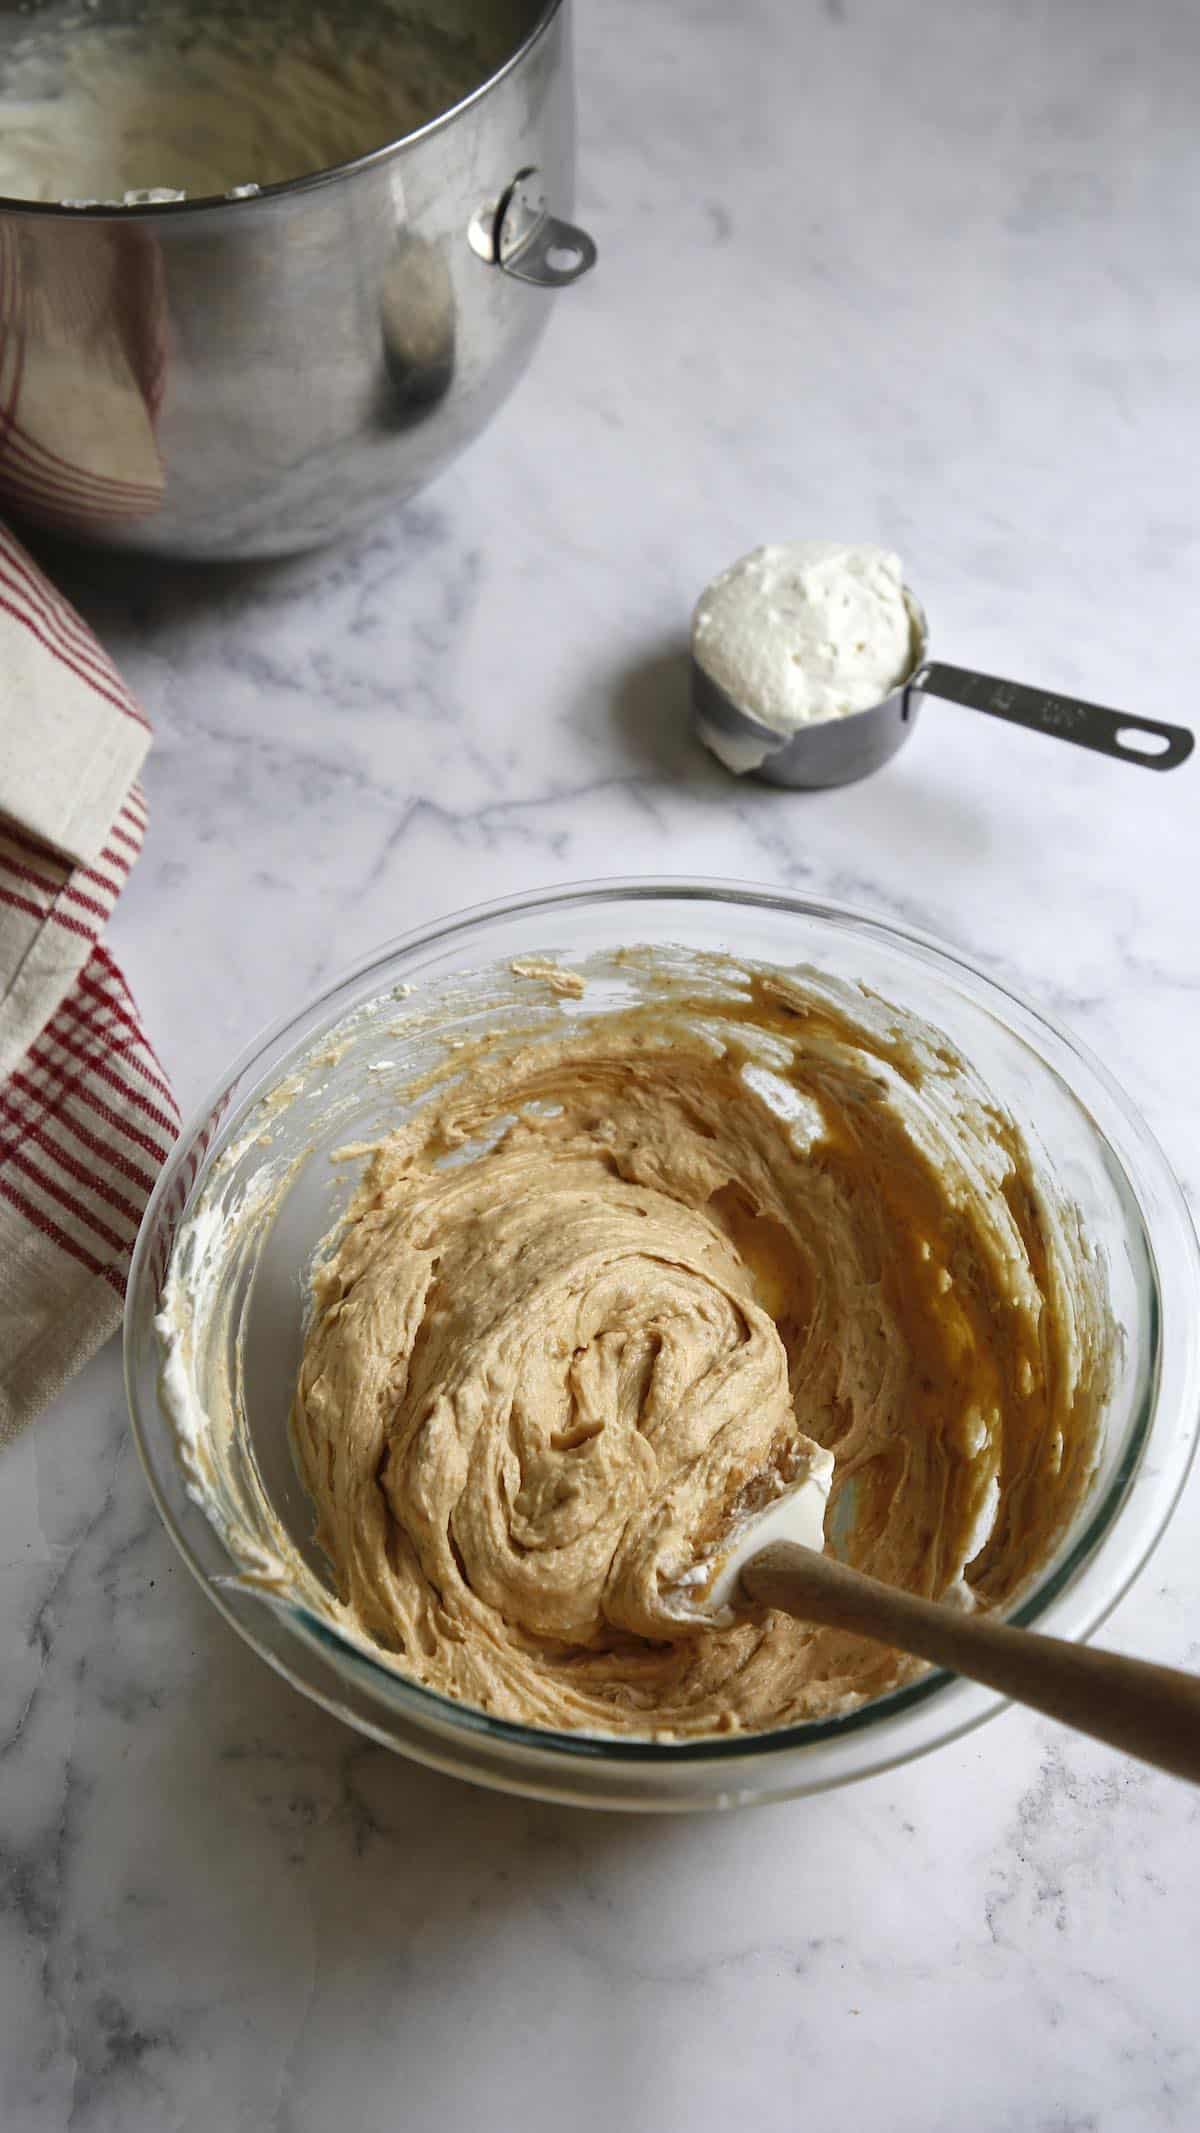
Creating the No-Bake Peanut Butter Filling
- The no-bake filling is what makes this pie recipe so easy!
- After mixing up the peanut butter filling, you’ll notice it will be dense.
- The filling is then lightened by folding in the homemade whipped cream.
- You’ll only need half of the whipped cream for the filling; the other half will be used to create the dollops of whipped cream around the perimeter.
- To make sure you don’t take more than you need, simply add 1 1/2 cups of the whipped cream to the peanut butter filling, 1/2 cup at a time
- Adding the whipped cream in small increments like this, and folding in between each addition, will keep the volume of your filling light and fluffy.
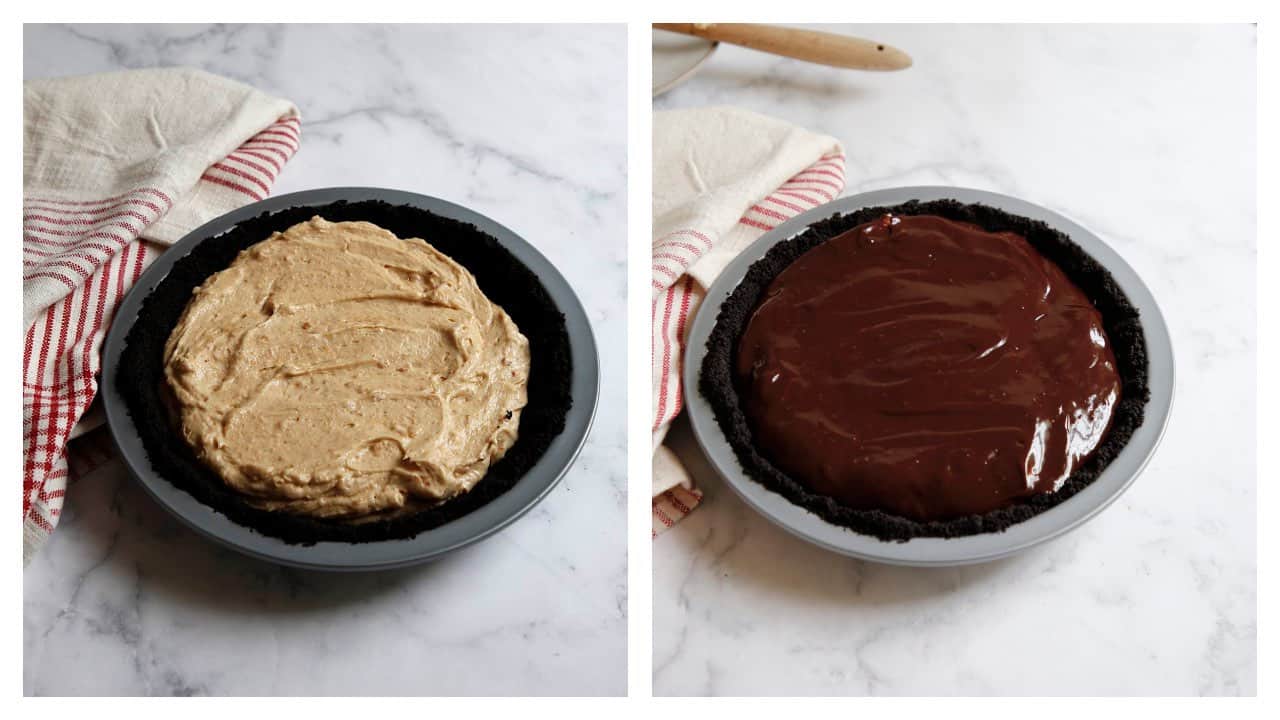
Filling the Pie + Adding The Chocolate Ganache
- Be sure your cookie crust is cooled before adding the filling; otherwise, it could melt and lose its volume
- Transfer the filling to the crust, leveling it out with a spatula
- Then, once the chocolate ganache is slightly cooled, you can pour it on top and spread it with the back of a spoon.
- You can choose to bring the ganache right to the crust or leave a border of filling in between. It doesn’t matter since the whipped cream dollops will cover it either way.
Garnishing The Pie
- You could stop here, and this pie would still be delicious, but I think three simple garnishes make it a real show-stopper, especially for a holiday pie.
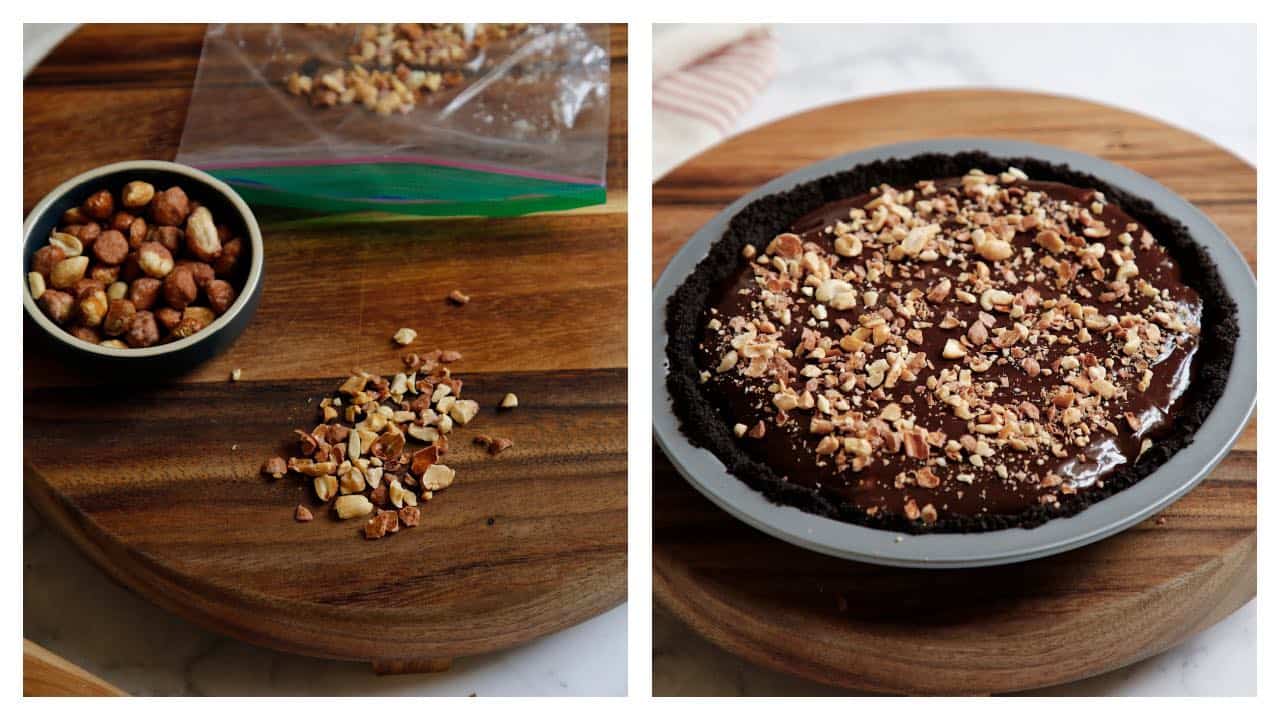
- First up, the buttered toffee peanuts.
- Place 2-3 tablespoons in a plastic bag and make sure it’s sealed
- Then whack the bag with a rolling pin a few times to create a rough chop
- Don’t chop them too finely, since you’ll want to preserve to toffee crunch
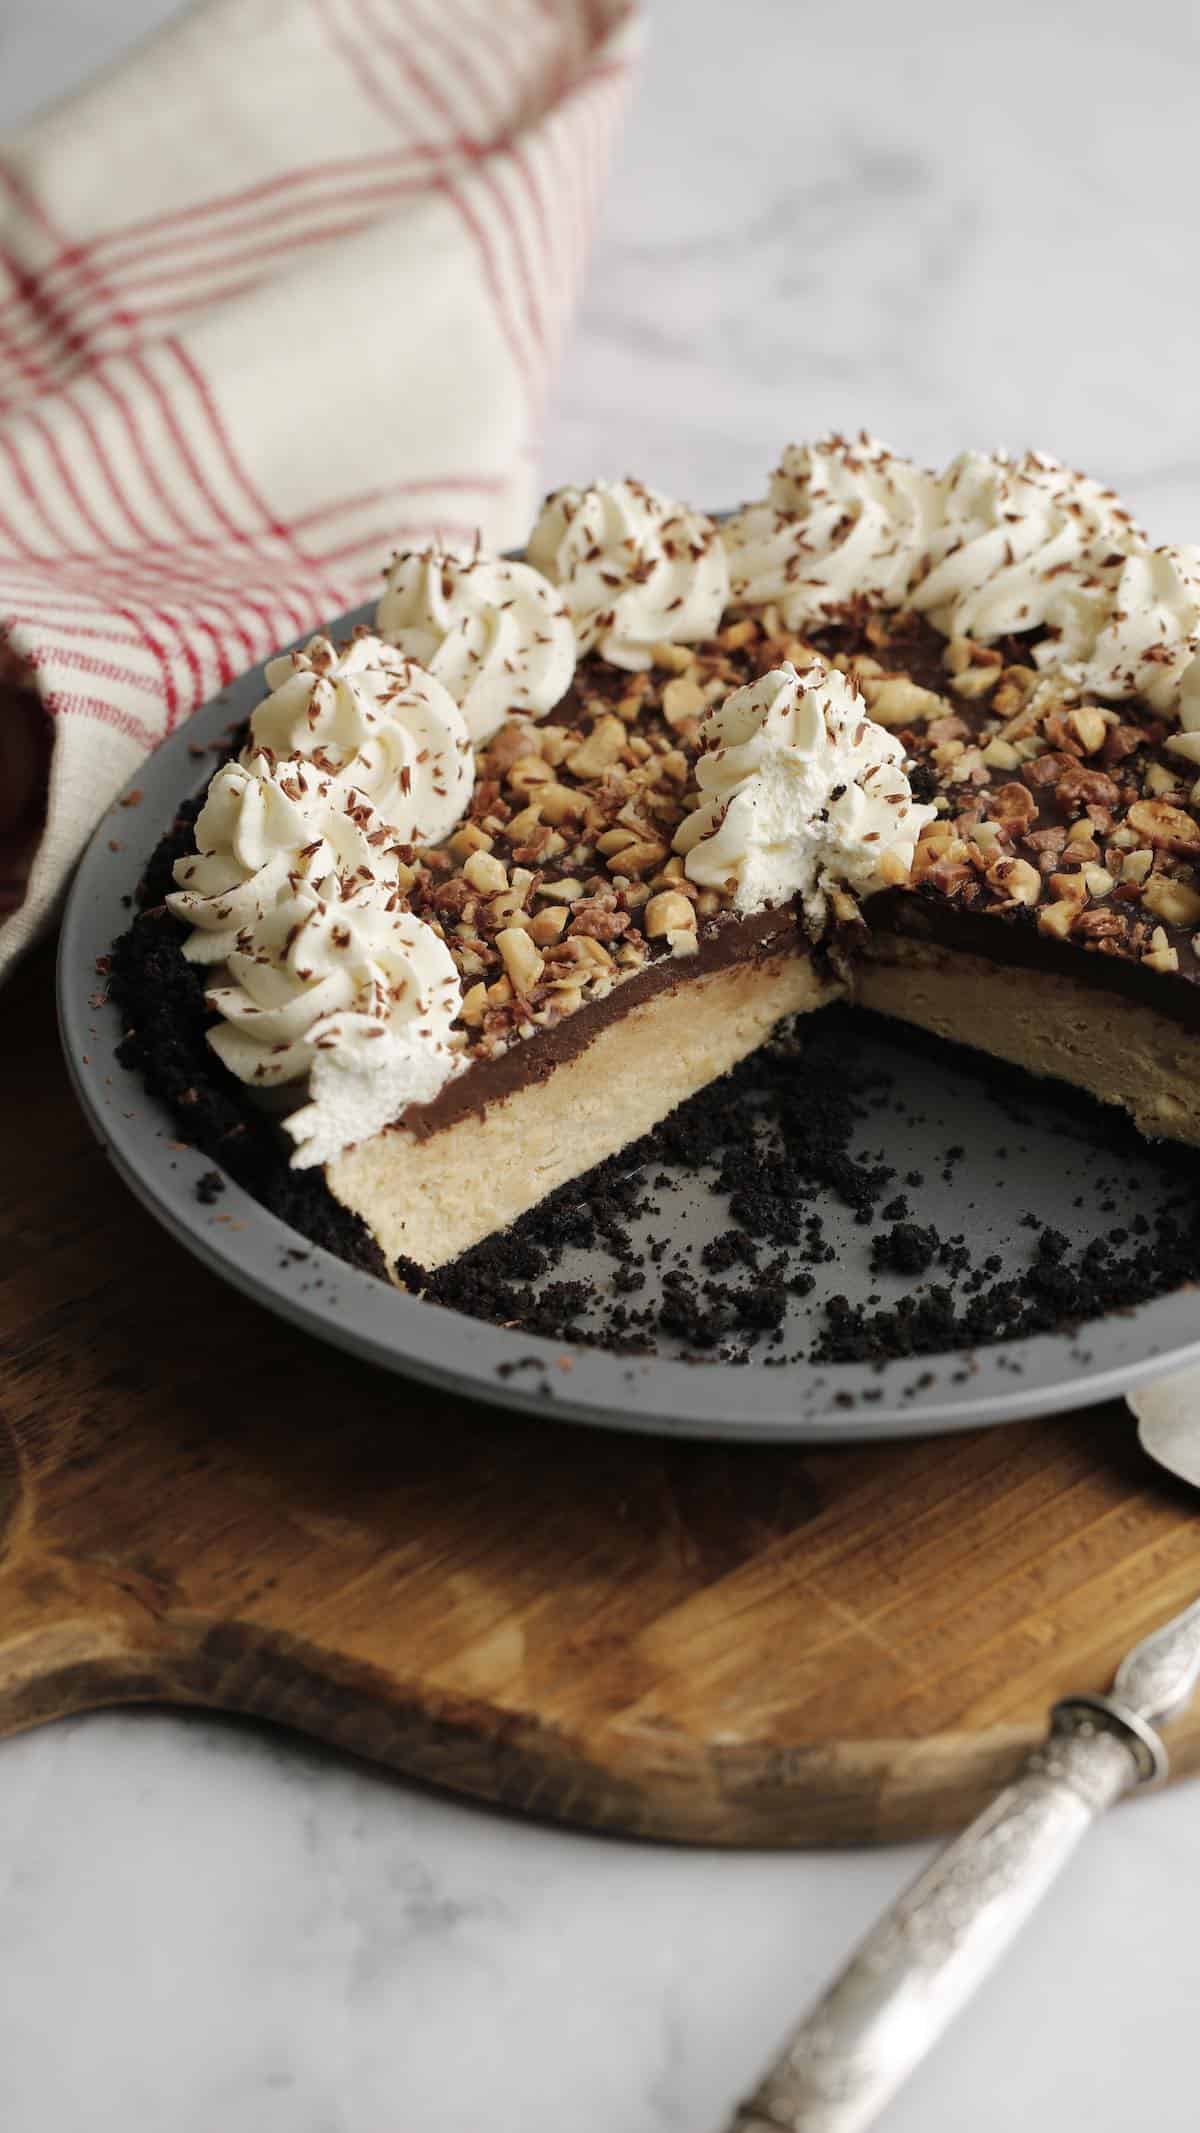
Adding the Homemade Whipped Cream:
- The other two garnishes that make a big impact are the whipped cream dollops and the grated chocolate on top.
- Transfer the remaining whipped cream into a pastry bag fitted with a star tip. I’m a huge fan of the Wilton fabric pastry bags 16″ and the Wilton 2D pastry star tip. It makes creating beautiful dollops a breeze!
- Once piped around the perimeter, add another dollop in the center.
- Then, grate the dollops with a bittersweet chocolate bar. This is best done with a coarse grater.
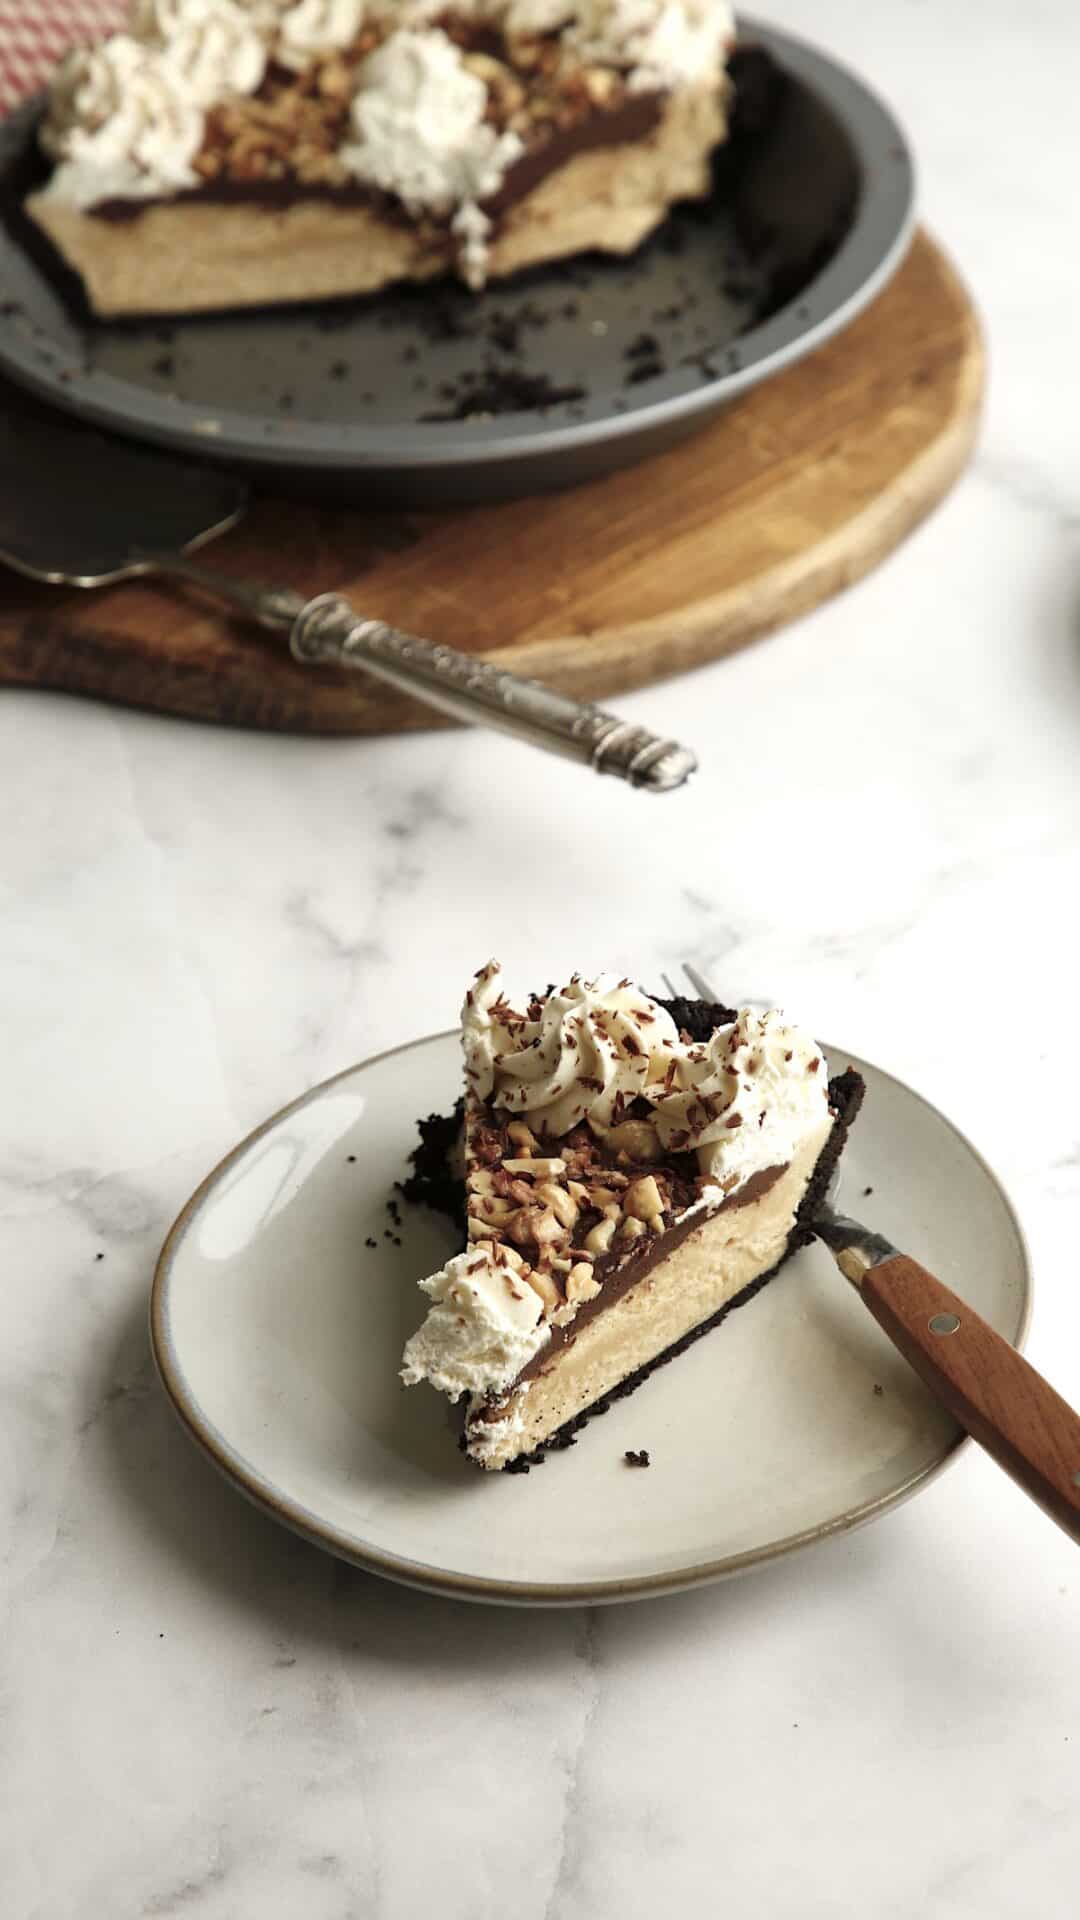
Make-Ahead Tips + Serving:
- This pie can be made up to 2 days ahead. Keep refrigerated, uncovered.
- If not making it a day ahead, a minimum of 4 hours of refrigeration is best before serving.
- Remove the pie from the refrigerator at least 15-20 minutes before serving for easy slicing and for the best creamy texture.
More Pie Recipes You’ll Love!
- Foolproof Apple Pie Recipe
- Pumpkin Pie with Marshmallow Topping
- Chicken and Mushroom Pie
- Ultimate Coconut Cream Pie
If You Enjoyed This Recipe
Please Leave a Rating and a Review Below!
Chocolate Peanut Butter Pie
Yield:
8
Prep Time:
45 minutes
Cook Time:
10 minutes
Additional Time:
4 hours
Total Time:
4 hours 55 minutes
A delicious chocolate peanut butter pie with a chocolate cookie crust, creamy no-bake peanut butter filling, topped with a gooey layer of chocolate ganache, crunchy toffee peanuts, and dollops of homemade whipped cream.
4.7 Stars (9 Reviews)
Ingredients
FOR CRUST:
- 7 oz (196g) of Famous Chocolate Wafers (33 cookies) or Oreos with the filling scraped out
- 5 ( 75ml) Tablespoons butter, melted
FOR NO-BAKE FILLING:
- 1 cup (240ml) unsalted peanut butter, creamy or crunchy, without any additional additives (like sugar oil etc. Only ingredient should be peanuts! (For best texture and flavor)
- 8 oz (230g) of Mascarpone Cheese
- 3/4 cup (75g) of powdered sugar
- 1 tsp (5ml) vanilla extract
FOR HOMEMADE WHIPPED CREAM:
- 2 cups (475ml) heavy cream
- 2 Tablespoons (13g) powdered sugar
- 1 tsp (5ml) vanilla extract
FOR CHOCOLATE GANACHE:
- 1/2 cup (120ml) heavy cream
- 3/4 cup (110g) semi-sweet. or dark chocolate chips
FOR GARNISH:
- 3 tablespoons (45ml) Buttered Toffee Peanuts, chopped
- 1 square dark chocolate, for grating
Instructions
- Preheat oven to 375F (190C)
- Lightly spray a 9" metal pie tin with baking spray, distribute it with a pastry brush and set it aside.
- Add the cookies to a food processor and pulse them up until a fine crumb forms. Then add the melted butter and pulse until combined.
- Transfer the crumbs to the pie tin, shaking the pan to level the crumbs, then pressing them against the sides to form a crust, in a "fist bump" motion up the sides so it adheres.
- Tamp the bottom of the pie down with a measuring cup to flatten out the bottom. Bake for 10 minutes then all to cool.
- Cream together the peanut butter, mascarpone cheese, 3/4 cup of powdered sugar, and 1 tsp of vanilla in an electric mixer. Then transfer to a large bowl.
- In a cleaned-out mixer, whip the 2 cups of heavy cream, 2 tbsp of powdered sugar, and 1 tsp of vanilla until stiff peaks form.
- Add 1 1/2 cups of whipped cream to the peanut butter mixture, 1/2 cup at a time, folding it in to lighten the mixture.
- Transfer the peanut butter filling into a cooled pie crust, leveling it out with a spatula, and set aside.
- Meanwhile, heat 1/2 cup of heavy cream in a saucepan until foamy and simmering. Turn off the heat and add the chocolate chips. Whisk until a smooth chocolate ganache forms. Allow to cool until slightly warm.
- Pour the chocolate ganache into the center of the pile, forming a pool. Then spread it out gently with the back of a spoon, extending to reach the pie crust.
- Place the toffee peanuts in a zip lock bag, seal to close well, and whack with a rolling pin until crushed.
- Top the pie with crushed peanuts.
- Transfer the remaining whipped cream to a pastry bag fitted with a star pastry tip, and pipe whipped cream dollops all around the perimeter of the pie and add one dollop in the center.
- Grate the dark chocolate over the whipped cream dollops.
- Refrigerate uncovered, for at least 4 hours, before serving.
- Remove from the refrigerator 15-20 minutes before serving for easy slicing and the best texture.

Do you have a substitute for the wafer cookies? They are no longer being made.
Oh sure you could use Oreos and scrap out the filling :). That works too!
Hello Beth,
I have made this pie two years in a row for Thanksgiving and everyone loves it! A wonderful addition to our table.
Thank you!
YAY! I’m so glad it was a hit! One of my faves too! 🙂
My husband love it!
YAY! So glad to hear it!