Apple Crisp with Oat Topping
SHARE THIS RECIPE!


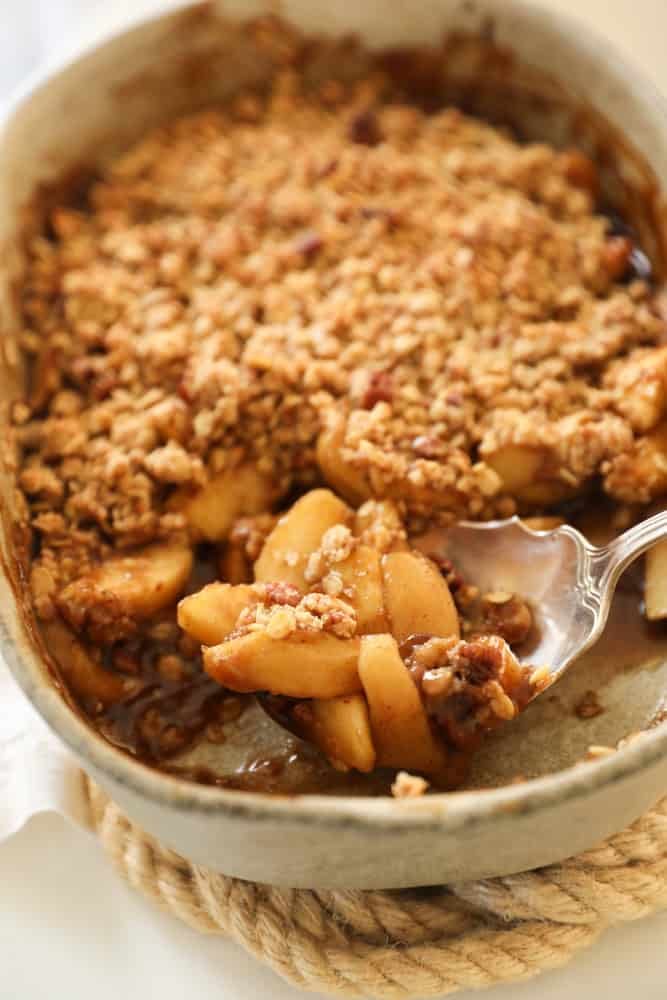
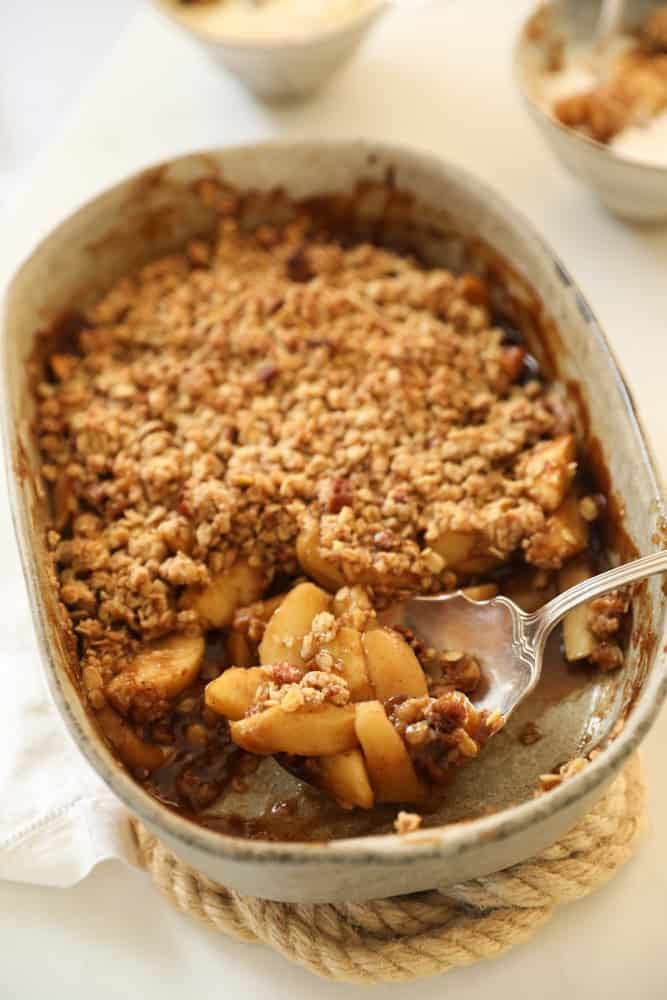
This Easy Apple Crisp with Oat Topping is a fantastic dessert idea for fall entertaining, or for Thanksgiving too. You’ll love the warm, syrupy apples that get a head start on the stovetop before baking in the oven—and the crunchy oat topping has a wonderful caramelized crunch thanks to toffee bits added to the oats.
Looking for a summertime crisp? Try my Strawberry Rhubarb Crisp, Plum Crumble or my Blackberry Crumble. Both are equally easy and delicious!
Would you like to save this?
Why You’ll Love This Recipe
- Simmering the apples on the cooktop before they go into the oven ensures they become nice and syrupy.
- The crunchy oat topping achieves next-level status thanks to the toffee bits.
- It’s an easy dessert to make ahead and bring to a potluck. Just reheat and serve!
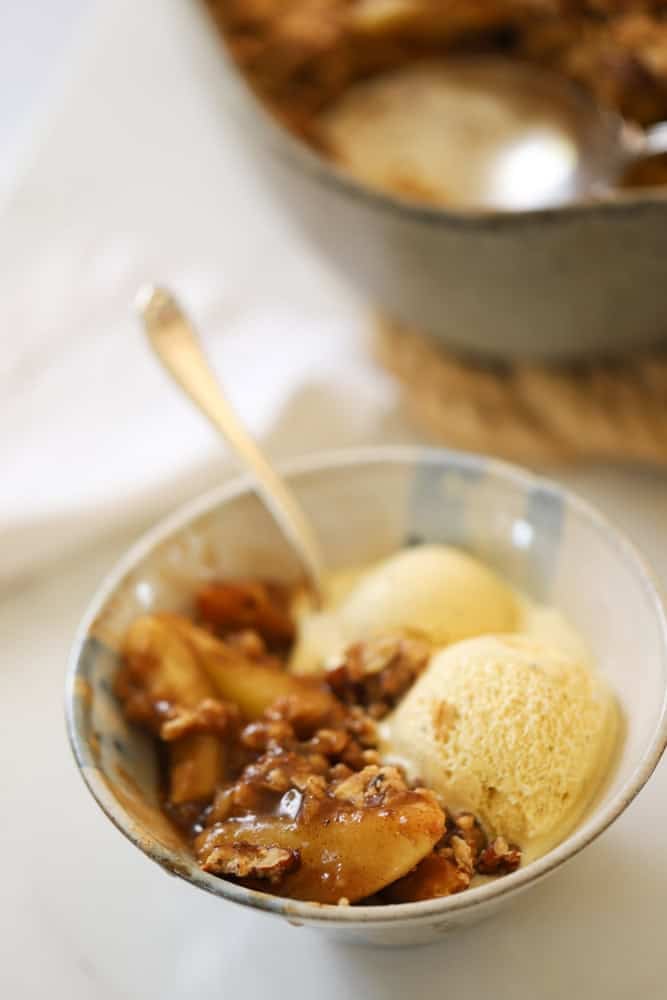
- Warm spiced apples, crunchy oats, and rich vanilla ice cream are a fantastic treat in the fall.
- Reheat it in the oven as soon as you serve dinner, and it will be ready when you are finished.
Ingredients:
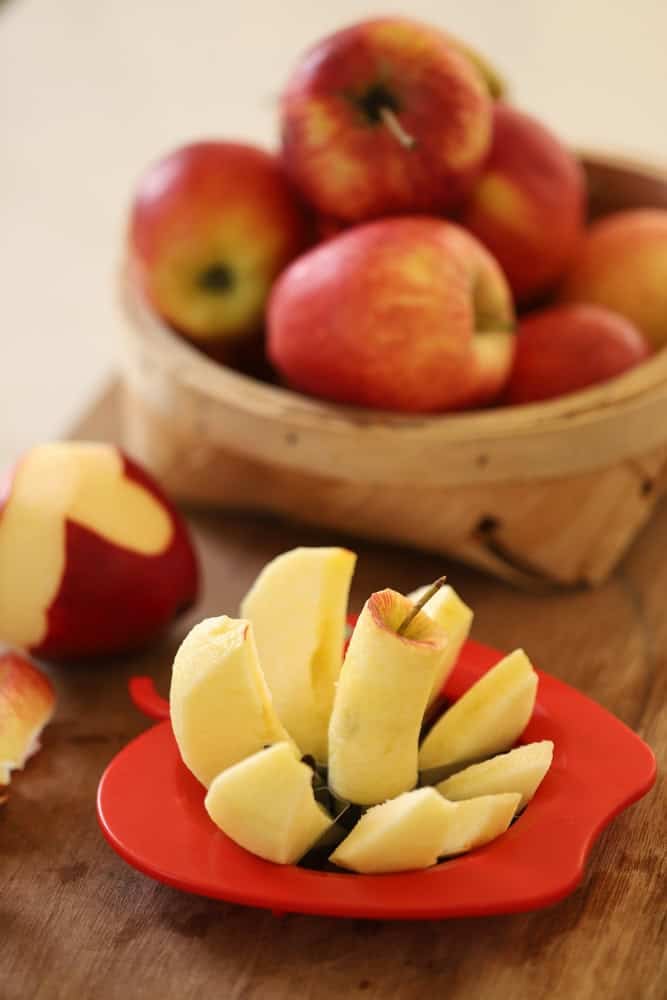
- Sliced Apples: I use Gala apples because they are already sweet. Since this recipe only takes 30-35 minutes to bake, it’s better to use an apple that doesn’t need to bake for over an hour to soften or sweeten.
- Lemon Juice: Adds a nice tartness to the apple mixture and provides a little liquid to enhance the syrupiness of the apple filling.
- White Sugar: You’ll need white sugar for both the crisp topping and the apple filling.
- Brown Sugar: Is also added to both the apple filling and the topping. The molasses in the brown sugar adds additional flavor and syrupiness.
- Cornstarch: I prefer cornstarch over flour for thickening the apple filling, it creates a better syrupy texture.
- Pumpkin Pie Spice: You could also use cinnamon but I love the depth of flavor it adds. No ready-made pumpkin pie spice? You can make your own with my homemade Pumpkin Pie Spice Recipe.
- Butter: If you live in the U.S.A., use Land O’ Lakes salted butter for the best flavor. Outside the U.S., use unsalted butter.
- Water: I add a little water before adding the oat topping and baking the apples to help the apple mixture absorb more liquid, creating a nice, syrupy texture.
- All-Purpose Flour: For the oatmeal topping, to give it a crumbly texture.
- Baking Powder: Will give your topping a little lift.
- Vanilla Extract: To give more flavor to the oat topping.
- Kosher Salt: To enhance all the flavors.
- Cinnamon: For extra spice to the topping.
- Old-Fashioned Oats: For a crunchy topping. Make sure you use old-fashioned oats, not quick-cooking oats, as they won’t work for this recipe. You can use up any additional oats in my Chewy Oatmeal Chocolate Chip Cookies.
- Pecans: Added to the oat topping for a delicious buttery crunch. But you could also use walnuts if you prefer.
- Toffee Bits: Don’t skip the toffee bits; they add such a nice caramelized chewiness to the topping. I use the Heath brand of toffee bits. You can usually find them in any major grocery store next to the chocolate chips.

What’s the Difference Between Apple Crisp vs. Apple Crumble
Typically, an apple crisp recipe includes oatmeal in the topping, whereas a traditional crumble usually has only butter, flour, and sugar.
What Types of Apples are Best for Apple Crisp?
Personally, I think Gala apples are best for apple crisp because they are sweet and juicy! I use Galas for my French Apple Tart as well. They also cook up quicker than Granny Smiths, which I think are better reserved for apple pie.
Step#1: Slice the Apple
- This recipe calls for seven cups of apples, so I like to use an apple slicer to speed up the slicing.
- Be sure to leave the apples a bit chunky, more like a wedge than a slice.
- Don’t cut them as thin as you would for an apple pie, this will give your crisp a better texture.
- Add the apples to a large bowl. Then toss them together with some cornstarch, white sugar, lemon juice, and pumpkin pie spice.
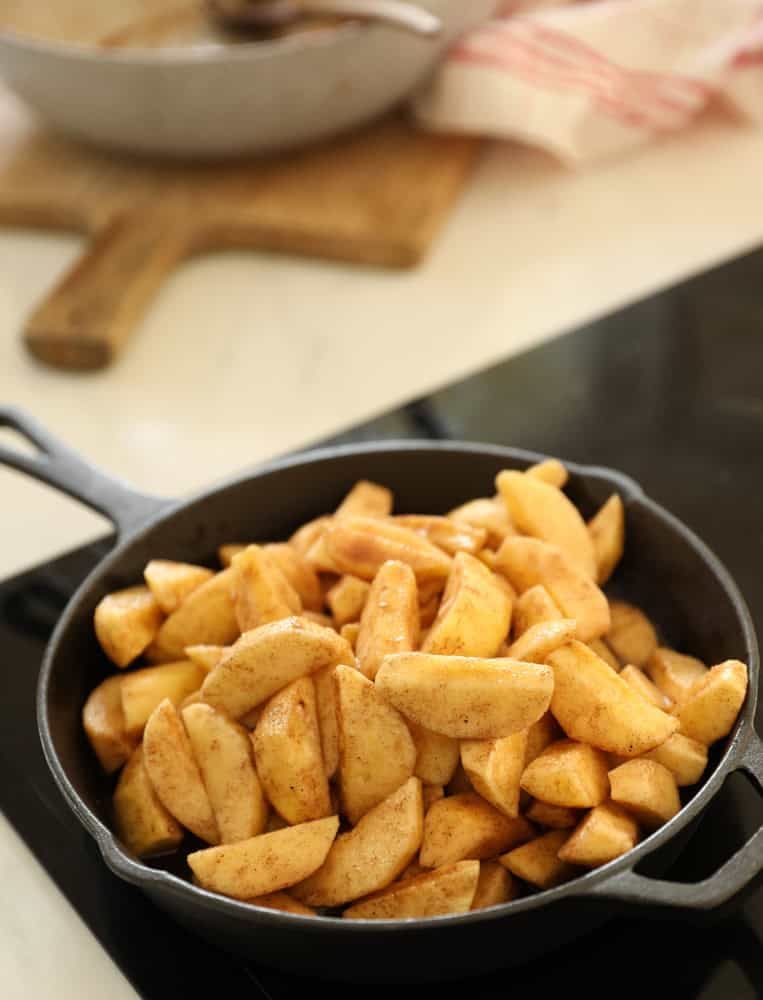
Step #2: Simmer Apples in the Skillet
- Next, you’ll give your apples a head start in a skillet on your cooktop. This will help the apple mixture achieve a delicious, syrupy texture.
- The syrupy texture is really the hallmark of a great apple crisp.
- Let’s face it, apple crisp is really a topping for ice cream, so the more syrupy, the better!
- Once the butter has melted and the brown sugar is added, it will form a paste, and that’s when it’s time to add the apples.
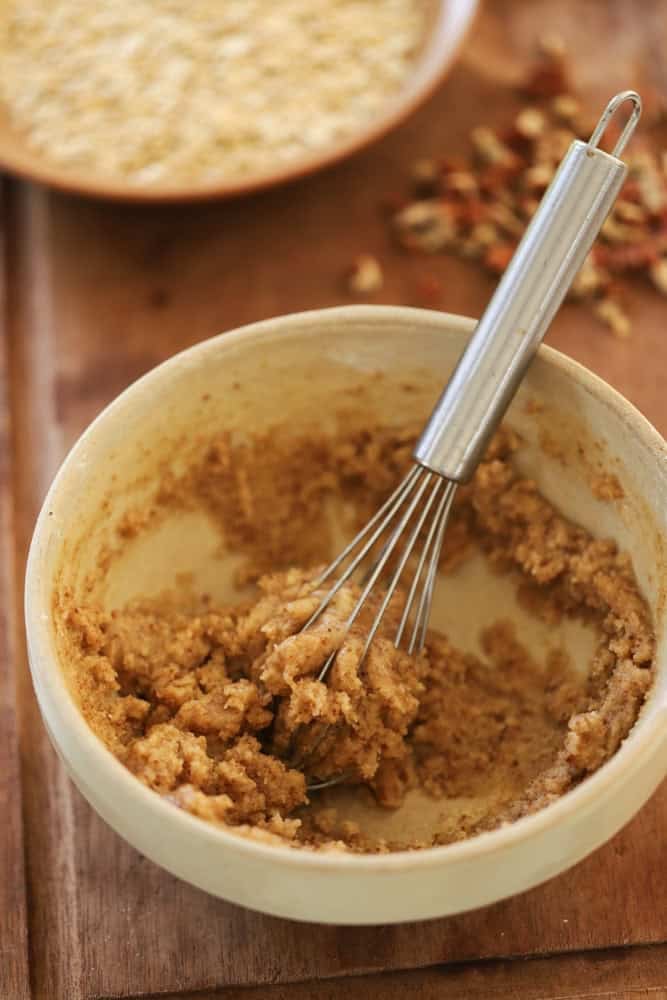
Step #3: Make The Oat Topping
- Start by whisking together the dry ingredients, then whisk in the melted butter.
- At this stage, you’ll have a crumbly paste that will resemble wet sand.
- Then stir in the oatmeal, pecans, and the toffee bits.
- Transfer the apple mixture to an oven-safe baking dish or a brownie pan.
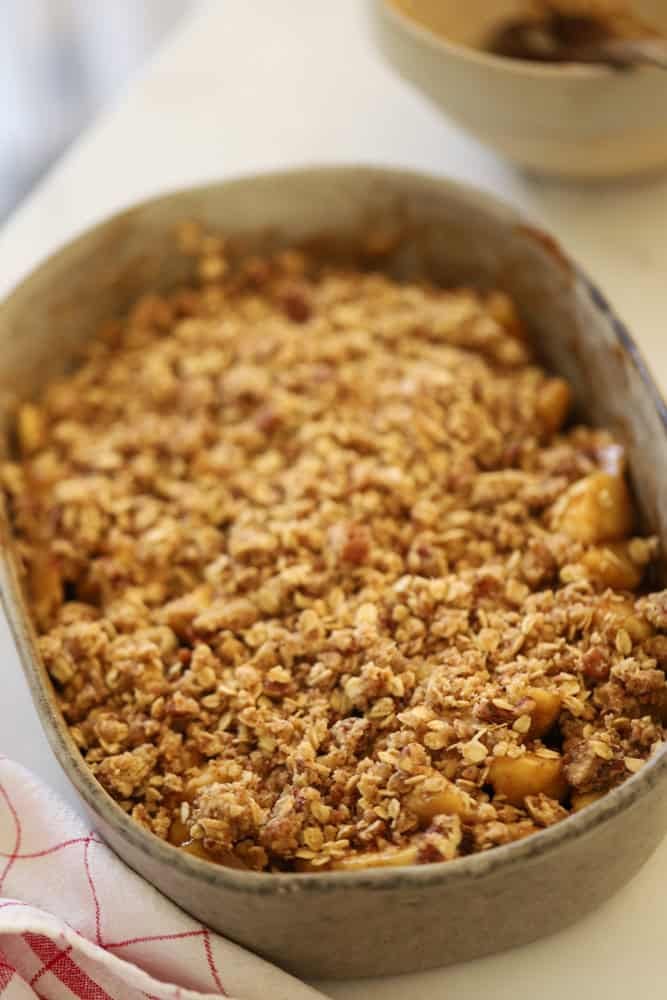
Step #4: Add The Topping and Bake
Place the crisp in a preheated oven at 375°F for 30-35 minutes or until the topping is golden brown and the juices underneath are bubbling.
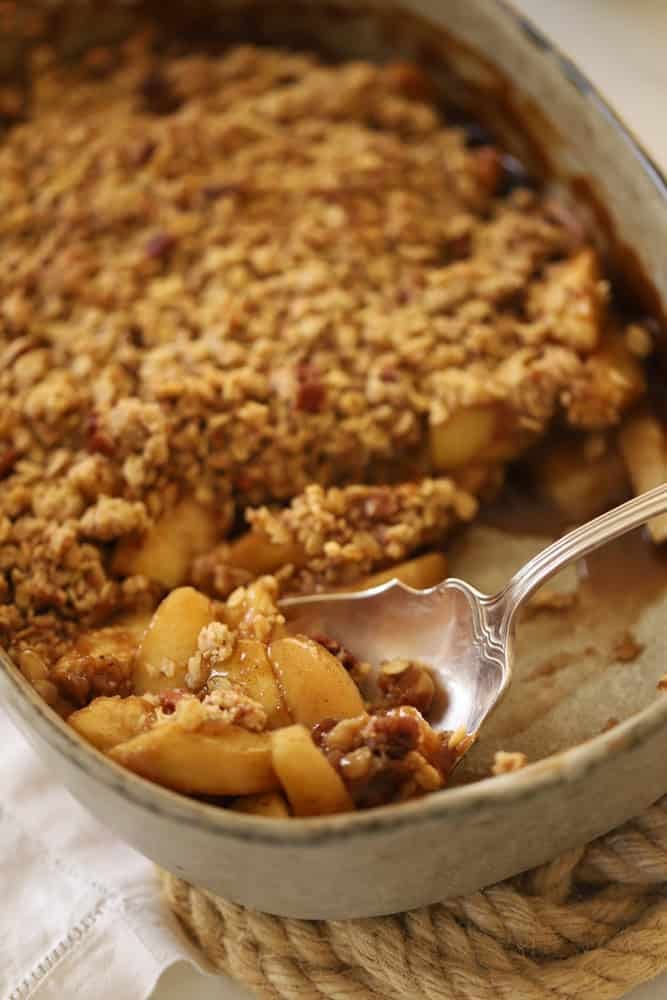
Serving/Storage Suggestions
- Once baked, allow your crisp to cool completely. Then cover it with foil and place in the fridge. As it sits overnight, the juices will thicken and congeal.
- I like to serve apple crisp in small bowls because it keeps the crisp extra hot and prevents the ice cream from melting too fast.
- For a decadent finish you could also add a drizzle of caramel sauce on top.
How To Reheat The Crisp
- You can thin the juices out and get them bubbling again with this simple trick.
- Sprinkle 2-3 tablespoons of water all over the top of the crisp.
- Then cover with aluminum foil and place in a 375°F oven for 15 minutes.
- Then remove the foil and continue baking for about 10 minutes more, or until the juices bubble up again.
- And let everyone dive in!
“I loved the something there that the pie spice brought- I also substituted whiskey for the water in the syrup. I wish I had the toffee bits! I had recipe requests as this dish was an elevated classic.”

Apple Crisp with Oat Topping
This easy apple crisp with oat topping is pure fall comfort food. Assemble it ahead of time, then pop in the oven to bake as soon as you sit down to dinner. It will be ready as soon as dinner is finished. Serve with a big scoop of vanilla ice cream.
Ingredients
- 7 cups (1050g) Gala Apples, peeled, cored and cut into wedges
- 2 tbsp (30ml) fresh lemon juice
- 1/3 cup (65g) white sugar
- 2 tbsp (15g) cornstarch
- 1 tsp (5ml) pumpkin pie spice or cinnamon
- 3 tbsp (45g) butter
- 1/3 cup (60g) brown sugar
- ¼ cup (60ml) water
Crisp Topping:
- ¾ cup (90g) flour
- 2 tbsp (23g) brown sugar
- 2 tbsp (25g) white sugar
- ¾ tsp (3.75ml) baking powder
- large pinch salt
- ¼ tsp (1.25ml) cinnamon
- 8 tbsp (120ml) melted butter
- 1 tsp (5 ml) vanilla extract
- ¾ cup (65g) old fashioned oats
- 1/2 cup (75g) pecans, chopped
- ½ cup (75g) Heath toffee bits
Instructions
- Preheat oven to 375°F (190 °C).
- In a large bowl, toss the apples with lemon juice, white sugar, cornstarch, and pumpkin pie spice. Toss with hands until everything is well coated and combined. Set aside.
- In a 10-inch cast-iron skillet, melt 3 tbsp (45g) of butter, add brown sugar, and whisk to combine. Transfer the apple mixture to the skillet and simmer on medium-low until the sauce thickens and becomes syrupy, about 5-6 minutes. Stir in 1/4 cup of water and then. Set aside.
- To make the oat topping: In a medium-sized bowl, whisk together the flour, brown sugar, white sugar, baking powder, salt, and cinnamon. Then add the melted butter. Stir to combine, then add the oats, pecans, and toffee bits. Set aside.
- Transfer the apples to a heat-safe casserole around 9" x 12" or a 10" round casserole dish, and add the crisp topping, sprinkling it evenly over the top.
- Bake for 30-35 minutes. The crisp will be golden brown, and the juices will be bubbling underneath. Serve right away or allow to cool completely, cover with foil, and refrigerate.
- Then, 25 minutes before serving, remove the foil and add a drizzle of 3 tablespoons of water all over the top of the crisp (this will loosen the syrup that has congealed due to the refrigeration), cover with the foil, and bake at 375°F for 15 minutes.
- Then remove the foil and bake for another 10 minutes uncovered until the topping is crisp and the juices underneath are bubbling.
- Serve in small bowls with vanilla ice cream.
Notes
This recipe works well with any fruit! Try stone fruit in the summer like peaches, nectarines, or plums. Or apricots in the spring, or pears and cranberries in the winter.
How To Reheat The Crisp
- Make the day ahead and refrigerate overnight. The juices will congeal.
- You can thin the juices out and get them bubbling again with this simple trick.
- Sprinkle 2-3 tablespoons of water all over the top of the crisp.
- Then cover with foil and place in a 375°F oven for 15 minutes.
- Then remove the foil and continue baking for about 10 minutes more, or until the juices bubble up again.
- Alternatively, you can assemble the crisp, do not bake right away, cover, and refrigerate, then bake as directed 35 minutes before serving.
Nutrition Information:
Yield: 8 Serving Size: 1Amount Per Serving: Calories: 741Total Fat: 34gSaturated Fat: 14gUnsaturated Fat: 20gCholesterol: 58mgSodium: 206mgCarbohydrates: 107gFiber: 10gSugar: 62gProtein: 8g
Could this recipe be put into two smaller pans and if so, would the baking time be the same? I would love to give part of this off to a friend.
Oh sure you could split this recipe, but the smaller the pan, the less time it will most likely take. It really depends on the size and the depth of the pan. Just check it at 15 minutes and it’s done as soon as the juices bubble and the apples are tender, and the topping is crisp. Hope you enjoy!
Beth, can I put this together on Wednesday to bake on Thanksgiving?
Yes of course I do that too :). Here’s how you would reheat it (also in the NOTES SECTION of the recipe card)
HOW TO REHEAT THE CRISP
Make the day ahead and refrigerate overnight. The juices will congeal.
You can thin the juices out and get them bubbling again with this simple trick.
Sprinkle 2-3 tablespoons of water all over the top of the crisp.
Then cover with foil and place in a 375F oven for 15 minutes.
Then remove the foil and continue baking for about 10 minutes more or until you see those juices bubbling up again
Beth, thank you so much for answering me. I wasn’t clear with my question: can I put it together on Wednesday and take out of fridge on T-day to get to room temperature and bake it on Thanksgiving?
Ah OK gotcha. I would actually bake it first and reheat on TDAY. That’s what I do 🙂 Otherwise, the apples will start to release their juices overnight and could get a bit mushy which could also prevent the crumble from crisping up. Better to just bake right away and then cool down and refrigerate and then reheat. I show you how to do this in the video in the blog post 🙂 It will turn out better this way. Hope you enjoy!
Hi Beth,
Could i make this today and serve on Sunday?
Would it be ok to freeze?
Monique
hmmm I’m not sure it would freeze well. I think the soonest you could make it/then bake it to reheat later would be 2 days ahead. The flavor and texture will be the best that way! 🙂
Made this with some old gala apples I needed to use and it was amazing! Totally fool proof recipe. Even if you are a little off on measurements, not enough apples ( me) or worried your apples were too old and bruised to work, this recipe still comes out beautifully! Super easy, I’d highly recommend you make this!
YAY! I’m so glad you enjoyed it Liz! It’s truly one of my favorites too! Such a great one for the fall 🙂
Hi Beth!
How would I adjust this recipe for an 11 inch pan? Thanks!
I would add 1-2 tablespoons more of water to the apples to create a bit more sauce. But other than that it .5 inches would make that much difference 🙂 My skillet is 10.5 inches hope you enjoy it!
Family favorite winter dessert! Anxious to try toffee bits as I bet it will be the ‘cherry on top”!
Oh it’s a yummy one! 🙂 Hope you enjoy!!
Hi Beth,
Is there an alternative to the toffee bits? I can’t get it in Asia.
Can’t wait to try this recipe.
Oh sure you could just use another type of nut, such as wlanuts. So 2 pecan and walnuts would make the crisp topping yummy and interesting. It will still be great! 🙂 Hope you enjoy!