Raspberry Almond Thumbprint Cookies
SHARE THIS RECIPE!

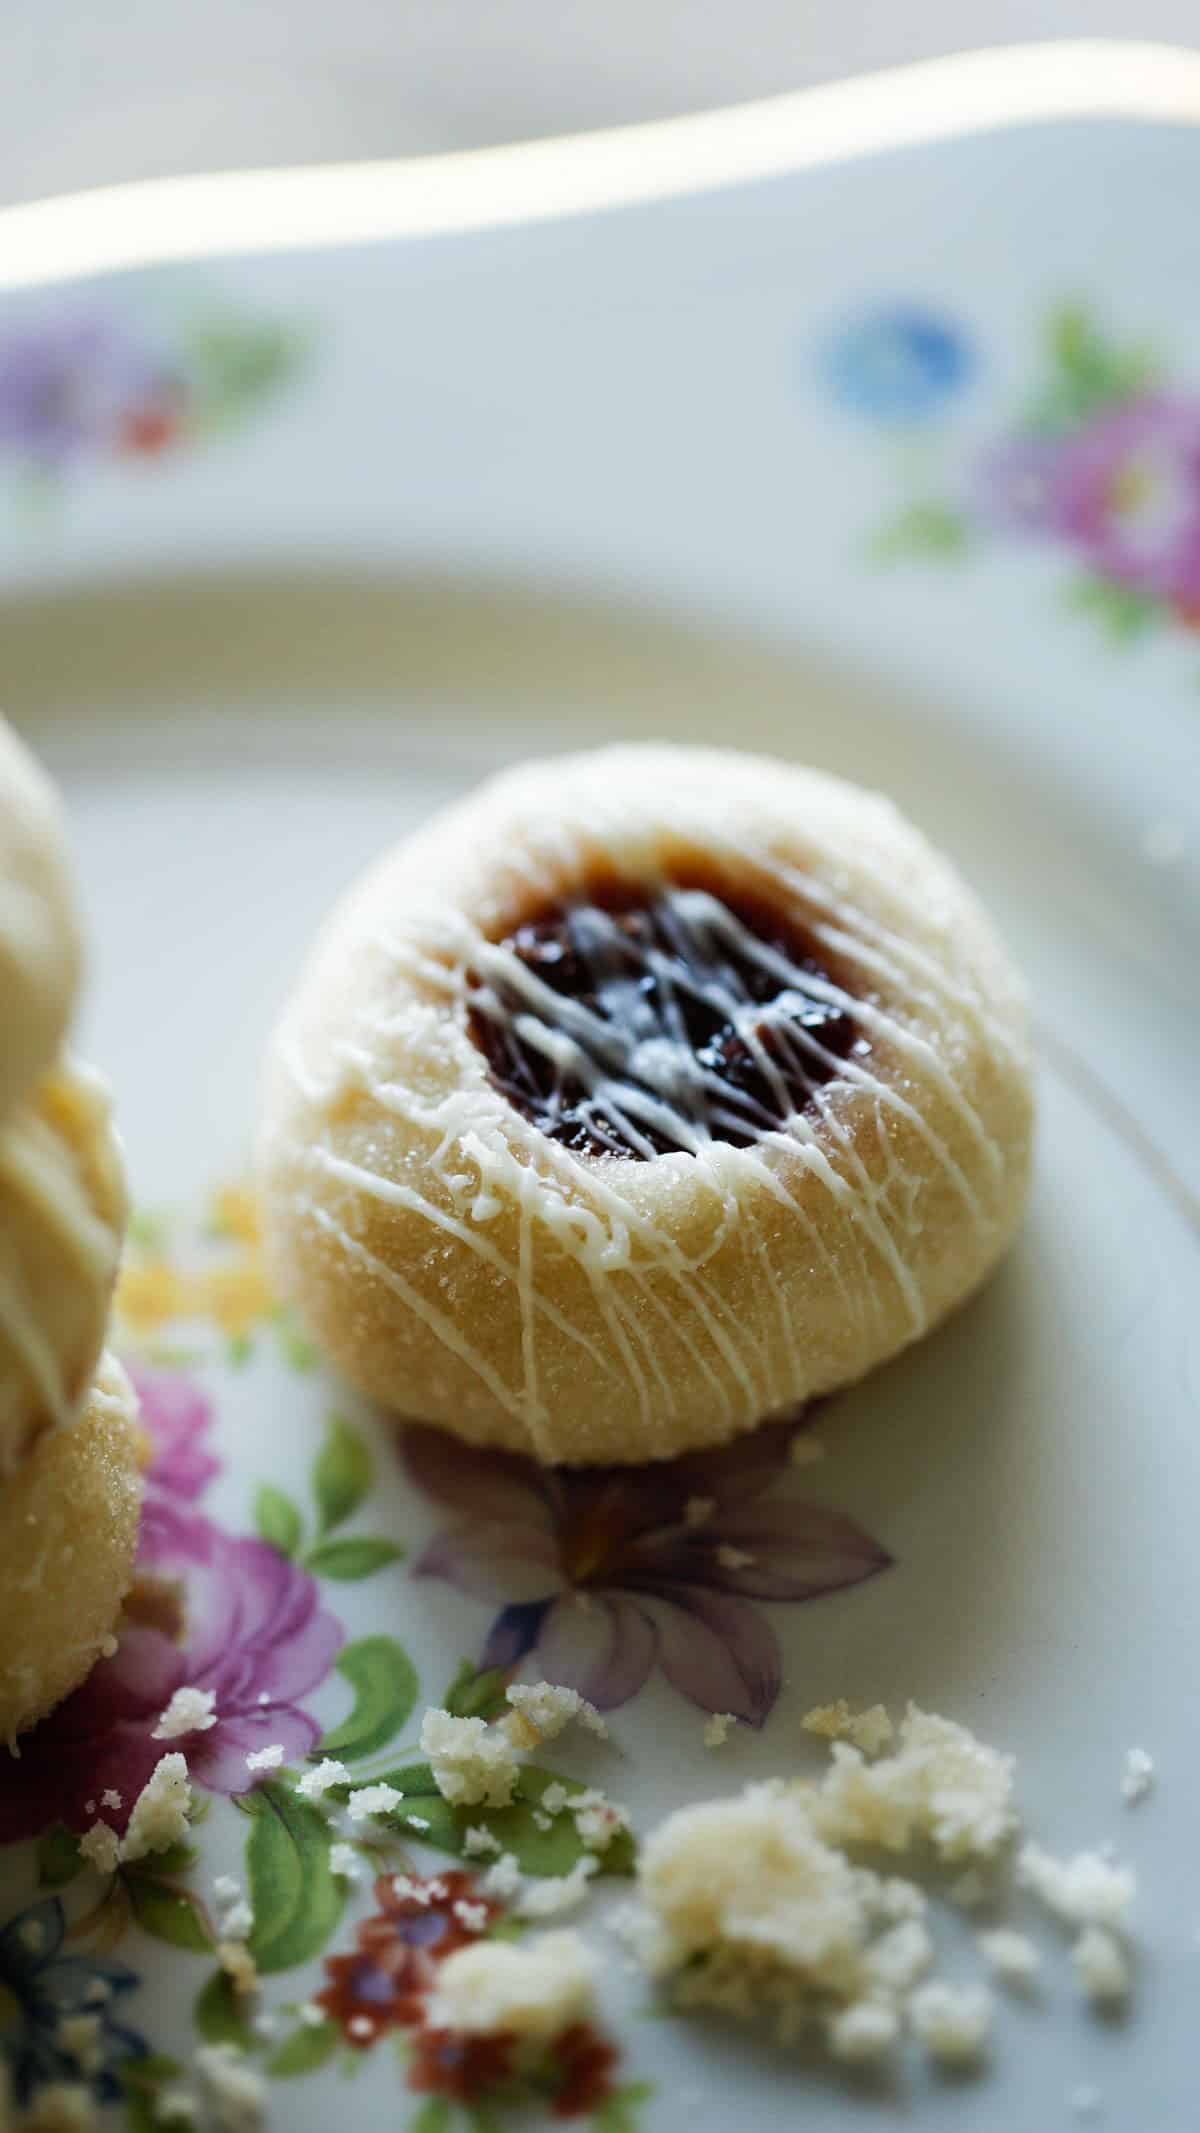
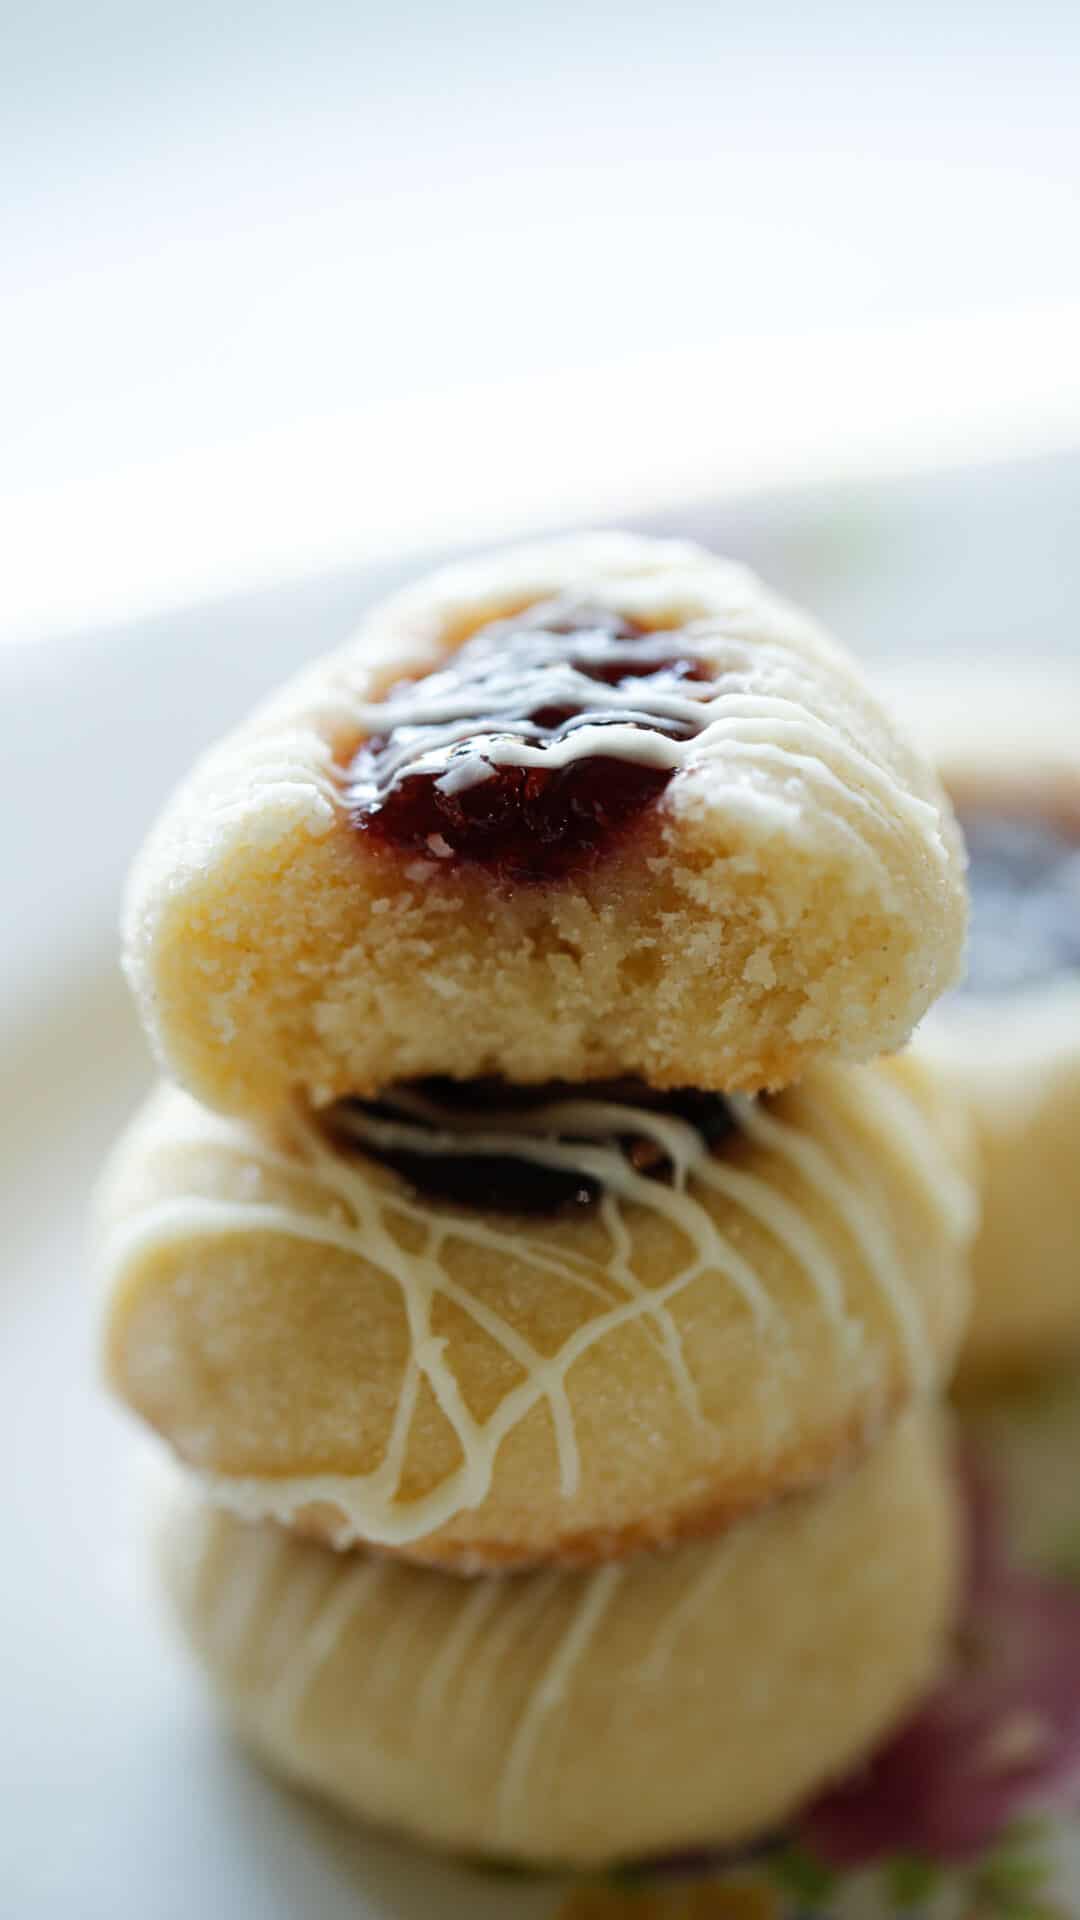
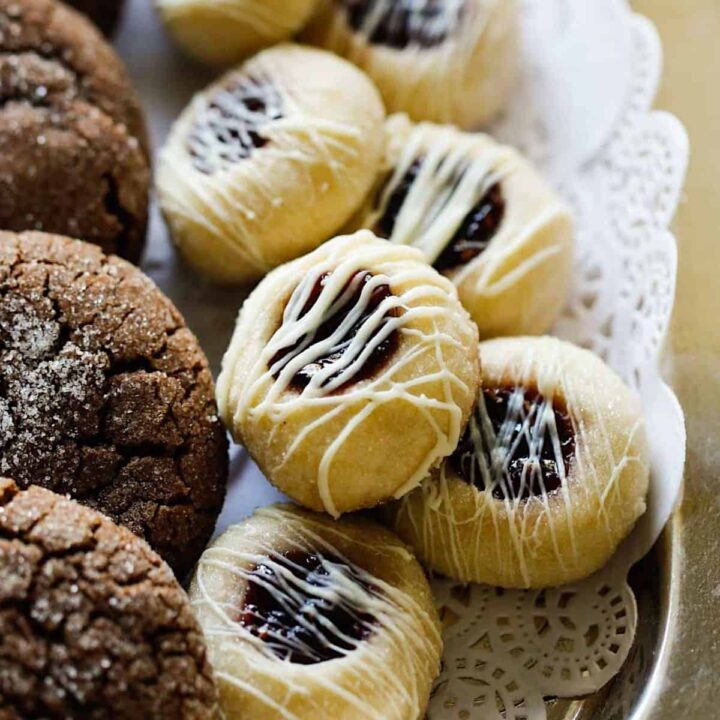
These raspberry almond thumbprint cookies are melt-in-your-mouth delicious! They are flakey and buttery, with just the right amount of almond flavor and when combined with the tart raspberry jam, it’s a flavor sensation!
They also make a very pretty holiday cookie when drizzled with white chocolate after they are baked. If you ask me, they are definitely one of my go-to cookie recipes for a cookie exchange party, along with my Fig and Walnut cookies, Gingerbread Cookies, and Vanilla and Chocolate Sugar Cookies.
For another wonderful Christmas cookie with almond flavor, try my Financier Cookies or my easy Amaretti Cookies.

Can Thumbprint Dough Be Refrigerated Overnight?
- This is one of the reasons I love this cookie recipe, you can make the dough and keep it refrigerated for 4-5 days and then bake the cookies as needed.
- If the dough gets too hard from being chilled overnight you can either leave it on the counter for 15 minutes to come up to room temperature, or you can pop it back into your stand mixer and beat it back up for a few minutes and it will soften up immediately.
- For a cookie dough that needs no refrigeration, try my White Chocolate Cranberry Cookies. Another great holiday cookie that you can bake straight away!
Why Did My Thumbprint Cookies Go Flat
Thumbprint cookies will flatten out in the oven if they were not chilled long enough. I think 2 hours is the sweet spot. But you could also refrigerate the dough overnight as well.
The Secret Ingredient
The secret to getting flakey, buttery shortbread that melts in your mouth, is powdered sugar. If you are out, you can definitely swap for granulated sugar, but you’ll get a lighter, more delicate thumbprint cookie with the powdered sugar.
Forming the Cookies: The Process
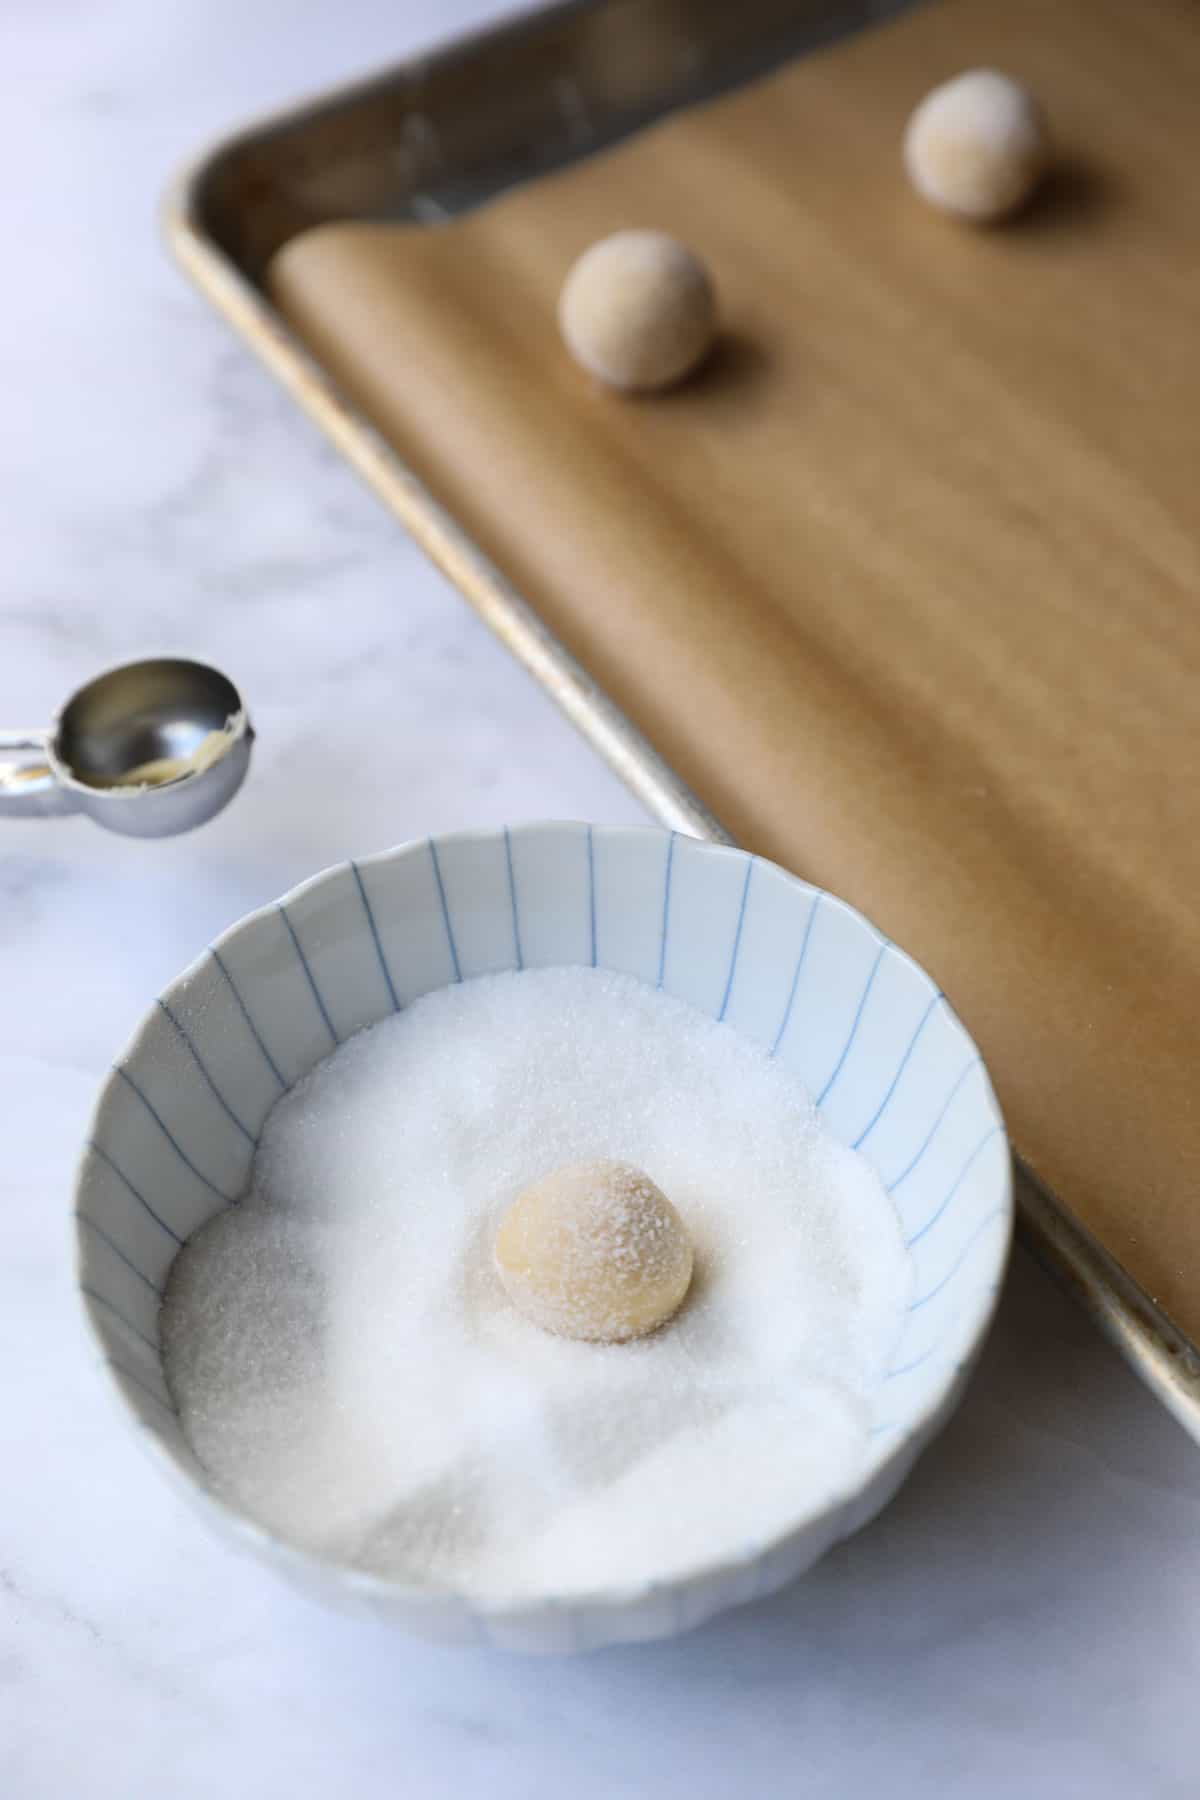
- Once the dough has chilled for 2 hours. Scoop out a dough ball using a small cookie scoop that holds one tablespoon.
- Then roll it into a ball with the palm of your hand and toss it in granulated sugar.
- The granulated sugar gives the shortbread cookie a little bit of extra sweetness since the dough itself isn’t that sweet.
- It also gives the exterior of the cookie a nice dusting of texture after they are baked. It’s a pretty look for a holiday cookie since they look a bit “frostbitten” with the baked on sugar.
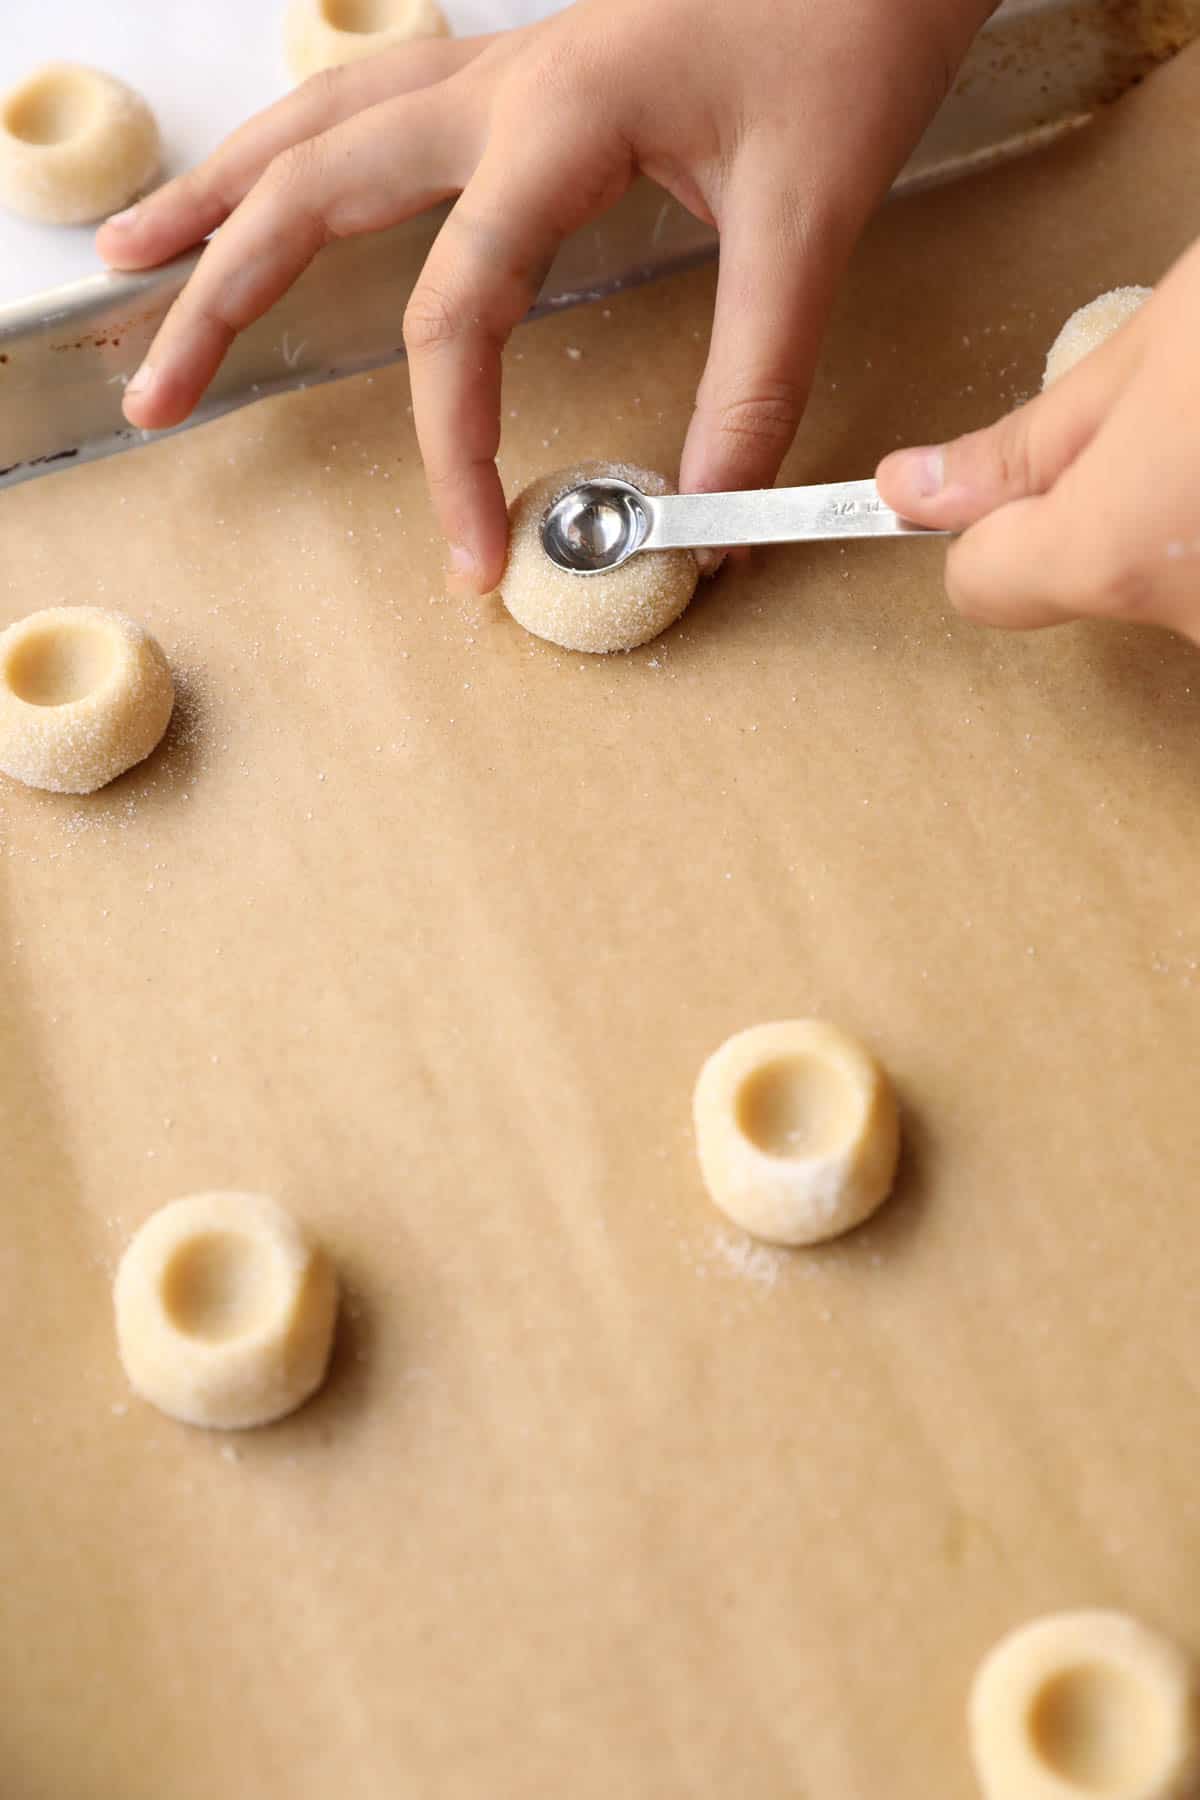
Forming the Indentation
- Thumbprint cookies get their name because the indentation is typically made with your thumb. But this can lead to a lot of irregularity in the size and shape of the indentation which then effects the look of the final result.
- For a more uniform indentation use the back of a 1/4 teaspoon. It’s the perfect size to get just the right amount of jam into the cookie. This is also a fun job for kids!
- Just be sure the dough balls are not too cold when you do this step, otherwise the dough will crack as it’s pressed down.
- If this happens, just roll the dough back into a ball and start again. It will warm up a bit in the palm of your hand while rolling it which will make it easier to press down.
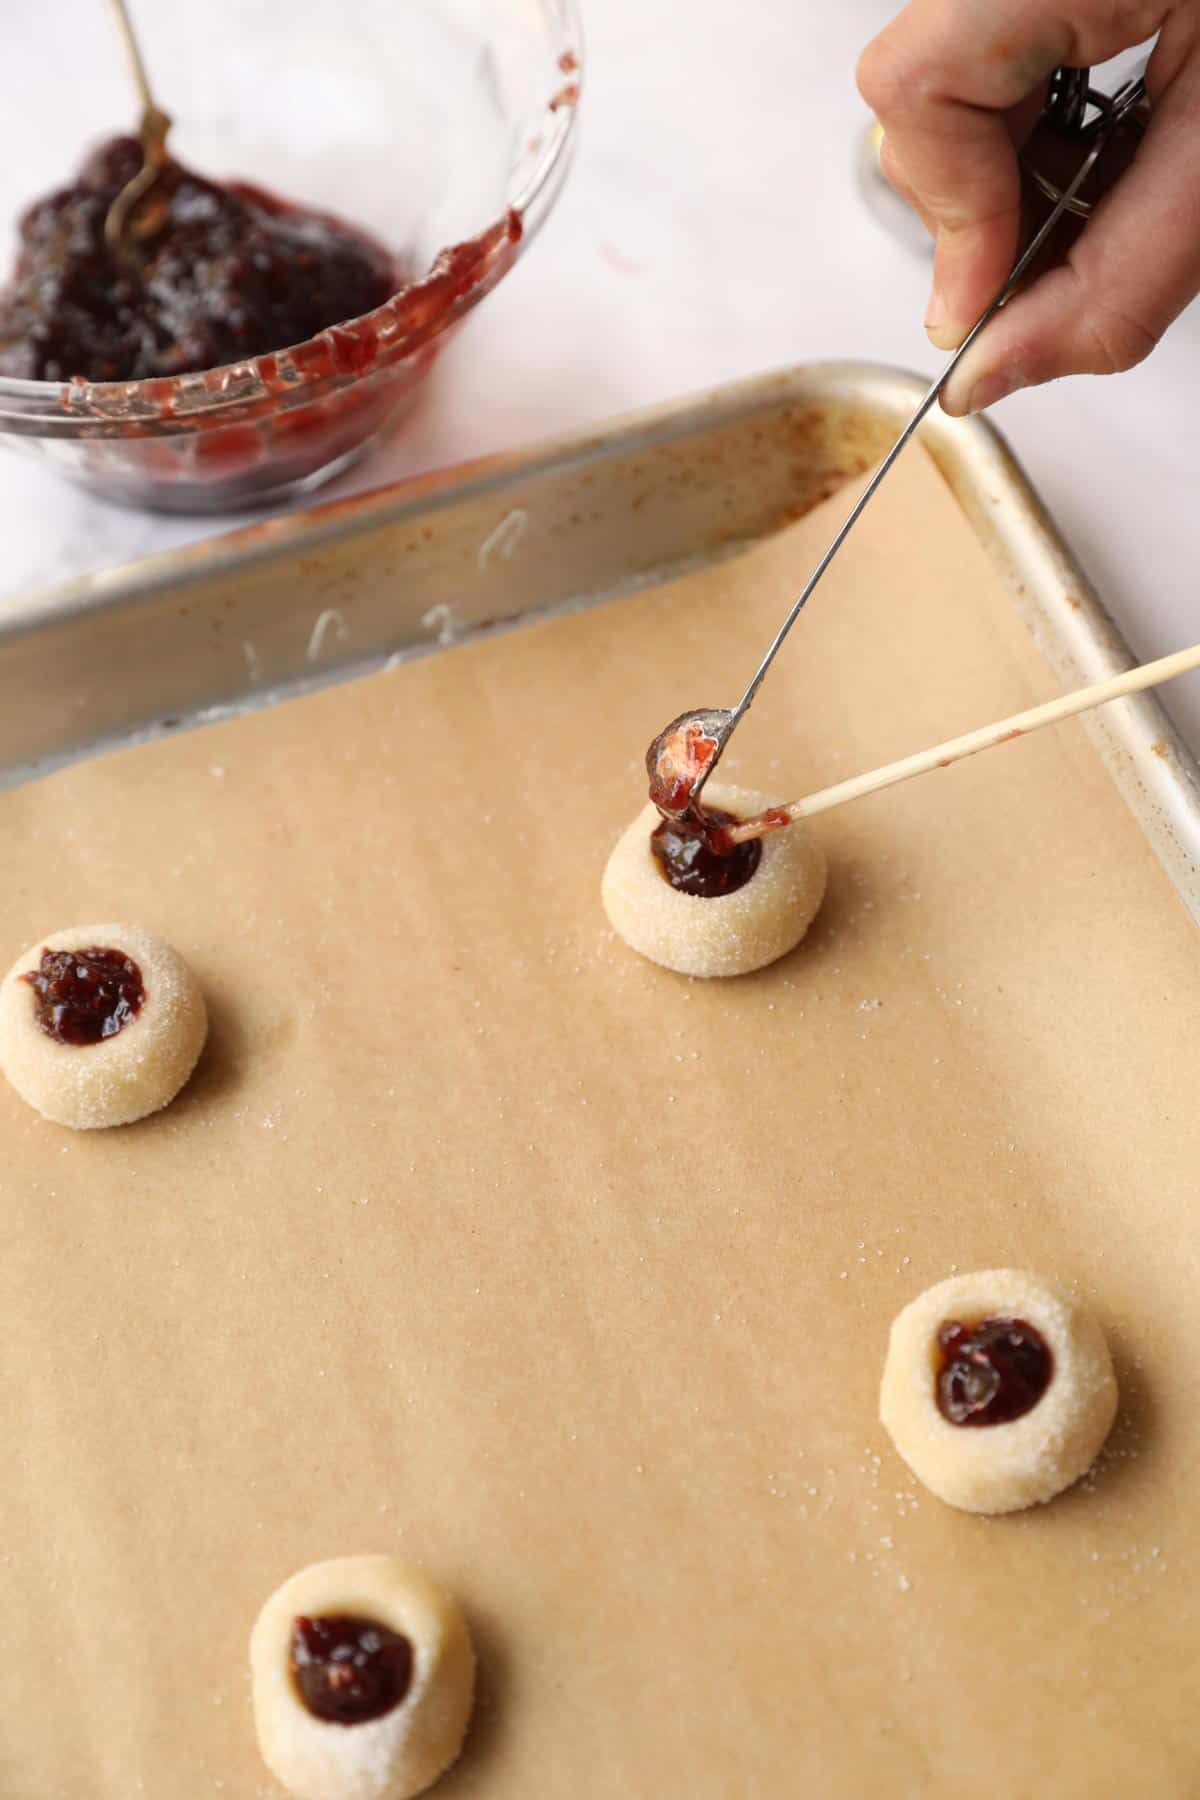
Adding The Jam to the Cookie
- The best way to add the jam or jelly to the shortbread is with the same 1/4 teaspoon since it is the exact size you’ll need to fill the indentation.
- To get the sticky jam to release a bit easier out of the spoon, use the flat side of a skewer.
- The skewer will help to push the jam off the spoon, while also allowing you to position it a bit better in the indentation.
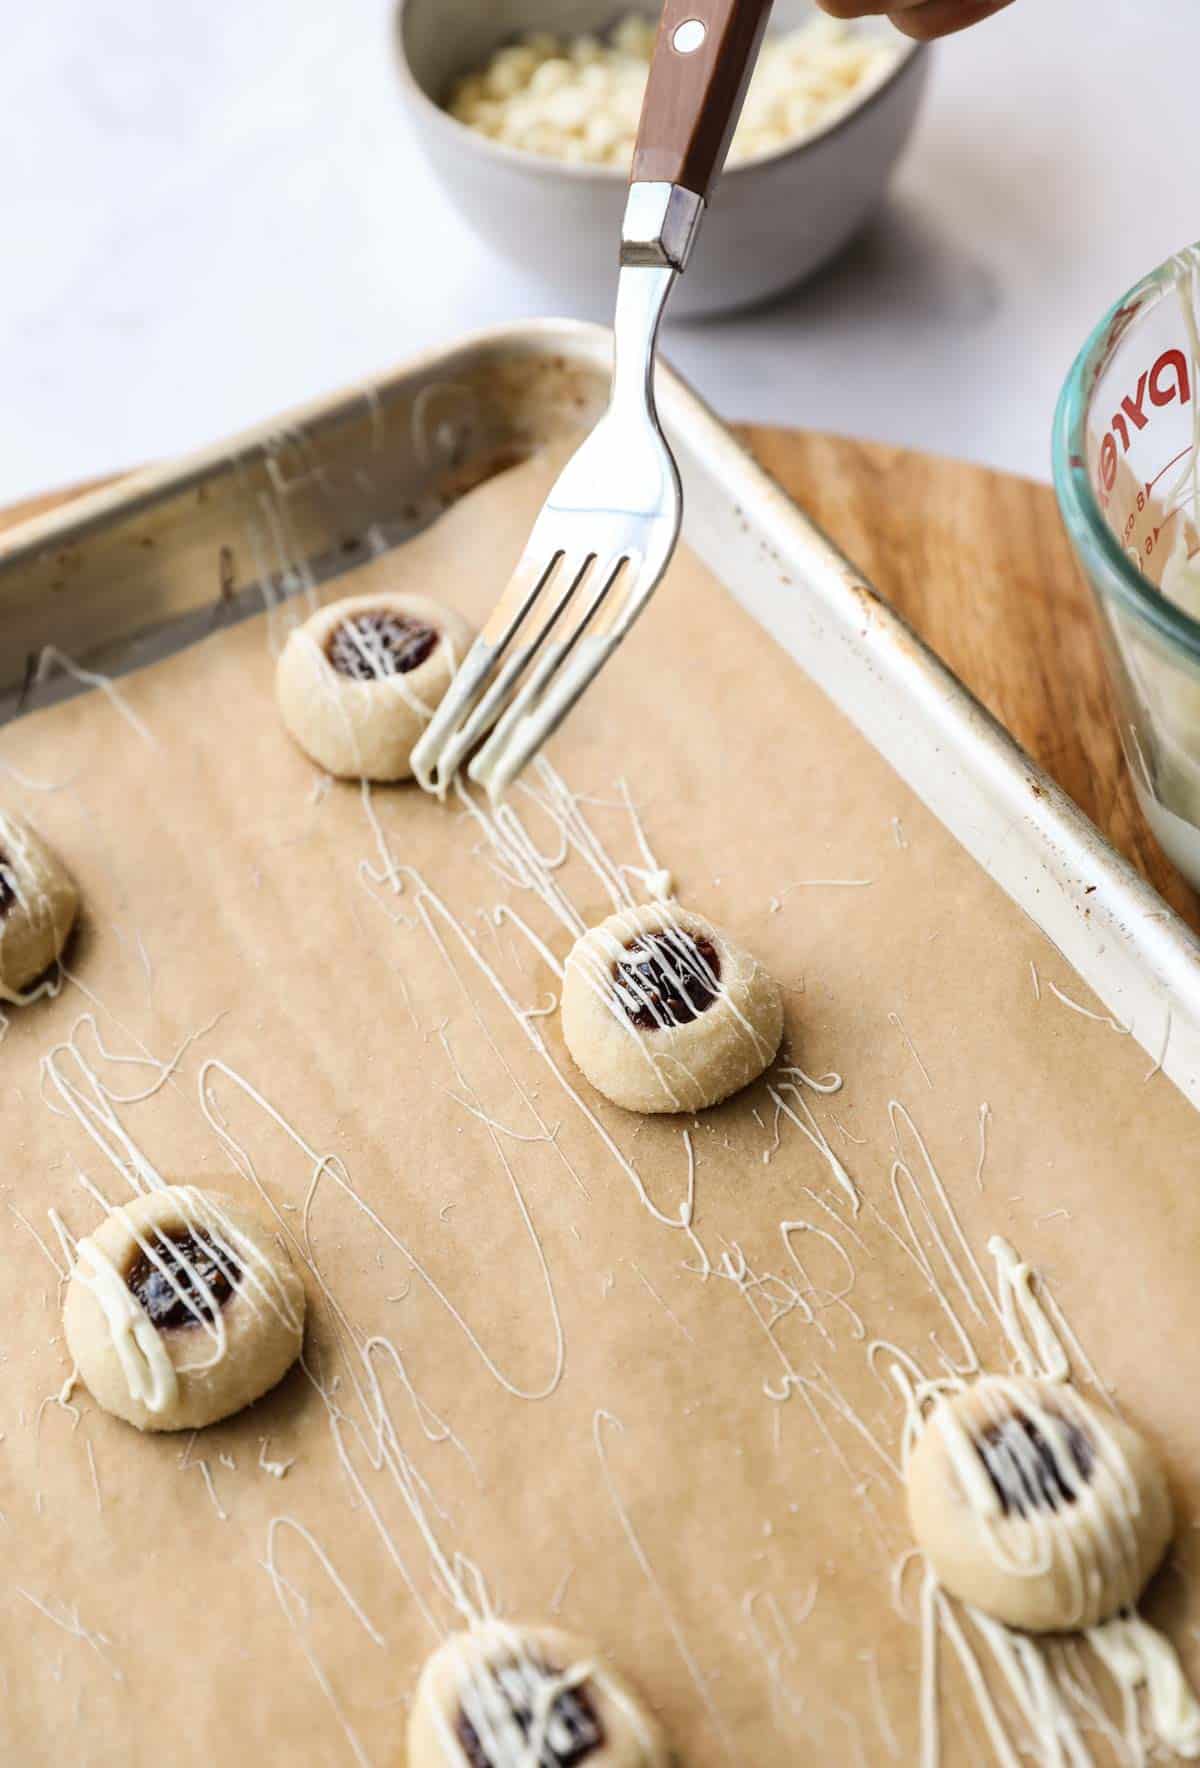
Adding the White Chocolate Drizzle
- A drizzle of melted white chocolate gives these cookies a nice festive, finish! It’s easy to do with white chocolate chips melted in the microwave at :30 intervals. I start with 1/4 cup and usually 1:30 is what it takes.
- But be sure to mix the chips with a fork after every :30 otherwise the chocolate can scorch and separate.
- The easiest way to add the flourish is to drizzle the chocolate with a fork over the freshly baked cookies, going back and forth.
- The more liquified the chocolate is the thinner it will be and the prettier the design will be.
- Also less is more in this regard. Just add a bit of chocolate to create wispy stripes otherwise too much chocolate on your fork will lead to globs of white chocolate which will then hide the pretty jam underneath.
- Allow the chocolate to set as it cools before serving or packaging them up.
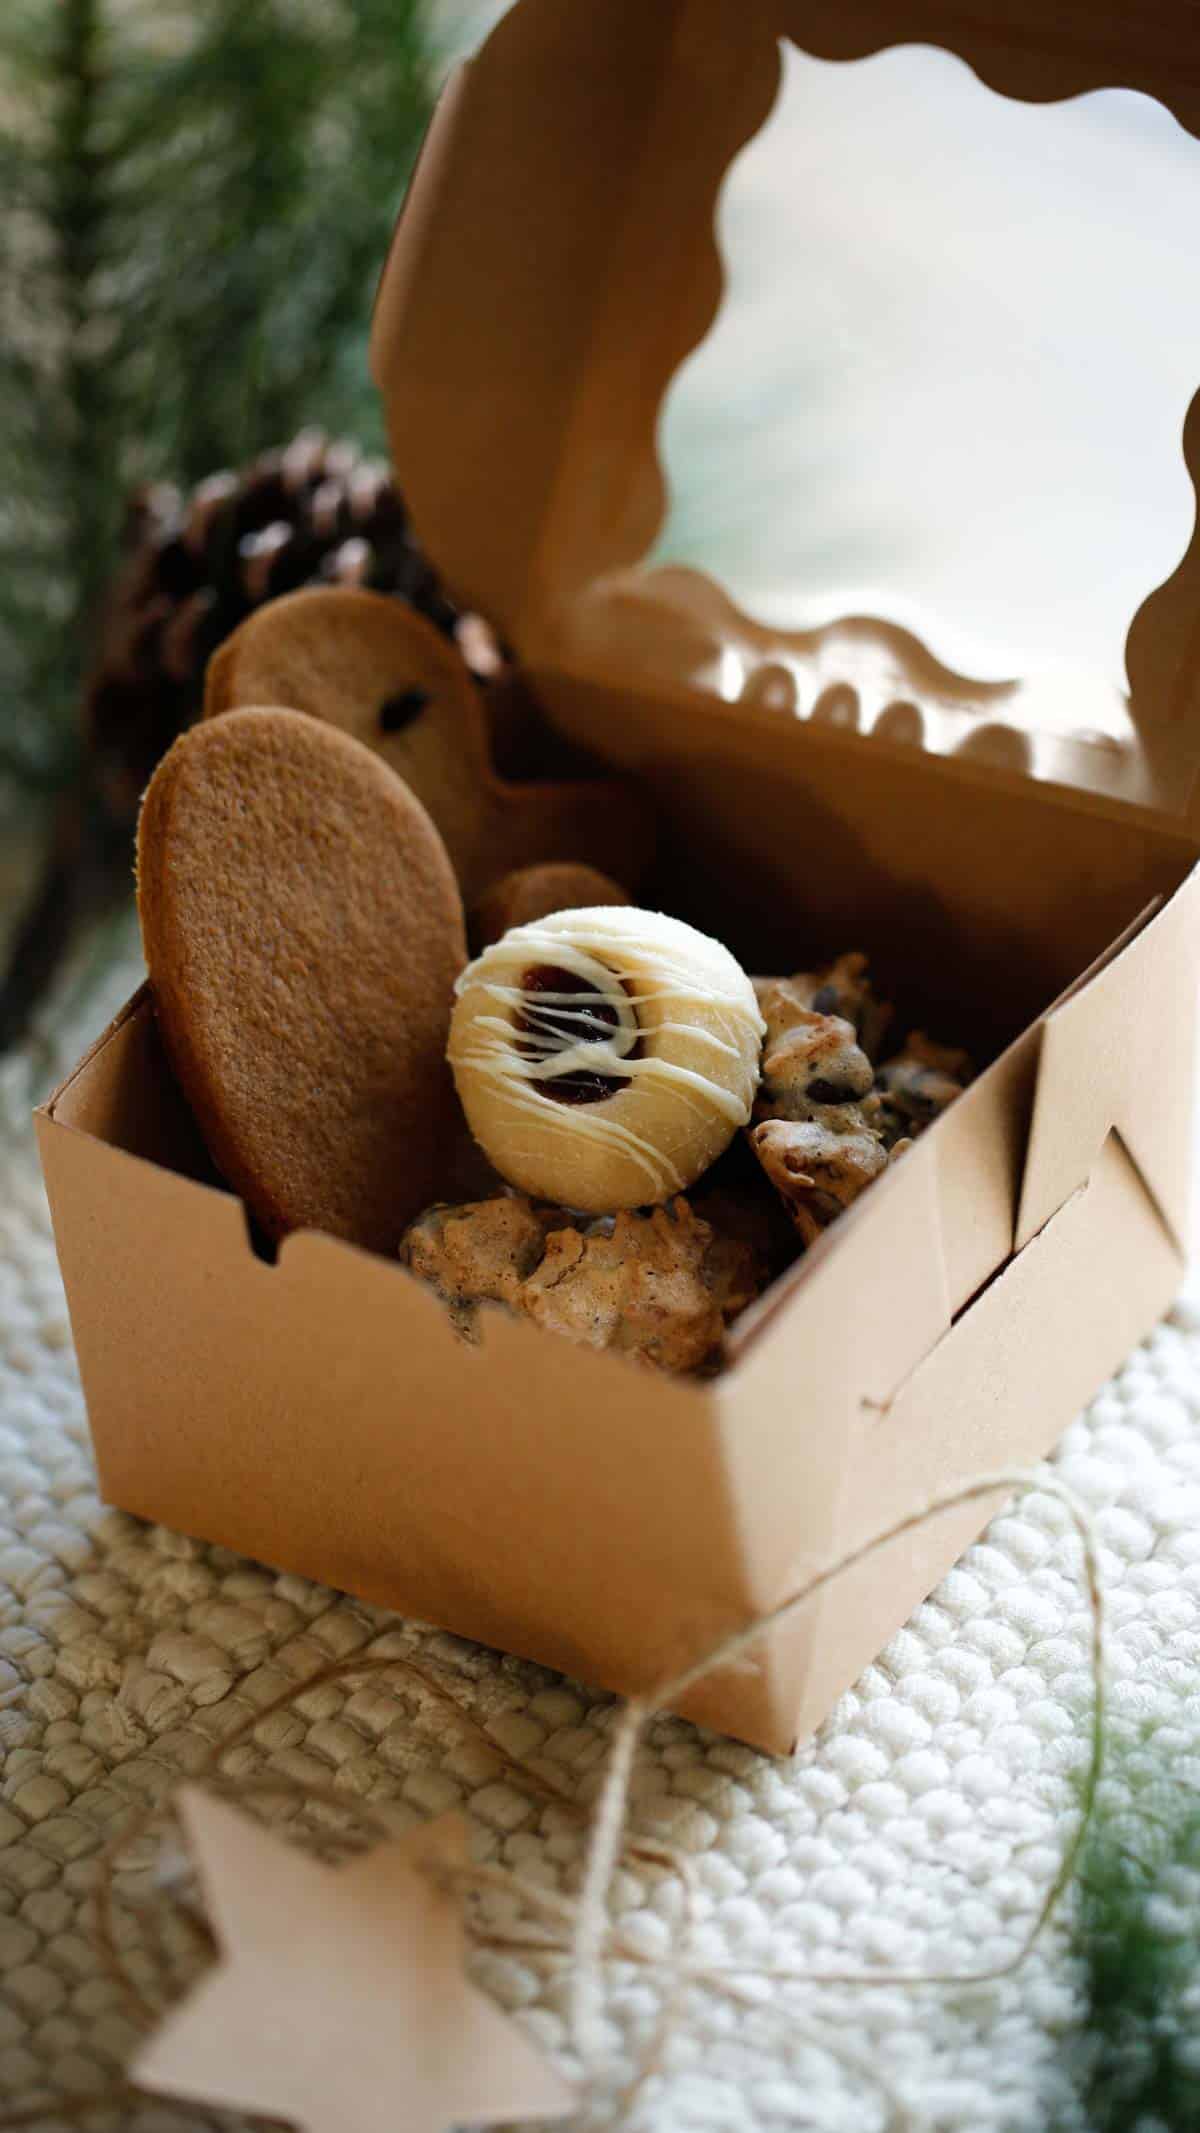
A Perfect Cookie for Gifting
Thumbprint cookies are the perfect addition to any cookie box for gifting! They are small enough to tuck into a box, and add a wonderful flavor and texture to the mix! Some of my other favorite treats for gifting include my Chewy Gingerbread Man Cookies, Chocolate Turtles, Vanilla and Chocolate Sugar Cookies, and my Chewy Chocolate Cookies.
Storage
- Once baked you can keep the cookies at room temperature in an air tight container.
- Alternatively, you can also freeze the baked cookies in Ziploc bags for up to a month. Thaw overnight in the refrigerator.
- You can keep the cookie dough in the refrigerator for 4-5 days (after that it’s best to freeze the dough to prevent it from drying out)
- You can freeze the dough for up to 1 month.
Raspberry Almond Thumbprint Cookies
These Raspberry Almond Thumbprint Cookies are melt-in-your mouth delicious! Flakey and buttery with a wonderful almond flavor that is a terrific match against the raspberry jam. They are a perfect addition to any holiday cookie platter.
Ingredients
- 1 cup (227 grams) unsalted butter, softened
- 2/3 cup (65g) of powdered sugar
- 2 tsp (10ml) Almond extract
- 1 tsp (5ml) vanilla extract
- 1/8 tsp salt
- 2 cups (240g) all-purpose flour
Garnish:
- 1/4 cup white granulated sugar
- 1/2 cup (74g) raspberry jam
- 1/4 cup white chocolate chips
Instructions
- In the bowl of an electric mixer, cream together the butter and powdered sugar until light and fluffy, scraping down the bowl as needed.
- Add the vanilla and almond extracts, and the salt and beat to combine.
- Slowly add the flour, in thirds, beating well in between each addition and scraping down the bowl as needed.
- Continue to beat until a dough forms and it begins to pull away from the sides.
- Refrigerate for at least 2 hours, or over night.
- Preheat oven to 350F. Line a baking sheet with parchment paper.
- Scoop out the cookie dough with a small cookie scoop (1 tablespoon in size).
- Roll the dough in the palm of your hand to create a round ball.
- Toss the dough ball in sugar so its coated on all sides.
- Place on the baking tray lined with parchment paper.
- Using the back of a 1/4 teaspoon create an indentation in the center of each dough ball, being careful not to press all the way down. If the dough cracks while pressing, the dough is too cold. You can then form it back into a ball with your hands to warm the dough up. It will not crack the warmer it is. But don't allow it to warm up too much or your cookies will loose their shape in the oven and spread out too much, becoming flat.
- Fill each cookie with the raspberry jam, using the 1/4 teaspoon and releasing it from the spoon with the flat side of a wooden skewer and positioning the jam into place.
- Bake for 12 minutes.
- Allow to cool slightly on the tray, while microwaving the white chocolate.
- Microwave the white chocolate at :30 intervals, stirring with a fork at each interval, until liquified and smooth.
- Dip the fork in the melted chocolate and run it across the cookies, back and forth, in a quick motion, to create the drizzle effect.
- Allow the white chocolate to cool and harden on the cookies, about 30 minutes or so. Then store in an air tight container at room temperature.
- Or freeze for up to a month in a Ziploc bag.

Hi Beth! I made these today and they’re delicious 😋
My cookies did spread out a little during baking, so I assume the dough was too warm. Would it help to refrigerate the cookies for a few minutes after indenting them but before adding the jam?
My family absolutely loved these cookies, but I wasn’t able to make them look as beautiful as yours. Big problem was getting the white chocolate to be thin enough to get that delicate look. I used my microwave for 30 second intervals but try as I might it just wasn’t melting to a thin enough consistency. Is there something I’m missing?? Perhaps a trick that you use. I love your recipes….always!!! Even this one I might do again but without the white chocolate fancy work and that would disappoint me.
I’m so sorry you had problems with the melting of the white chocolate. Over the years I have noticed some brands work better than others when melting. I have no idea why, it must be the composition of the chocolate. But I have the best success with the Ghirardelli Brand of white chocolate, their White Chocolate chips. Try that brand next time and let me know how it goes!
Can I substitute the almond extract for vanilla extract? I’m not the biggest fan of almond but these are too cute not to make!
Oh sure! In that case I would use 2 tsp of vanilla extract. Hope you enjoy! 🙂
The dough was easy to work with but I can a tough time getting the chocolate chips thin enough to drizzle. It took me three tries and I had to add water.
Adding a flavourless oil is the easiest way to thin your chocolate! Oil also won’t cause it to seize 🙂