Financier Recipe
SHARE THIS RECIPE!


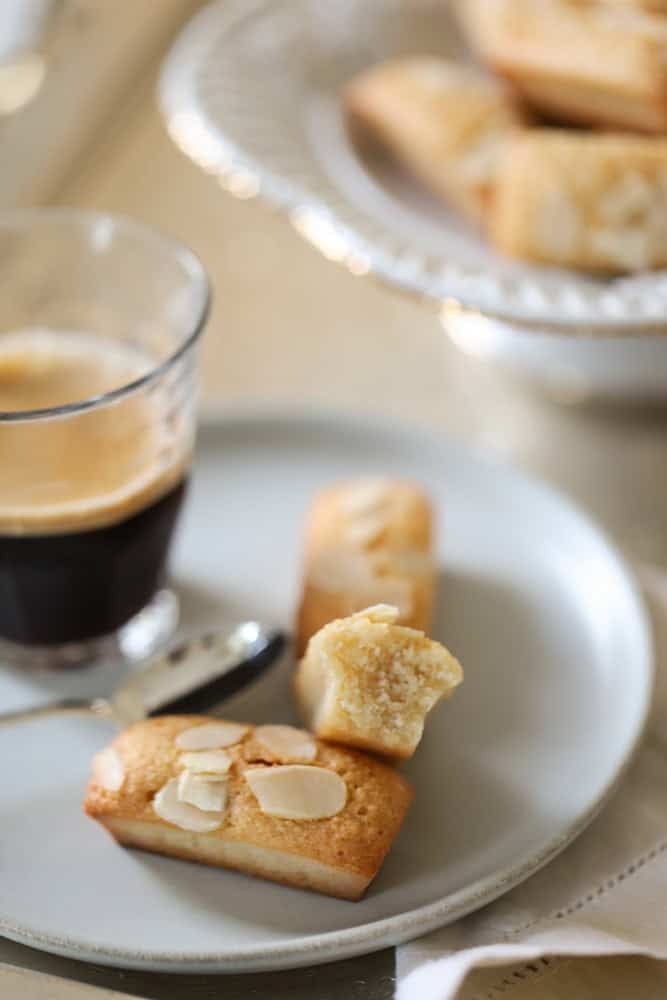
Le Financier (pronounced fee-NAHN-see-ay) is a dainty French almond cookie that resembles a tiny cake. It’s slightly chewy on the outside and moist and delicious on the inside. It’s filled with almond flavor and is the perfect companion to a cup of coffee or tea.
They are typically sold in French bakeries, packaged up into little bags, but I find they are even better when made at home because there’s nothing better than a warm financier just out of the oven with a strong cup of coffee.
These cookies are great for holiday gifting too! Along with my Chewy Molasses Ginger Cookies, Peanut Butter Cookies or Gingerbread Cookies.

Would you like to save this?
Why are They Called Financiers?
- Financier essentially means “financial” in French. In 1890, a Parisian baker located near the stock exchange started selling these little cakes in molds that resembled gold bars.
- Stock traders enjoyed these little cakes because they were small enough to slip into a vest pocket and take to work.
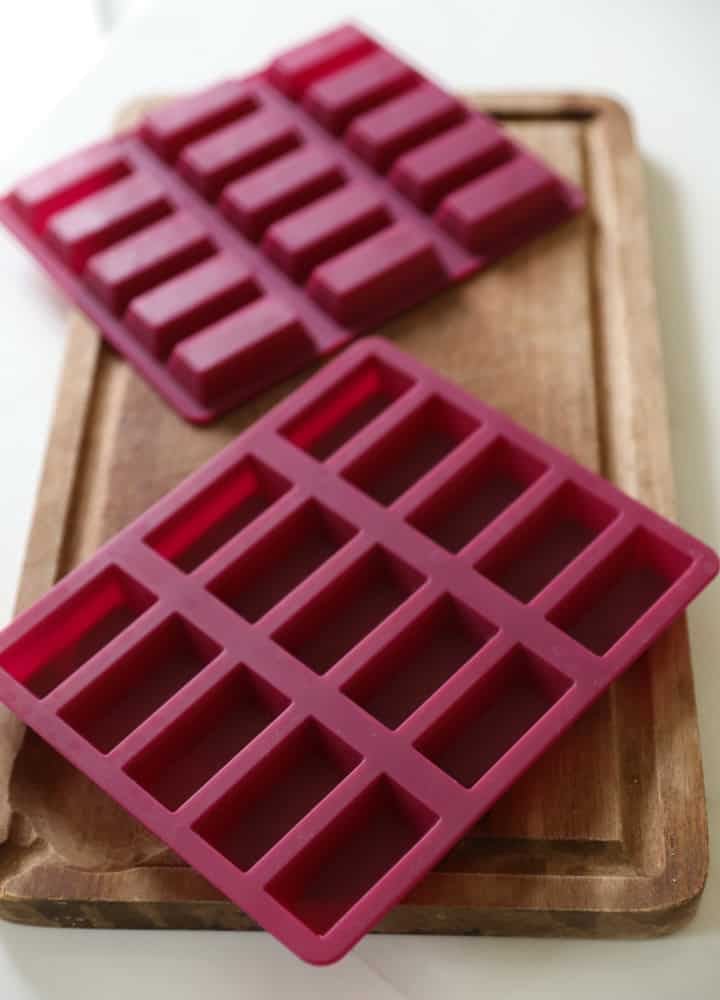
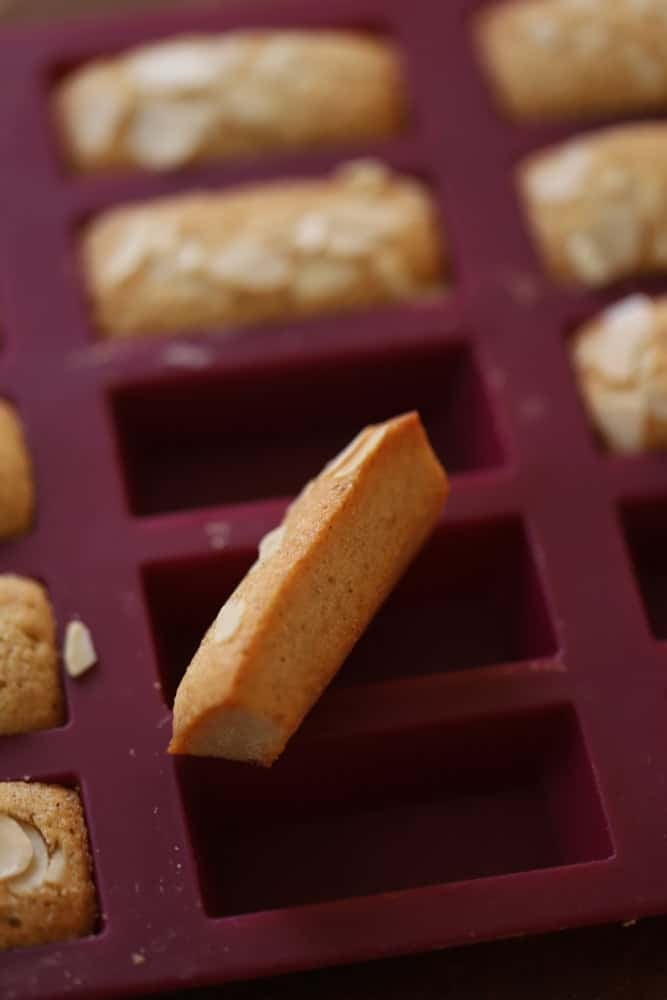
- Today, the traditional shape of a financier is a small beveled rectangle, but you can also bake them in a mini muffin too.
- Double this recipe if baking these cakes in a mini muffin mold. I would also use a silicone muffin mold to allow for an easy release. It will also ensure even browning too.
A Financier vs. a Madeleine
- The difference between a financier and a madeleine can be seen in flavor and texture.
- A financier is filled with almond flavor and has a slightly chewy exterior and a very moist interior. Whereas a madeline is light and airy on both the exterior and interior with a delicious buttery flavor that is usually complimented by adding lots of vanilla or a little citrus zest.
- But they also differ in two other important ways.
- A financier uses only egg whites, and leaves the leavening agent out. This is what gives them a denser, chewier texture.
- Madeleine recipes on the other hand, use whole eggs and include leavening in the form of baking powder.
- Both are classic French recipes and are worthy of mastering!

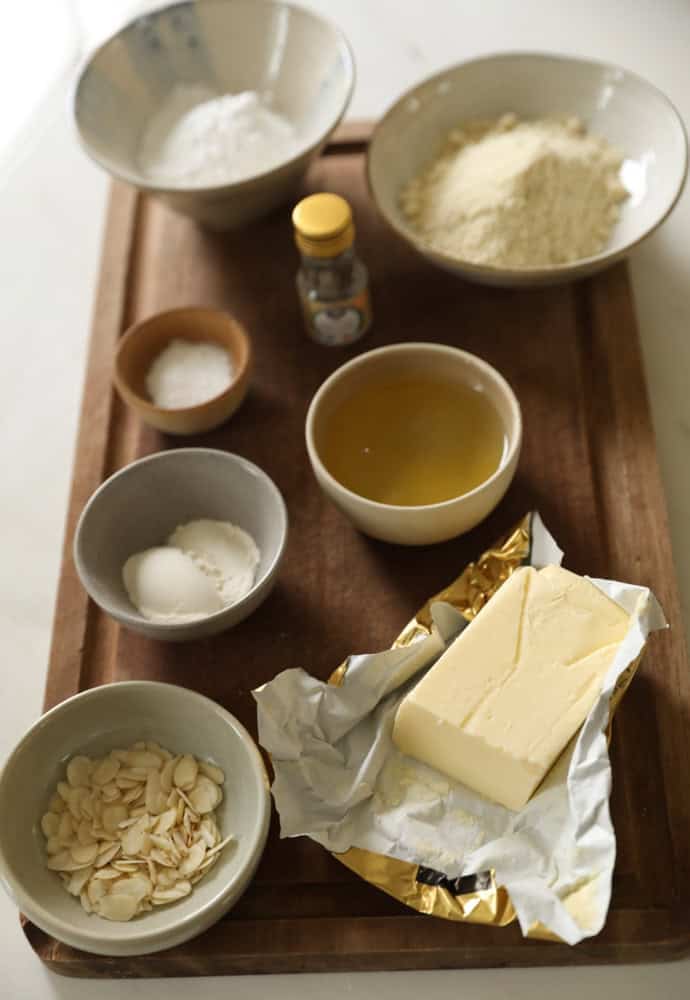
Ingredients:
Watch the Demo of this Recipe Below
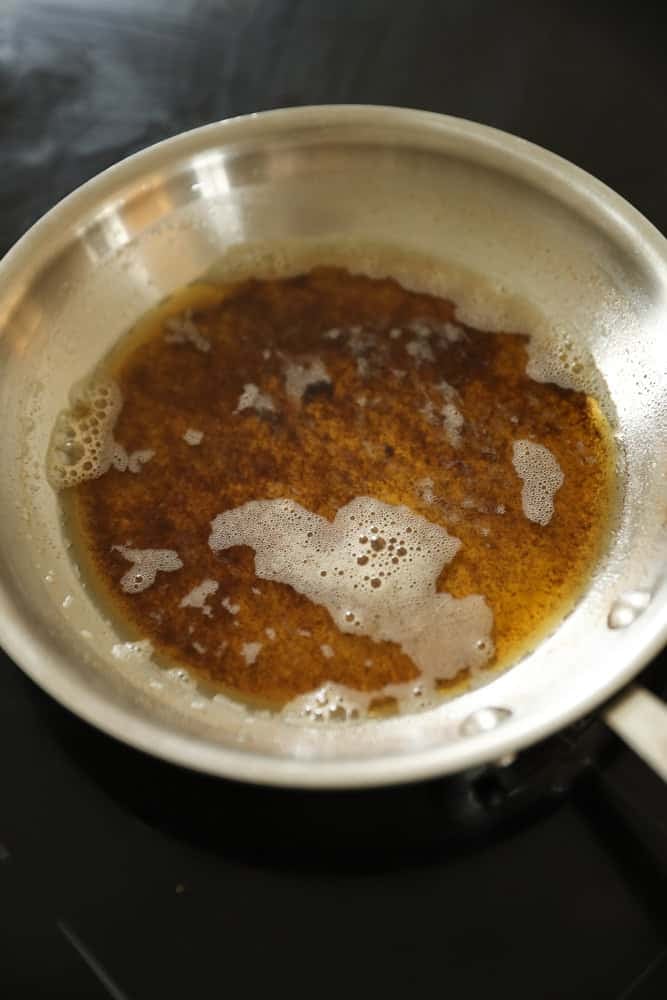
Browning the Butter
- A traditional financier recipe calls for browning the butter first or creating a beurre noisette, as it’s known in France. Noisette means “nutty” in French and describes the slightly nutty flavor the browned butter provides.
- I have tried this recipe both ways. Browning the butter and just melting the butter.
- And I must say, despite the pesky step of browning butter, it does make all the difference!
- It gives this cookie a deeper depth of flavor, and I think it also contributes to a better texture. They are denser, chewier, and more interesting with the browned butter.
- When browning the butter, keep an eye on it—swirling around the melting butter in the pan until it turns amber.
- Then, you’ll notice the brown bits will form at the bottom. Take it off the heat as soon as the bits turn caramel in color.
- Otherwise, they will quickly turn black and will burn.
- Burnt butter doesn’t have the same flavor as “browned butter,” and you’ll have to start all over.
- Be sure to allow the butter to cool completely once browned, otherwise your batter will be too runny and it will be harder to pipe it into the molds.
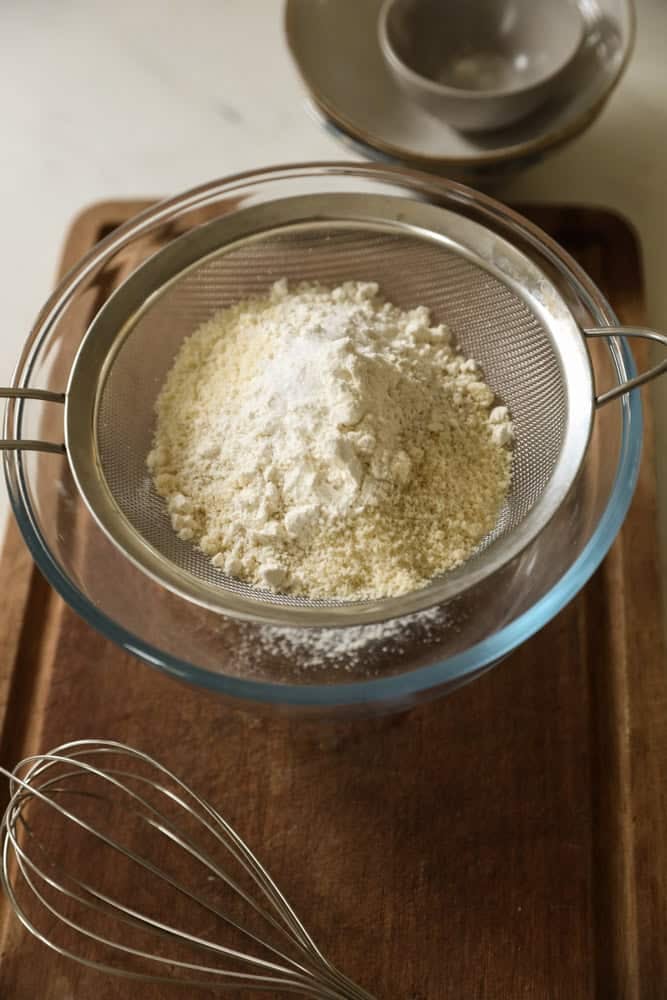
Sifting the Dry Ingredients
- Powdered sugar and almond flour are notoriously lumpy!
- Those lumps must be worked through a sieve to provide a smoother, more delicate texture to your finished cookie. You can also include the all-purpose flour in the sifting as well.
- Removing the lumps will also ensure they do not get stuck in the piping bag when piping out the batter.
- This batter is runny, and to get it into the small financier mold without it making a fantastic mess, you’ll need to pipe it in through a tiny hole in your piping bag (see below!)
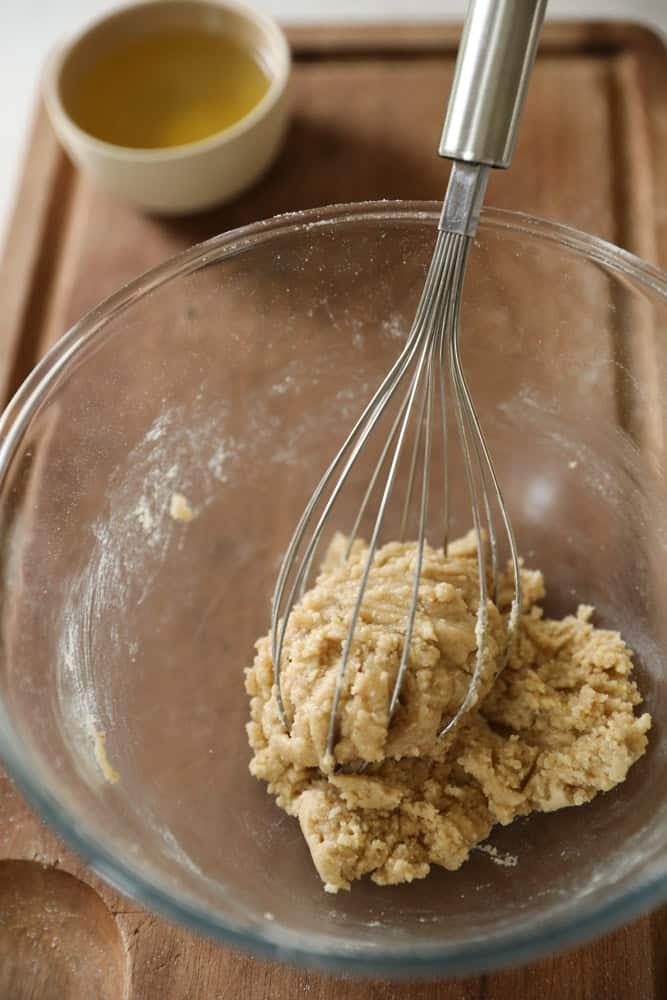
Combining the Butter and Egg Whites
- Once your butter is completely cooled, whisk in the almond extract to the butter. This will give you a consistent flavor throughout the batter.
- Then, add the cooled butter to the dry ingredients and whisk to combine. It will resemble a coarse paste.
- Then add the egg whites in two batches, whisking in-between each addition, until a smooth, sticky batter forms. Then you are ready for the piping bag.
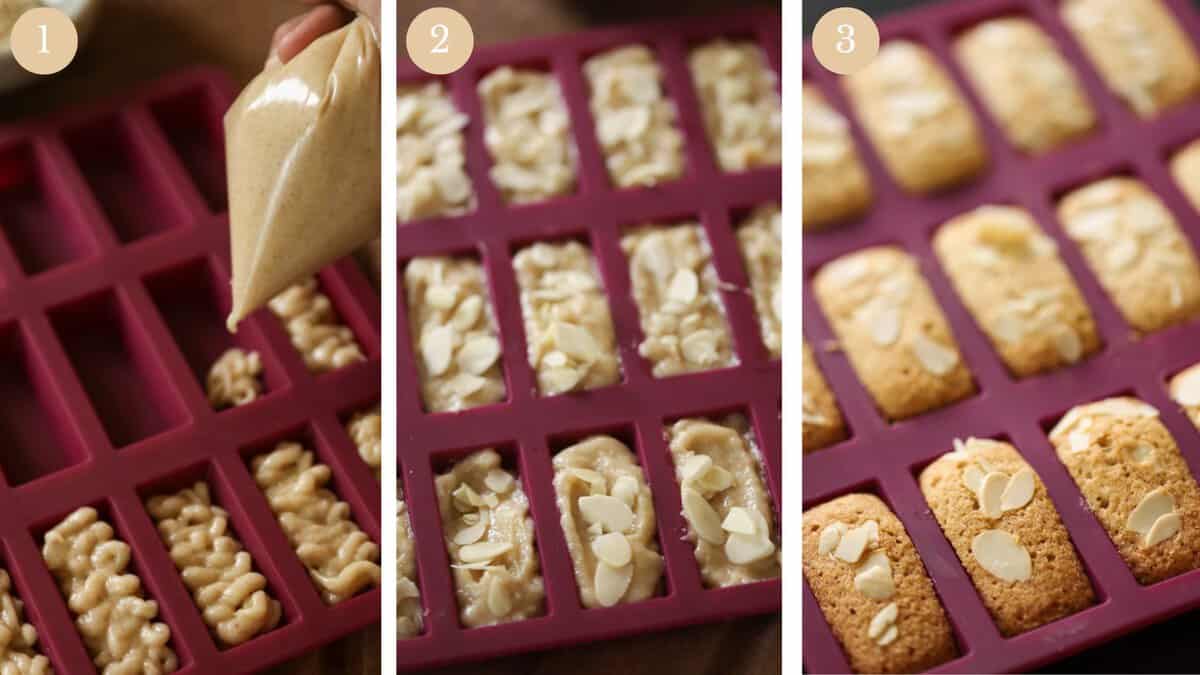
Filling the Financier Mold
- This recipe makes enough for 15 mini financiers. In France, the standard mold is 15 cookies, but it looks like in the States. It can vary from an 8-cavitiy Financier mold to a 20-cavity mold.
- For an easy piping bag, use a large 1-gallon Ziploc bag. Fold it over a glass so it’s stable. Then, transfer the batter into it.
- Push the batter into one corner of the bag, and then snip the corner for a tiny hole.
- The smaller the hole, the easier it will be to pipe the batter in.
- Once all the batter is piped, smooth it out to an even layer with the back of a small spoon, then add the sliced almonds.
Baking Tips:
- Bake these cookies in a preheated oven at 350F (175C) for about 25-30 minutes or until risen and golden brown.
- If your oven has the option, bake these cookies on the convection setting at 325F (170C). The convection setting will create a beautiful, even browning to these cookies and produce an even, chewy texture.
- It will also prevent over-browning on the bottom.

If you enjoyed this recipe, please leave a rating and review below!

Financier Recipe
Yield:
15 cookies
Prep Time:
20 minutes
Cook Time:
30 minutes
Total Time:
50 minutes
No Ratings
Ingredients
- 1/2 cup (60 g) powdered sugar
- 1/2 cup (60 g) almond flour
- 2 Tablespoons (20 g) All-Purpose Flour
- Pinch of salt
- 1/3 cup (76 g) unsalted butter
- 1 teaspoon (5 ml) Pure almond extract
- 3 egg whites
- 2 Tablespoons (9 g) sliced almonds
Instructions
- Preheat the oven to 350F (175C) * (see notes).
- Place a small skillet on medium-high heat and melt the butter.
- Swirl the butter around the pan until it starts to turn amber in color. Caramelized brown bits will form at the bottom. Once this happens, remove it from the heat immediately. You do not want those brown bits to turn black. If that happens the butter unfortunately has burned and you'll need to start again (burnt butter will not taste like browned butter)
- Transfer the butter (and all the brown bits! This is where the flavor is) to a heat-safe bowl. Add the almond extract, whisk to combine and set aside to cool.
- Meanwhile, in a large bowl sift together the powdered sugar, almond flour, all-purpose flour, and salt. Set aside.
- Add the browned butter to the dry ingredients and whisk together until a sticky paste forms.
- Then add half the egg whites, whisk to combine, and loosen the paste. Then add the remaining half of the egg whites and whisk to combine until a sticky, smooth batter forms.
- Place a 1-gallon Ziploc bag over a tall drinking glass (or 2-cup Pyrex pitcher).
- Transfer the batter to the bag. Twist the bag, and push the batter down into one of the corners of the bag.
- Snip off a very tiny amount of the corner to create a small piping hole.
- Pipe the batter into the 15-piece financier mold almost to the top (leave about 1/8 of an inch to allow for rising)
- Then smooth out the batter with the back of a teaspoon to create an even layer.
- Top with a few sliced almonds and bake for 25-30 minutes until golden brown and risen.
- Allow to cool, then remove the little cakes from the mold by pushing them up out of the mold, from the bottom.
- Once cooled store at room temperature in an airtight container.
Notes
- My preference is to use the convection setting if your oven has this feature. They come out beautifully golden brown with even color all around. In this case set the oven for 325F (170C) for convection heat.