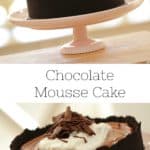
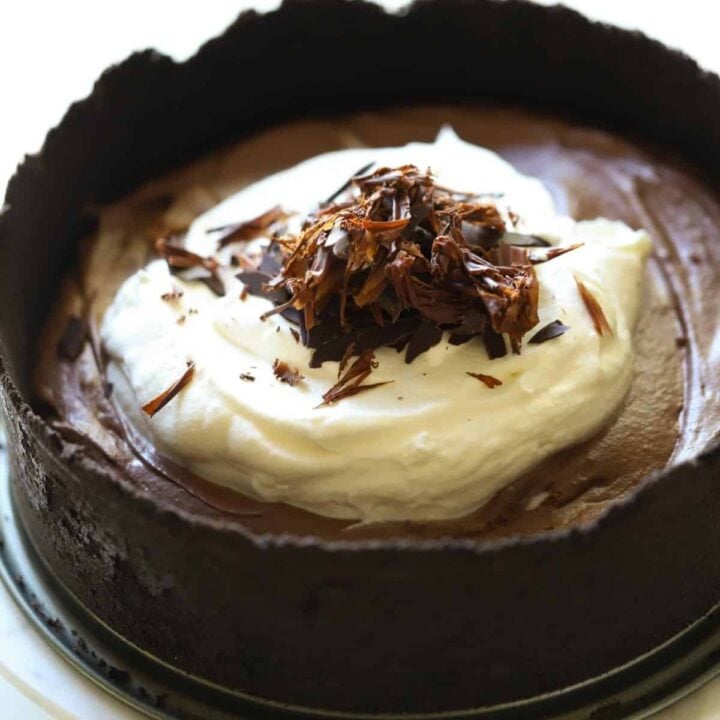
French Chocolate Mousse Cake
SHARE THIS RECIPE!

The easiest way to wow a crowd is with anything that involves chocolate mousse.
This is why I love this French Chocolate Mousse Cake Recipe. It’s an easy chocolate mousse cake, since it doesn’t involve using chocolate ganache. But it’s just as decadent, a bit mysterious (how is it so light?!), and oh-so divine! It’s really easier to make than you might think, and in my video below, I’ll give you all my tips!
For more fantastic cake recipes, try my Gingerbread Cake with Cream Cheese Frosting, my Chocolate Christmas Cake, or my Flourless Chocolate Cake with Crème Anglaise.
Would you like to save this?
Ingredients:
- Famous Chocolate Wafers: I prefer these cookies for making chocolate cookie crusts because they are not too sweet and are full of chocolate flavor. If you can’t find this brand, you can also use Oreo cookies scraped of their cream filling.
- Melted Butter: For a bit more flavor, use unsalted butter or salted American butter. You’ll need this to bring the cookie crumbs together to create a crust.
- Bittersweet Chocolate: Look for bittersweet chocolate that is around 60% cacao. Anything higher than that is a bit too bitter. Try to stay away from chocolate chips since they typically have emulsifiers in them, which can affect how the chocolate will melt.
- Butter: You’ll melt the butter with the chocolate for a smooth, luxurious texture.
- White Sugar: Use basic white granulated sugar, which melts quickly and easily under the heat of the melted chocolate. Stay away from organic sugars, as they tend to be a bit coarser and can create a gritty texture in your mousse.
- Vanilla Extract: Look for pure vanilla extract; you’ll get the best flavor that way. Avoid anything that is labeled “imitation vanilla” extract.
- Egg Yolks Will give the chocolate base its silky texture. Keep your eggs refrigerated until it is time to separate them. Cold eggs are easier to separate than eggs at room temperature.
- Egg Whites: Whipped to stiff peaks will give the mousse a light and fluffy texture.
- Cream of Tartar: This helps the egg whites keep their lift and helps your mousse keep its lift as well.
- Heavy Cream: You’ll need this for the mousse. You’ll whip it to soft peaks to lighten the texture and flavor of the mousse and for the garnish on top.
What is a French chocolate mousse cake?
- A French Chocolate Mousse Cake is a basic French mousse recipe poured into a chocolate cookie crust and chilled in the fridge for several hours.
- Like a traditional French chocolate mousse, this recipe contains raw eggs. If you prefer to avoid the raw eggs, you can make my Eggless Chocolate Mousse recipe and use that for the chocolate mousse filling for this cake.
- Either way, just be sure to plan ahead and allow enough time to refrigerate it, since it does take at least 4 hours to chill and set up.
Watch a Video Demo of This Recipe Below!
Step 1: Make The Crust
How do you make a chocolate wafer crust?
- A chocolate wafer crust is super simple to make with a package of these Famous Wafer Cookies. These cookies can sometimes be hard to find outside of “Ice Cream Season,” so I usually buy them online.
- If you can’t find the chocolate wafers, you can also use Oreo Cookies, just scrape out their cream fillings and use the same quantity.
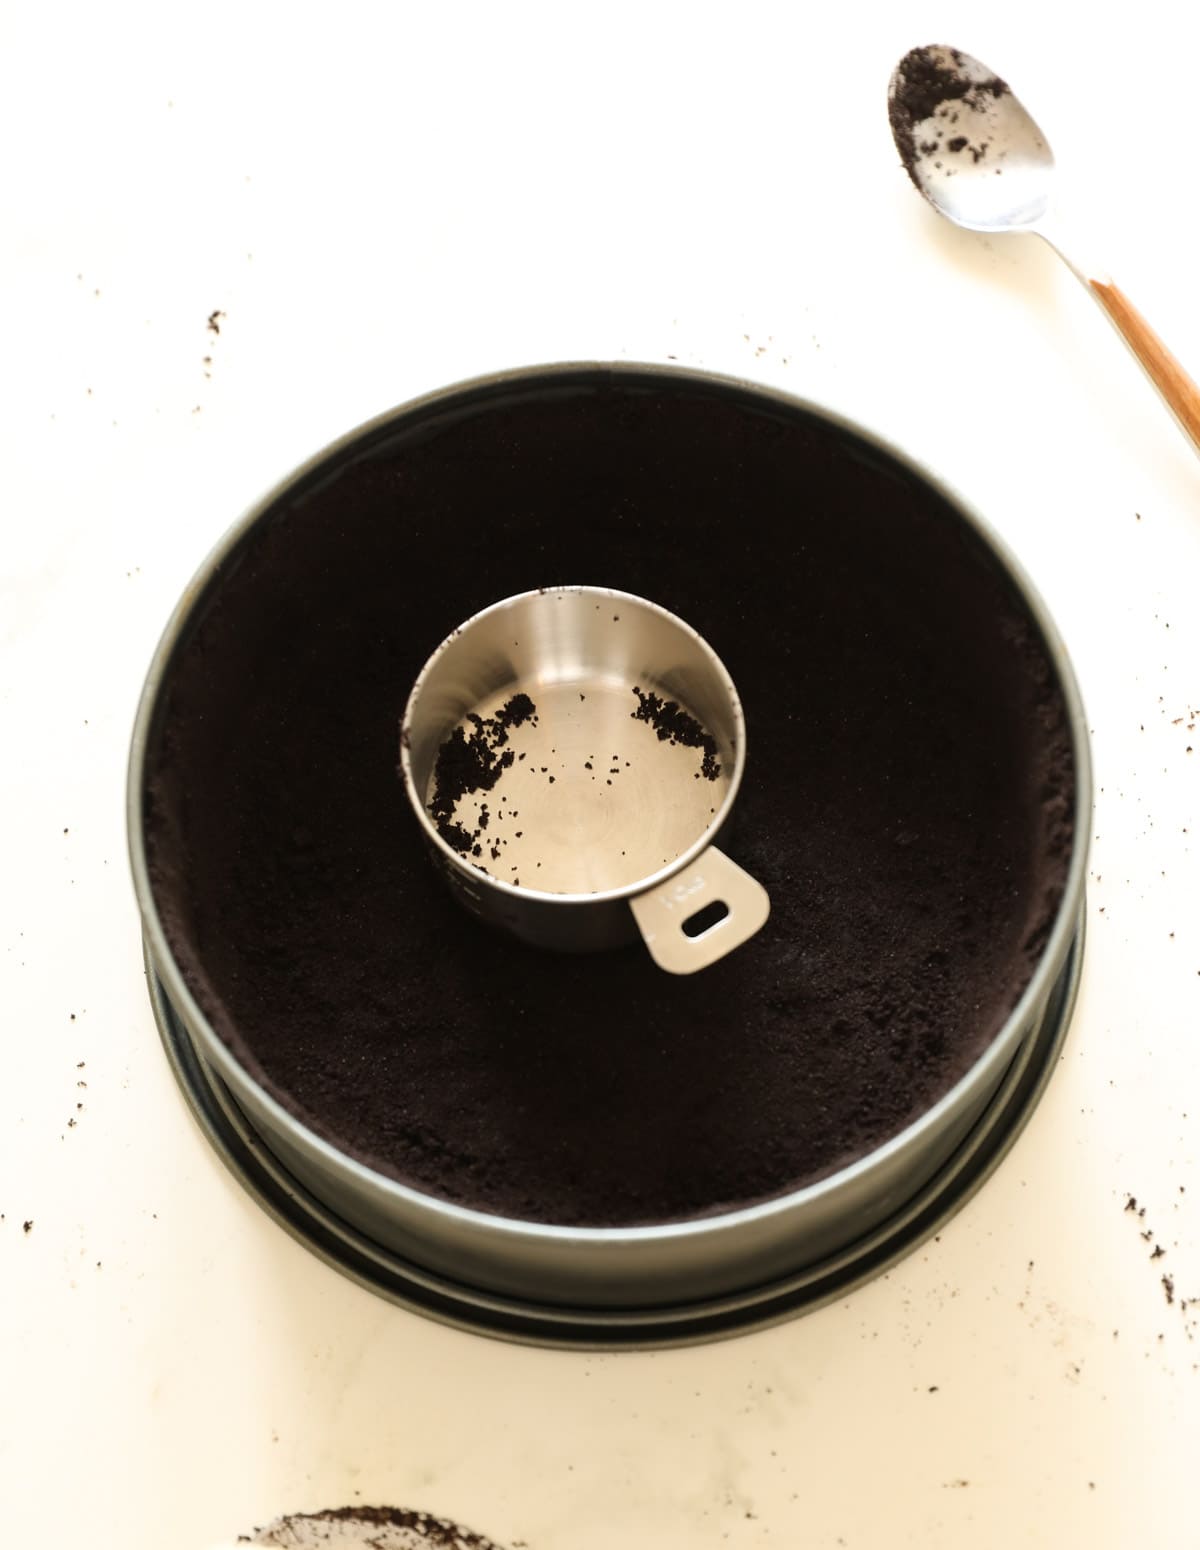
- Whirl the cookies in your food processor until fine crumbs form, then add the melted butter until a coarse meal forms that will stick between your fingers when you pinch it.
- Fit the crust into your cheesecake pan, tightening the sides with a measuring cup, and then place it in the oven to bake!
- Be sure the crust is completely cooled before pouring in the mousse mixture. This is why you’ll want to do this step first.
Step 2: Make the Chocolate Filling
- Before you make the chocolate filling, have your egg whites whipped and whipped cream whipped.
- The process should go quickly. Do not let any one step sit too long, or the chocolate mousse will begin to set.
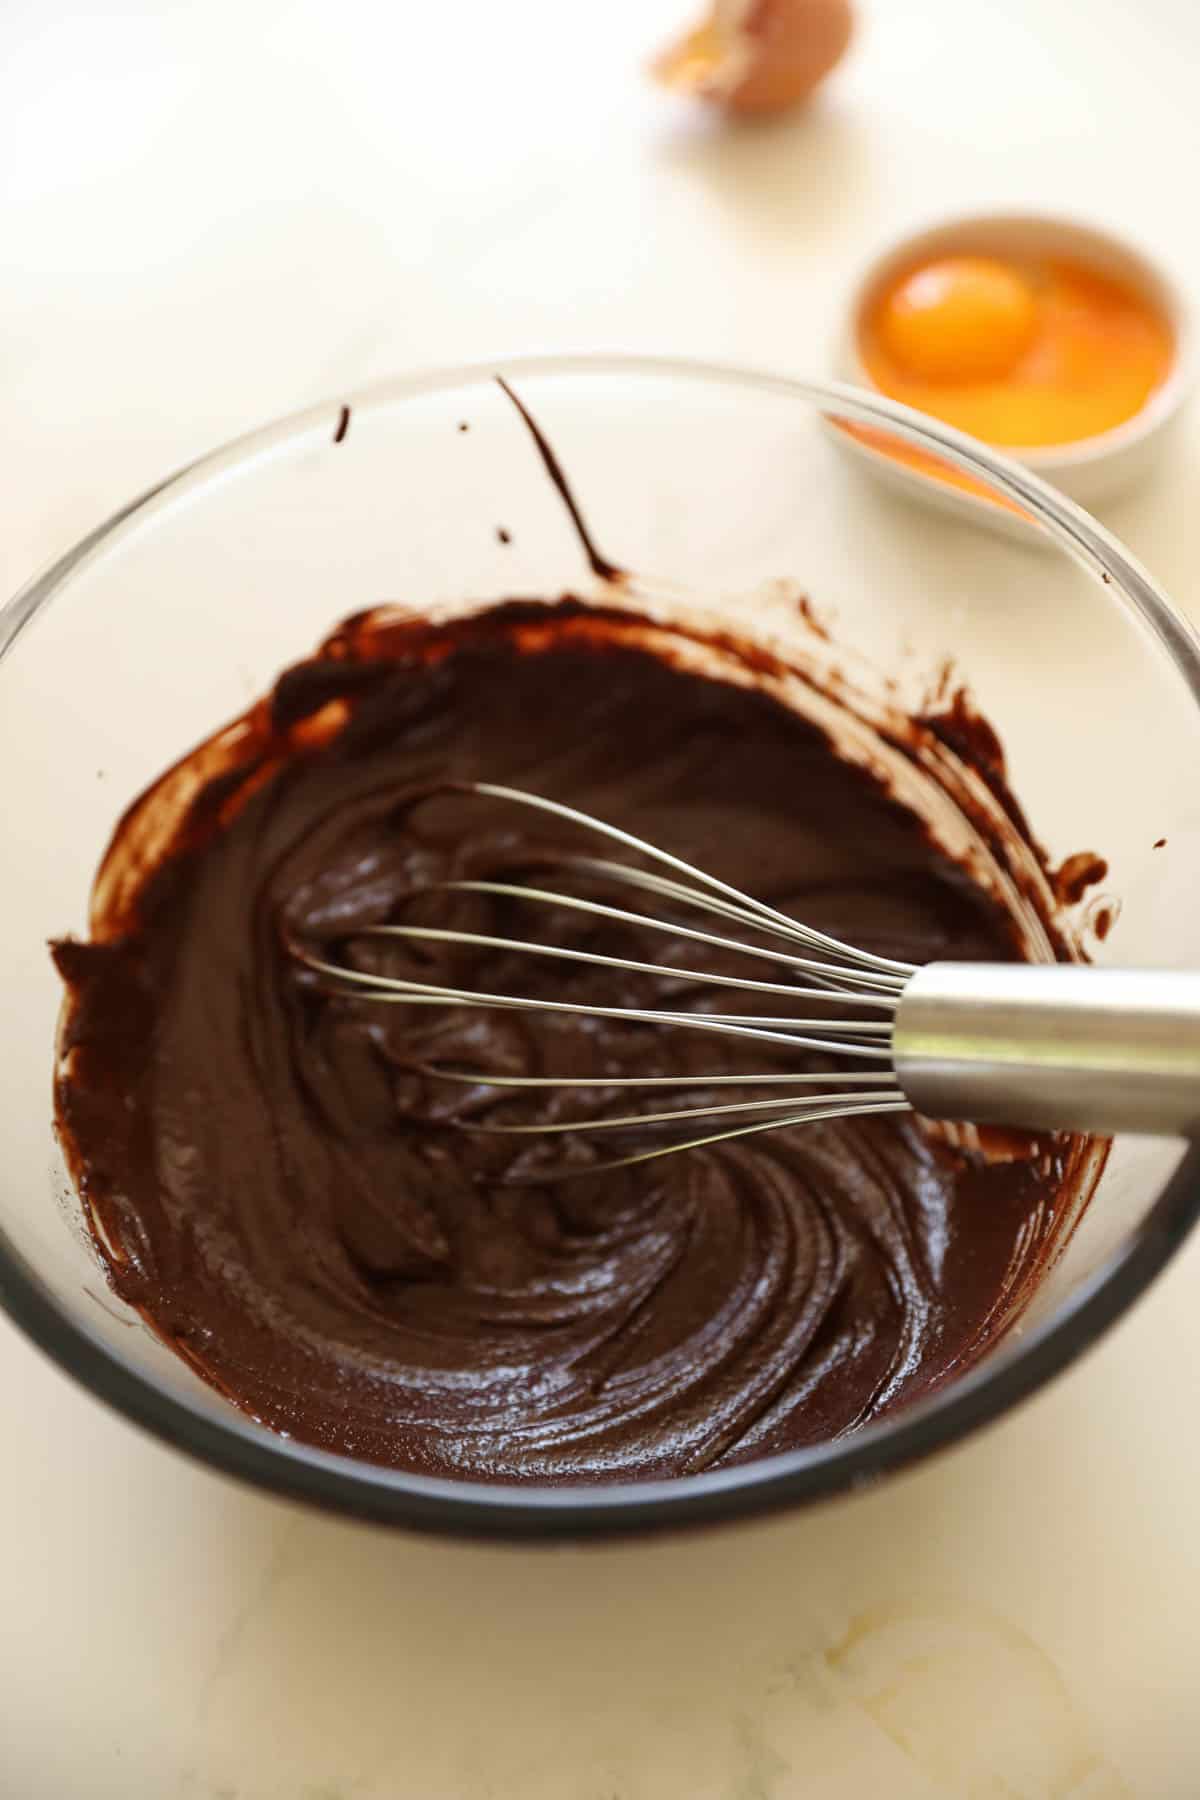
- For the chocolate base, melt bittersweet chocolate and butter in a microwave-safe bowl in 30-second increments.
- Then you’ll add the egg yolks, sugar, and vanilla, and a rich chocolate mixture will form.
Step#3: Fold in the Egg Whites
- Whip the egg whites to stiff peaks with a stand mixer or electric hand mixer.
- Fold in the egg whites into the chocolate mixture.
- A little at a time, lightening the dense chocolate mixture with each addition of egg whites.
- At this stage, it’s all about “lightening” the mixture, not mixing it, so if you have some streaks at this stage, that’s OK; they’ll be incorporated in the next stage.
- Be sure to work your spatula to the bottom of the bowl, where the denser chocolate will settle, and bring it to the top to incorporate it into the whites
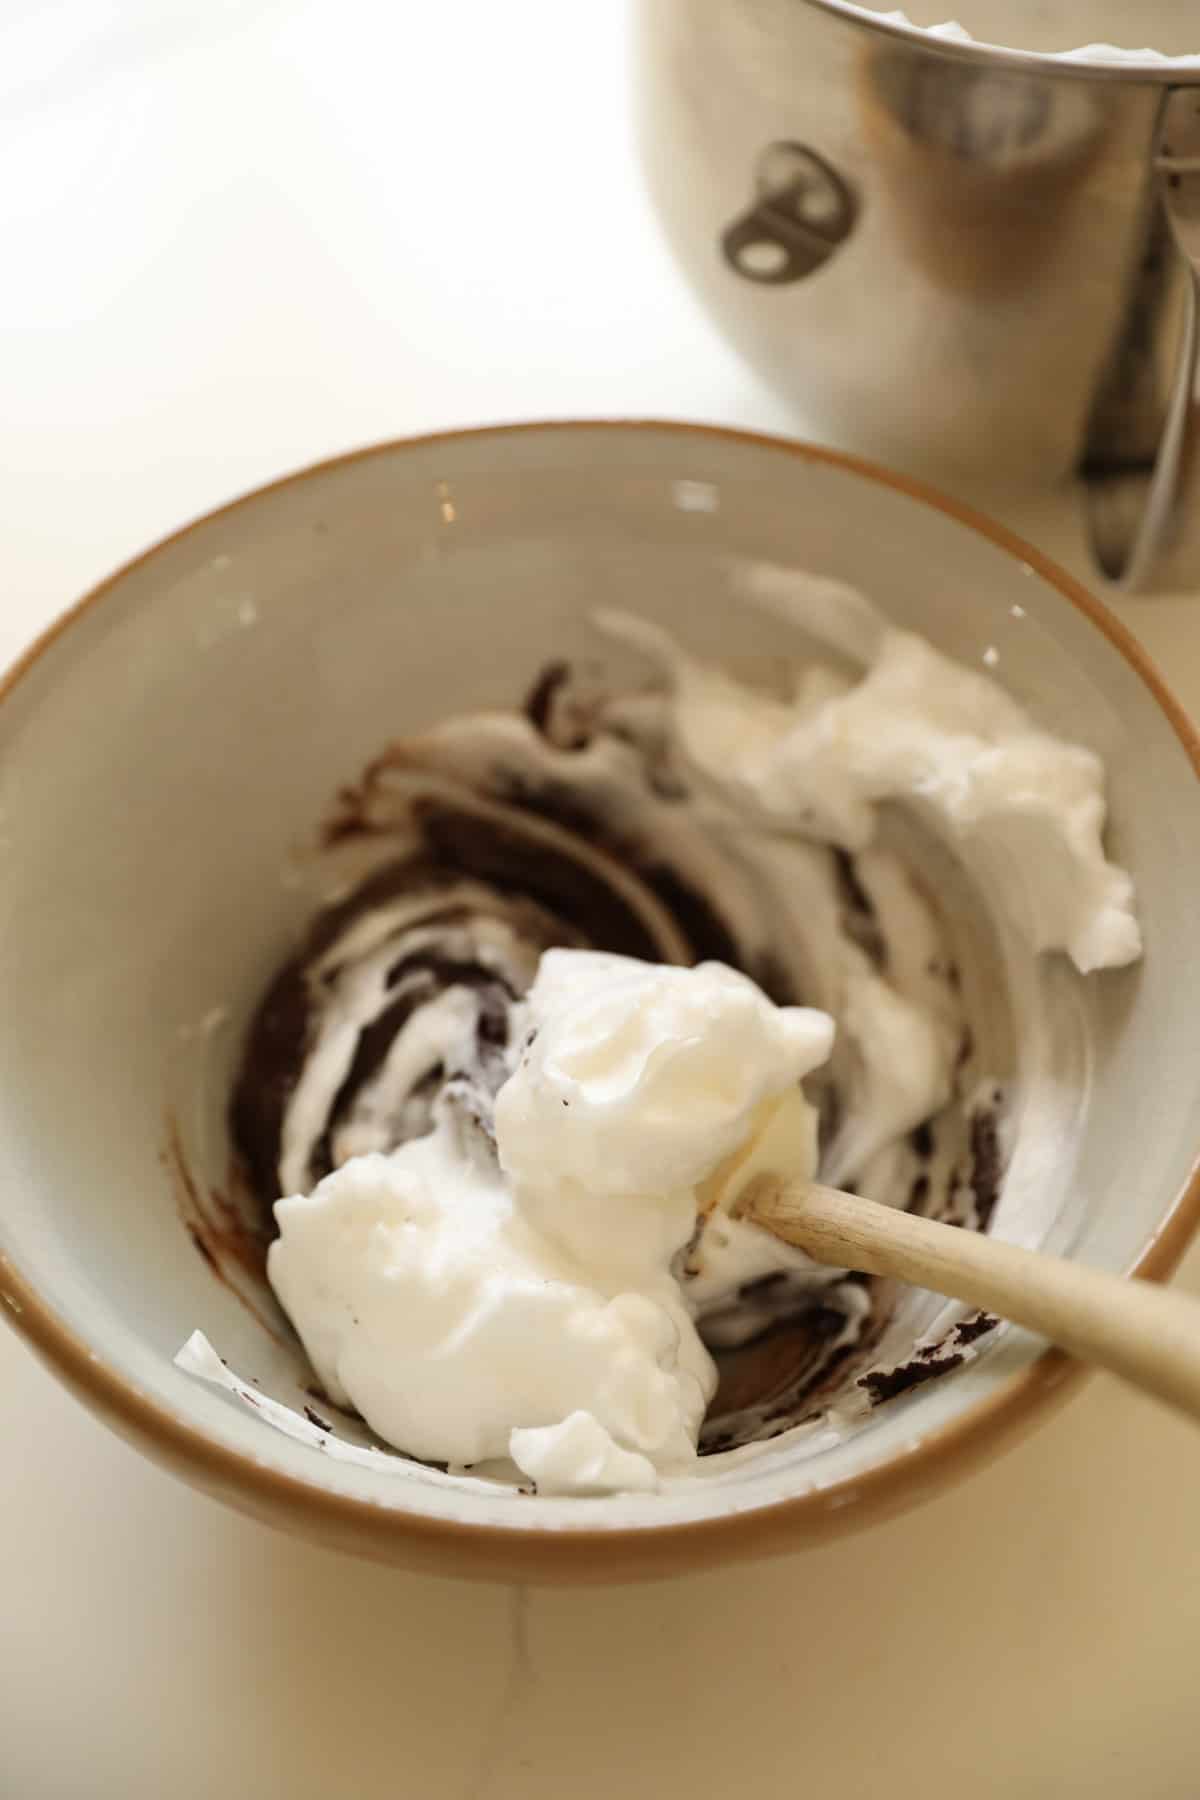
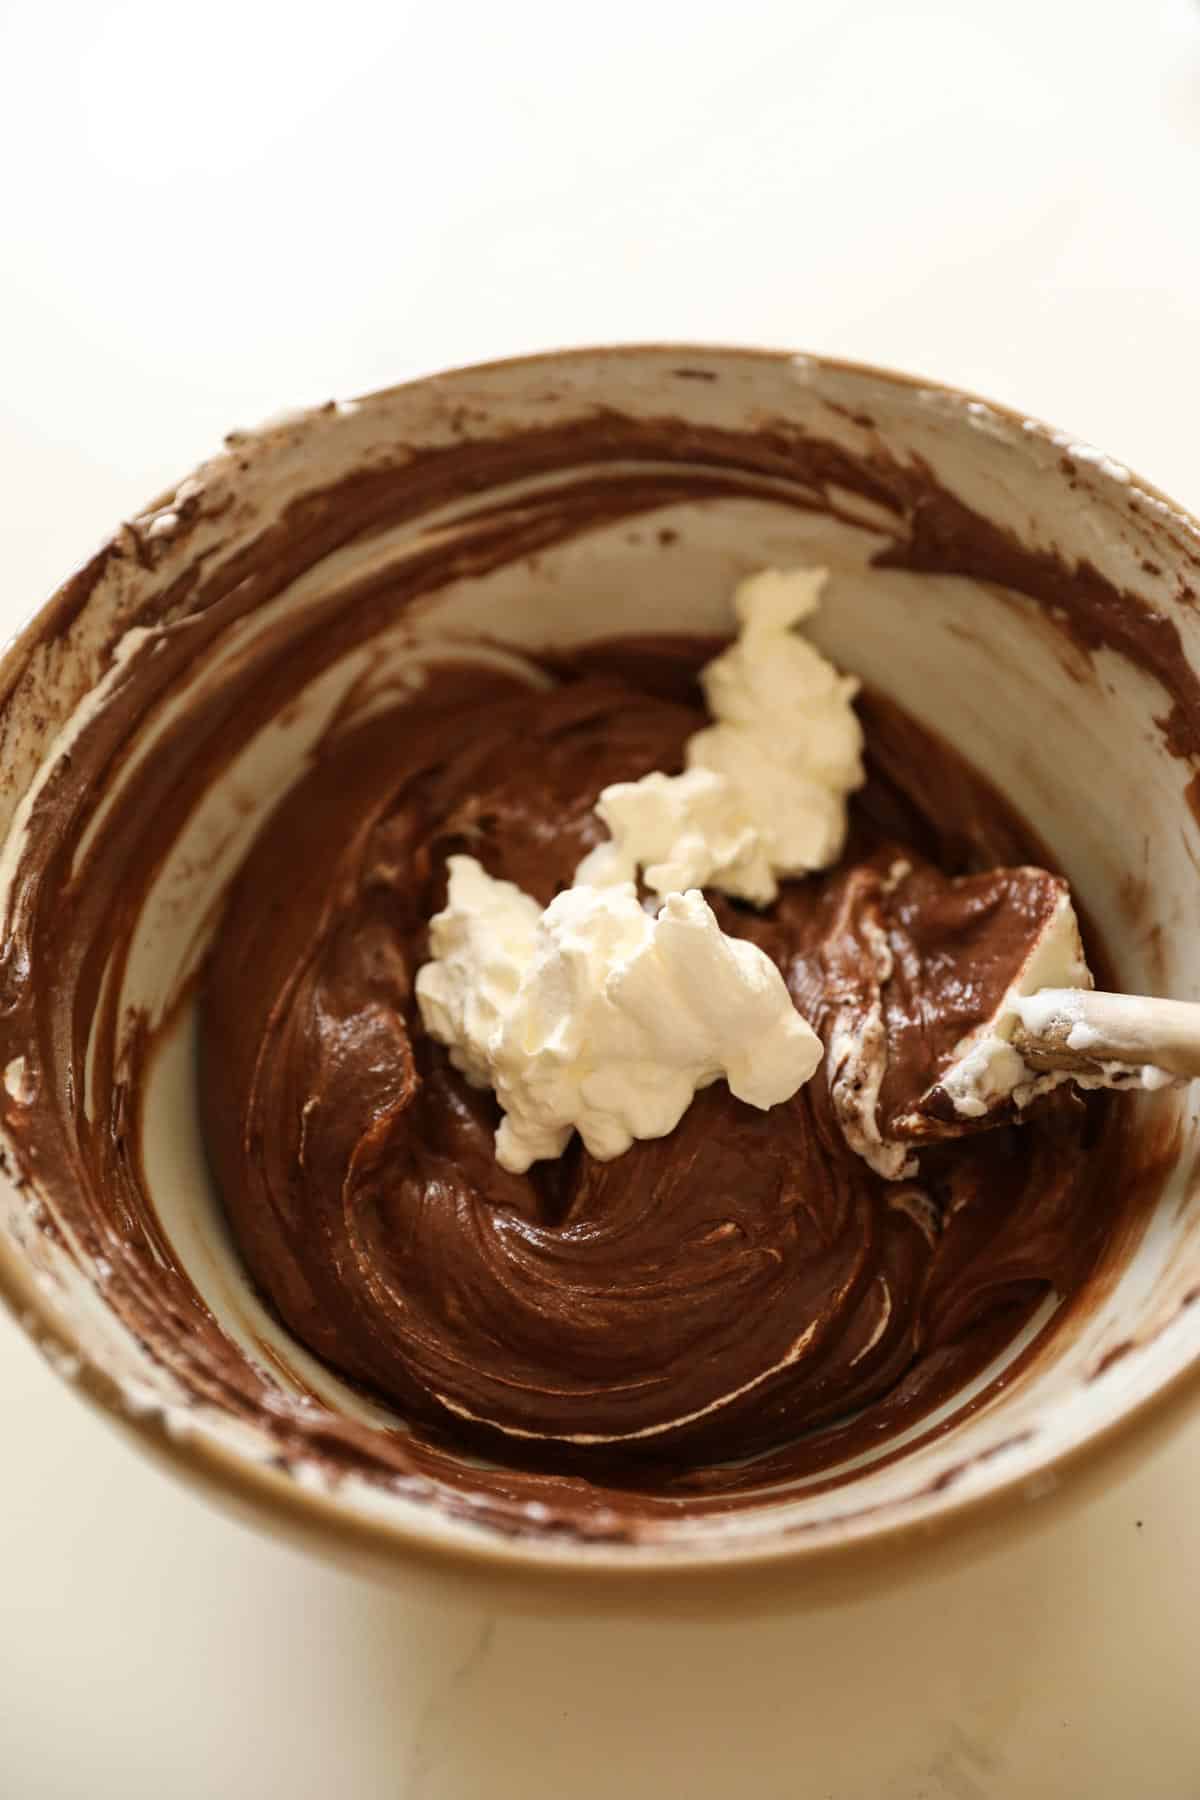
Step#4: Fold in the Whipped Cream
- Clean out the bowl of your stand mixer and whip the heavy cream to soft peaks.
- Fold in the whipped cream to lighten the mixture even further. At this stage, it should be mixed without streaks. Gently stir with a wire whisk if any streaks remain.
- Once your mixture has lightened, pouring this batter into your cheesecake pan should be easy.
- If your mixture doesn’t seem pourable, your chocolate may have seized up, and you can fix this by folding in more unsweetened whipped cream, about 1/2 cup at a time, into looser, softer, and more pillowy.
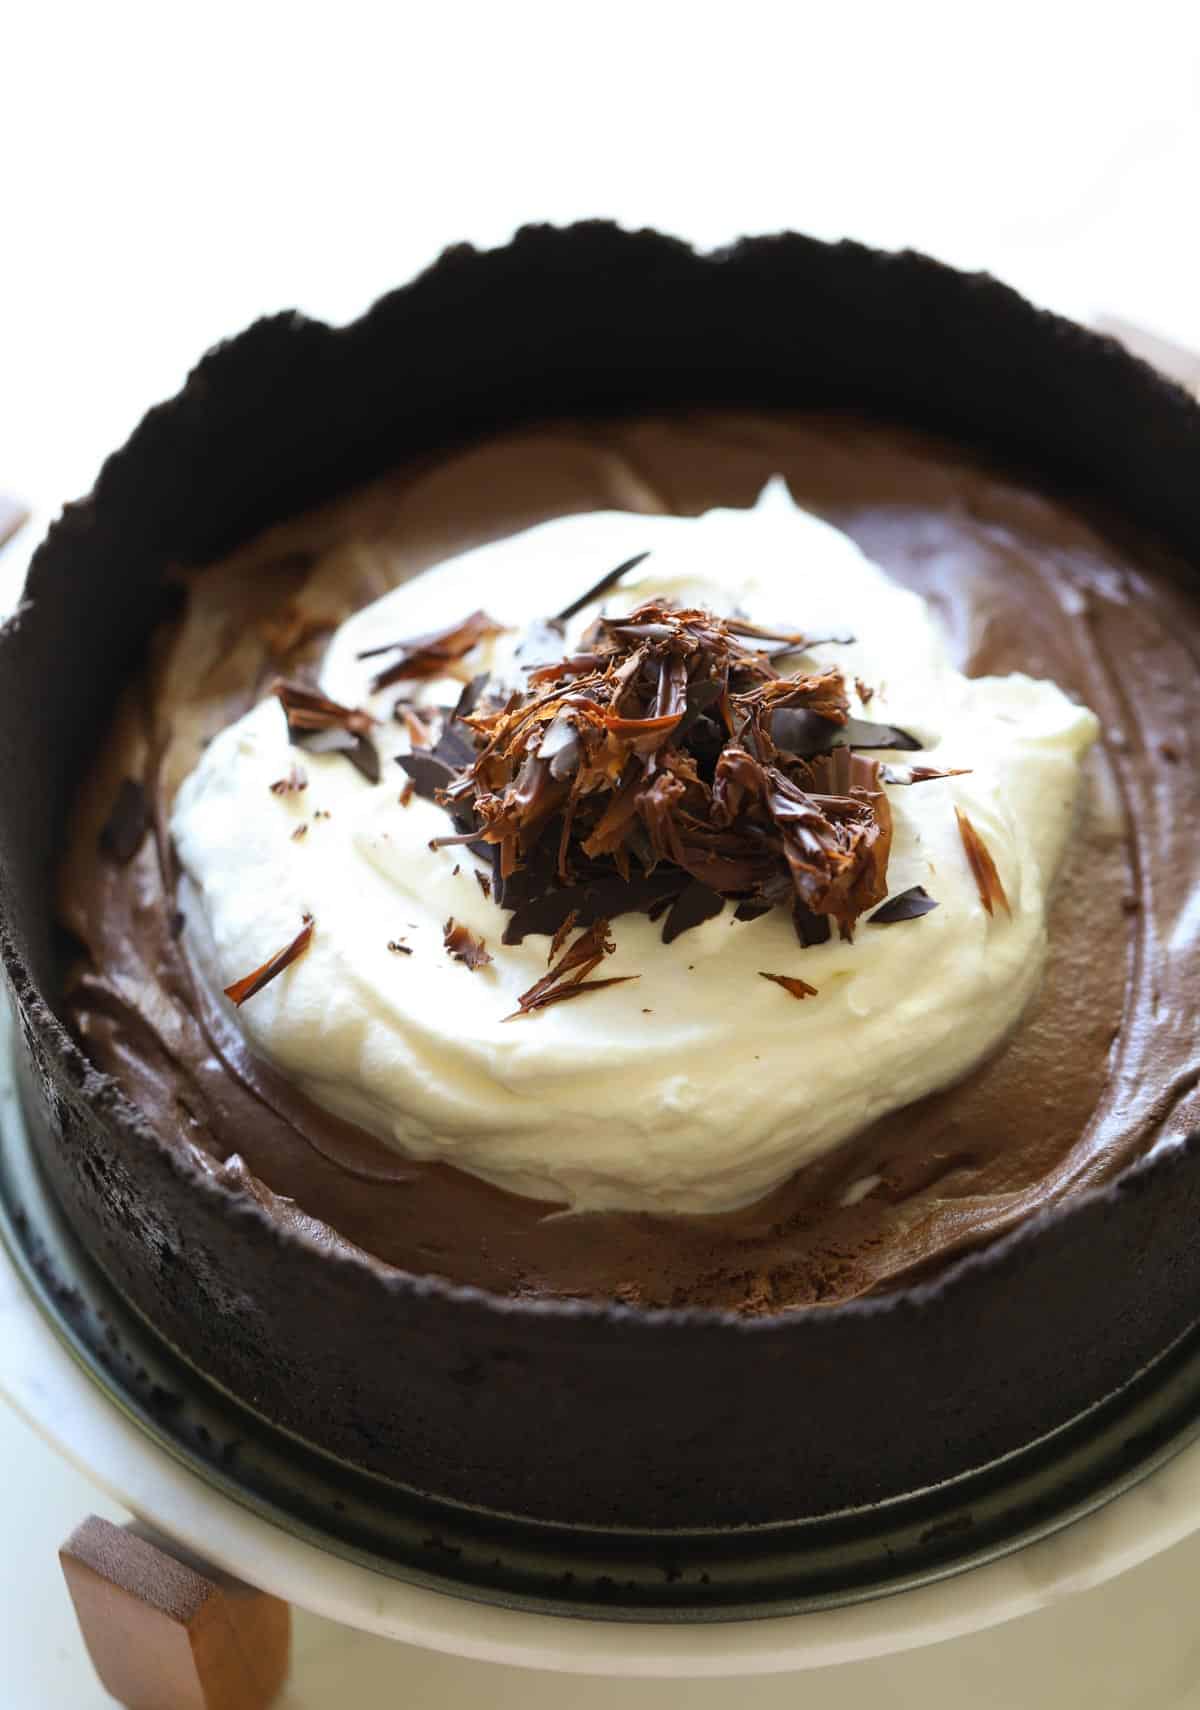
- Pour it into the cooled crust. At this stage, you can smooth out the top with a spatula or leave the soft peaks.
Can you make chocolate mousse cake ahead of time?
Yes! In fact, I think it’s even better if you can make it a day ahead. That way, it will have time to set up, making it easier to slice. I even add the whipped cream topping the day before, too, which will assure cleaner slices.
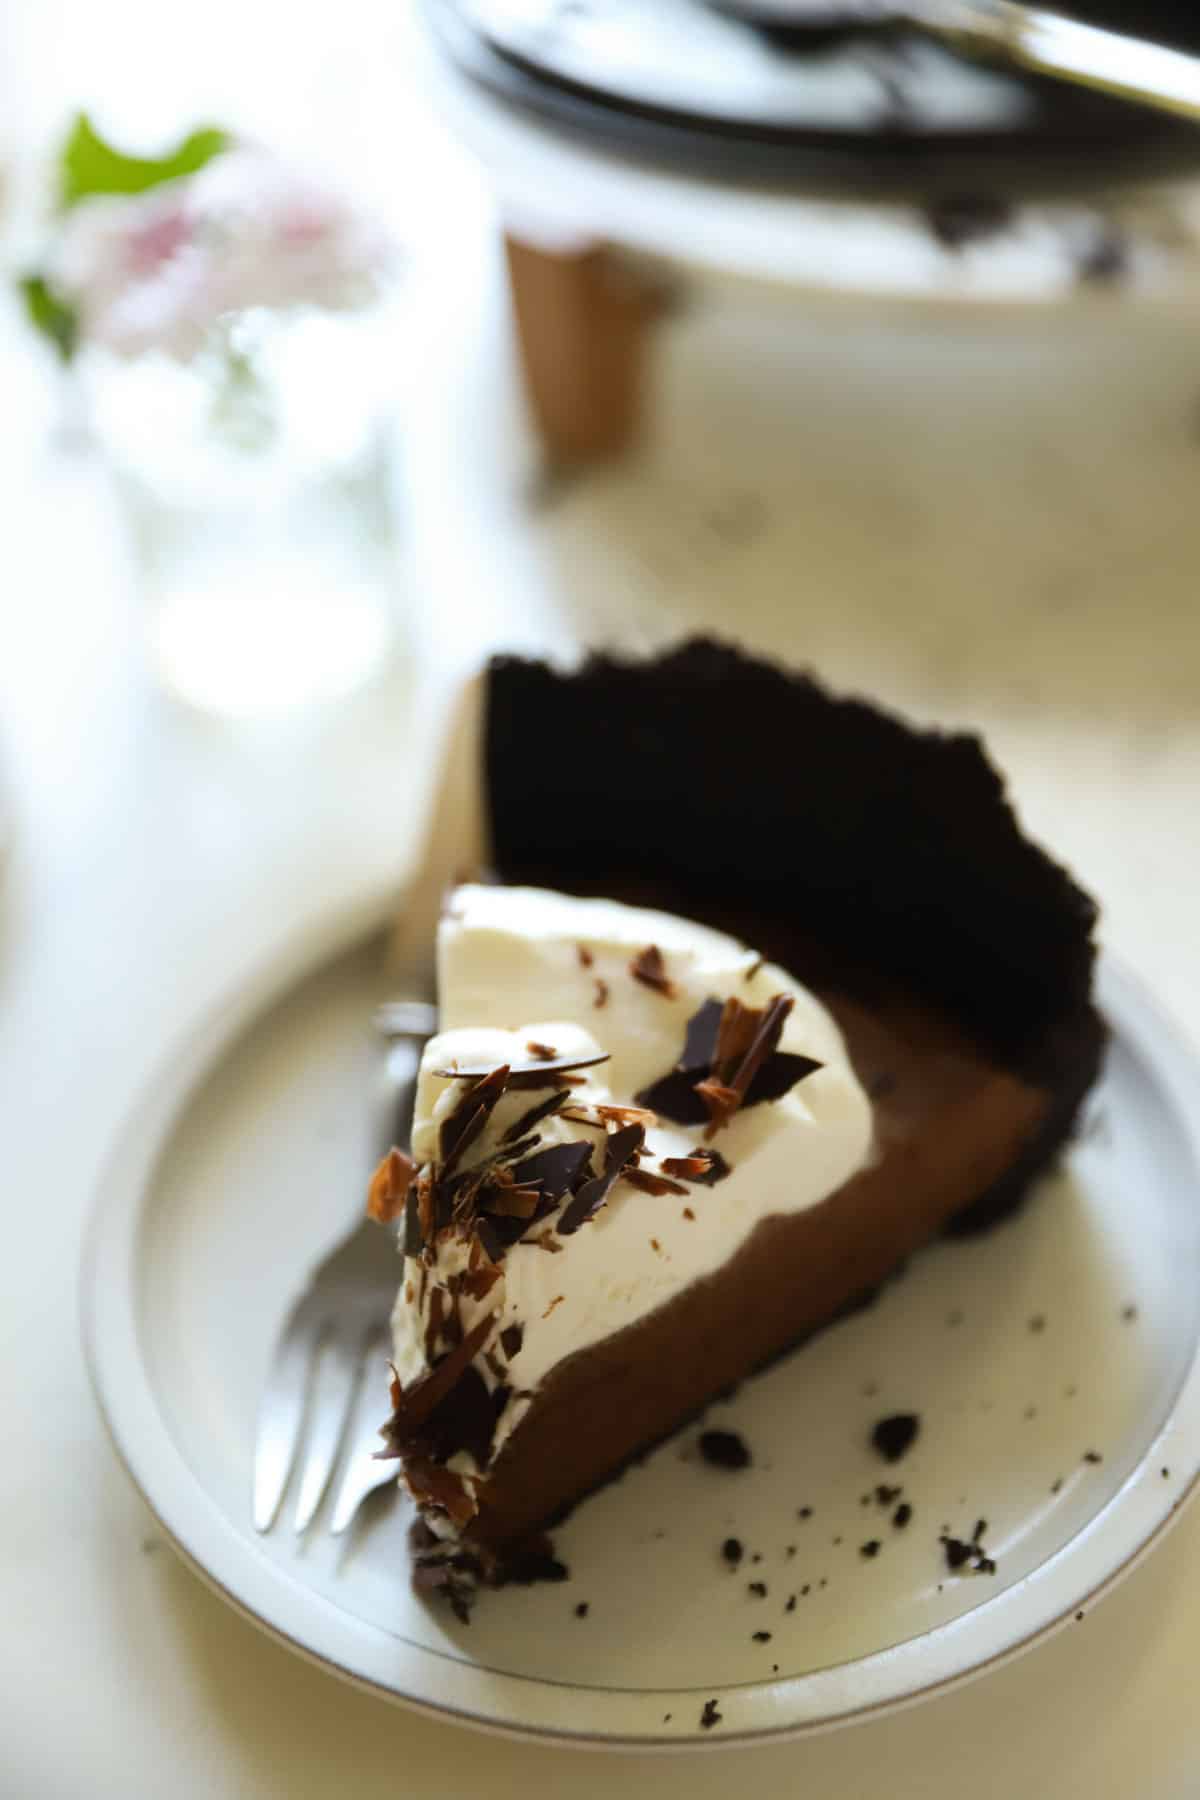
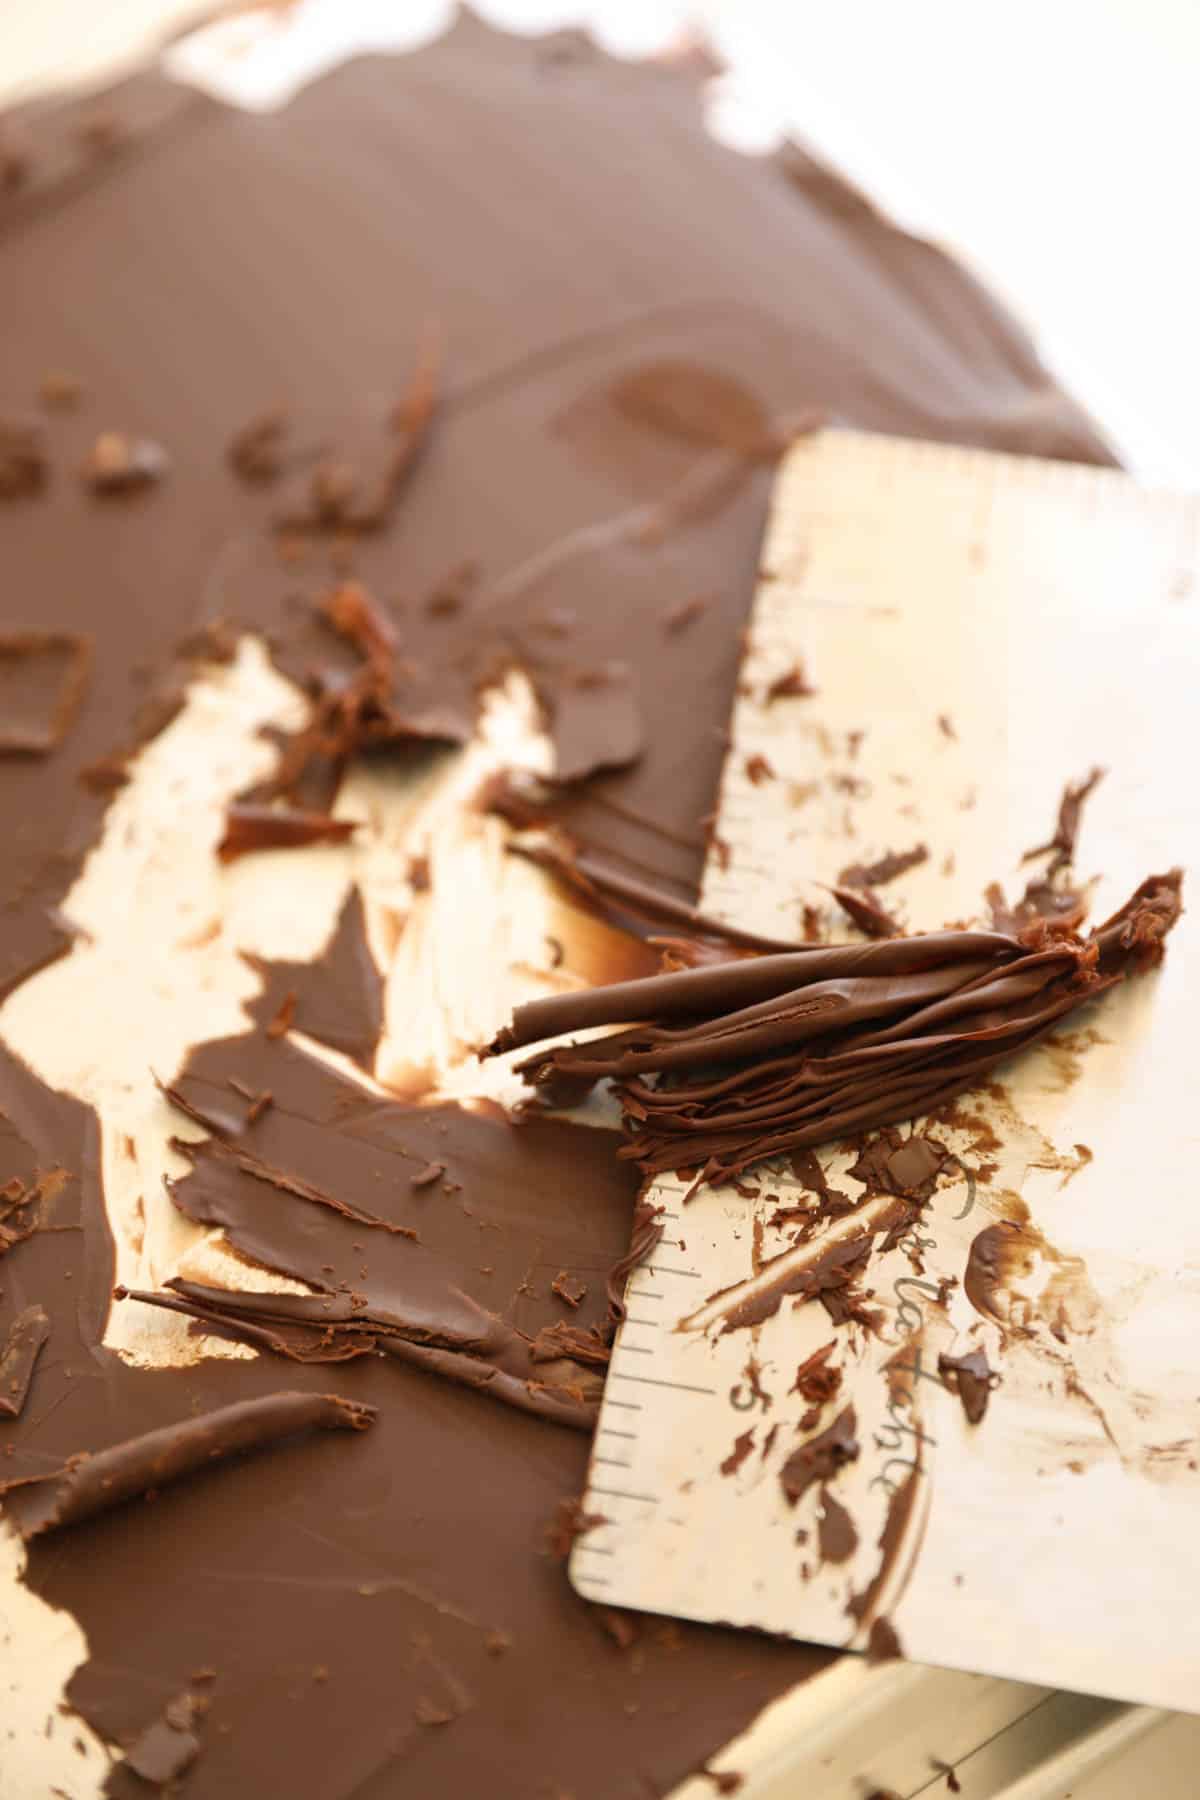
Step #5: Garnish with Chocolate Shavings
How do you make chocolate curls?
- You can make chocolate curls for this recipe in a couple of ways. You can either peel the chocolate with a potato peeler for small curls.
- Or for larger, more impressive curls, melt some dark chocolate in the microwave, then pour it into a frozen baking sheet that you have placed in the freezer for a few minutes until cold, and flip it over.
- Smooth the chocolate on the pan with an offset spatula until a thin layer forms. The thinner the better!
- Otherwise, if the chocolate is too thick, it won’t curl but will break like a shard—which is also pretty!
- Allow the chocolate to set, or place it in the refrigerator to set quickly.
- Then use a bench scraper to push the chocolate into curls, or shavings with a bench scraper.
- And presto! Beautiful dark chocolate curls!
Plating Suggestion:
- I would not attempt to slide the cake off the cheesecake plate, but rather place it directly on a cake stand.
- You can buy the pink cake stand here, which I use in my YouTube video.
- It adds a pretty, elegant touch to the presentation. It’s a generous-sized stand, which makes it ideal for holding a dozen muffins, too!
- Just before serving, you can add some more chocolate shavings to each slice of cake.
Try More Decadent Chocolate Desserts:
- Hot Fudge Sauce
- Chocolate Skillet Cake
- Chocolate Eclairs
- Chocolate Banana Bread
- Chocolate Christmas Cake
Please let me know if you make this recipe
by leaving a rating and review below
French Chocolate Mousse Cake
This French Chocolate Mousse Cake is the go-to dessert when you need to wow a crowd. It is rich and chocolaty, with the most luxurious texture.
Ingredients
for the crust:
- 1 (9 0z) package of famous chocolate wafers or Oreos scraped of their filling
- 7 tbsp (103 ml) melted butter
for the filling:
- 10 oz (286 g) bittersweet chocolate (no more than 60% cacoa)
- 2 tbsp (30 g) butter
- 2 egg yolks lightly beaten
- 2 tbsp (25 g) sugar
- 2 tsp vanilla extract (10 ml)
- 4 egg whites
- ¾ tsp (3.75 ml) cream of tartar
- 1 cup (240 ml) of heavy cream
for sweetened whipped cream topping:
- 1 cup (240 ml) heavy cream
- 1 tbsp (7g) powdered sugar
- 1/2 tsp (2.5ml) vanilla extract
For the Chocolate Curls:
- 3.5 oz (169 g) Bittersweet Chocolate
Instructions
- Place wafers into a food processor and pulse until finely ground.
- Or place wafers in a large zip lock bag and whack with a rolling pin until crushed and crumbs form.
- Add melted butter to the crumbs and pulse to combine.
- Transfer crumbs into a 9" (23 cm) springform pan and press into bottom and up the sides of the pan to form a crust. Bake at 375F (190C) for 8 mins. Allow to cool.
- Place 10 ounces of bittersweet chocolate and 2 tbsp butter in a large microwave-safe bowl. Microwave on high in 30 second increments until melted. Or melt over a double boiler. Do not over heat or chocolate and mousse will be grainy!
- Allow to cool slightly. Set aside.
- Place egg whites and cream of tartar in a mixing bowl and beat on high until soft peaks form. 2-3 mins. Set egg whites aside
- Then beat 1 cup of heavy cream until stiff peaks form. Set that aside.
- You will now have 3 components. The melted chocolate, the whipped egg whites and the whipped cream.
- Add egg yolks, sugar, and vanilla to the chocolate mixture. Whisk until combined.
- Fold whipped whites into chocolate mixture, gently lightening the mixture in stages, until combined.
- Fold the whipped cream into the mousse mixture, and gently mix until combined.
- Gently pour the mousse into cooled crust.
- Then whip the remaining heavy cream, sugar and vanilla for the topping. Keep it a bit loose and soft.
- Garnish the chocolate mousse with a large dollop of sweetened whipped cream in the center, and chocolate shards or shavings. Refrigerate for at least 4 hours, but overnight even better!
- For Chocolate shards:
- Place a metal baking sheet in the freezer for 15 mins.
- Melt chocolate in a microwave at :30 intervals until melted. Whisk until slightly cooled and smooth.
- Pour chocolate over bottom of frozen pan, creating a thin layer.
- Allow to set. May take 15-20 minutes.
- Take a metal bench scrape and scrap chocolate until shards or curls form.
Notes
Be sure to allow the cake to set up in the refrigerator for a minimum of 4 hours but overnight is even better. This will help create a nice clean slice.
You could also use milk chocolate but then omit the sugar in the filling recipe since the milk chocolate will be sweet enough
Nutrition Information:
Yield: 8 Serving Size: 1Amount Per Serving: Calories: 207Total Fat: 16gSaturated Fat: 9gTrans Fat: 0gUnsaturated Fat: 5gCholesterol: 77mgSodium: 120mgCarbohydrates: 12gFiber: 1gSugar: 10gProtein: 4g

Is this gluten free!?
Well it would be if you used gluten-free cookies for the crust 🙂
Hi Beth one of my family members birthday is coming up so I thought I can make this for dessert after dinner and I can’t find the chocolate wafers you talked about anywhere and the link isn’t working either so instead of that can I just take the cream off of Oreos and use that instead? And if so how many should I use?
Oh sure you can absolutely use Oreos scrapped of their fillings. I wish I knew the exact amount, but I have done this before and I think it took about half of a large packet of Oreos. Alternatively, here’s a new link to the waffers, I hope this helps!
Thank you so much this really helps!!!
Of course! Hope you enjoy!
I have made this twice now and it tastes really great and is def a crowd pleaser. However I know that I am doing something wrong as my chocolate mixture always clumps up and I have to add a tsp of hot boiling water at a time to get the texture in the video. This has now happened to me twice. Not sure what I am doing wrong.
I found the video skipped the folding in of one cup whipped cream (after folding in egg whites) that is in the written instructions. Maybe that?
U forgot to add gelatine for texture?
Hey Beth! I am planning to make this for school and I was wondering if I can make and bake the crust tonight (December 2), and fill the crust with the mousse tomorrow night (December 3), and serve it on Monday lunch (December 4). Will baking the crust 2 days beforehand affect it in a bad way?
Absolutely that will be fine! Just leave the crust out at rom temp. Don’t refrigerate until you add the mousse 🙂 Enjoy!!
Hi. I really like your recipee, and I was wonderung what brand of chocolate you use? thanks very much
Oh sure I use Ghiradelli Chocolate
I made this cake for my daughter’s birthday and it was the hit of the year. I tried another recipe later but it was not as good. This will stay in my recipe file forever. Thanks!
Would heavy whipping cream work ? would there need to be any changes or alterations? thank you !
Oh sure heavy cream and whipping cream are really interchangeable in recipes. It would be fine 🙂 Enjoy!
I am in a search for a good springform pan. Where did you purchase this one? Trying this recipe soon 🙂
Oh sure it’s my favorite one! Works great and is leakproof for cheesecakes too 🙂 It’s from Nordic ware I bought it on Amazon, here’s the link Enjoy!http://amzn.to/1Q59VPS
Looks amazing!!! Is there any way to make this without that type of pan?
Oh sure you could really make this in any pan 🙂 a pie plate would work too 🙂 It will still taste great!
why in your recepie of creme brulé says that i have to put a ramekins to cook 15 to 20 mins and in your recepie in yotube says 30 a 35 mins?
So sorry for the confusion! Go with what the recipe says. I was incorrect in the video and when I noticed it it was too late to fix the video part, much easier to fix the written recipe part 🙂 Apologies for the confusion!