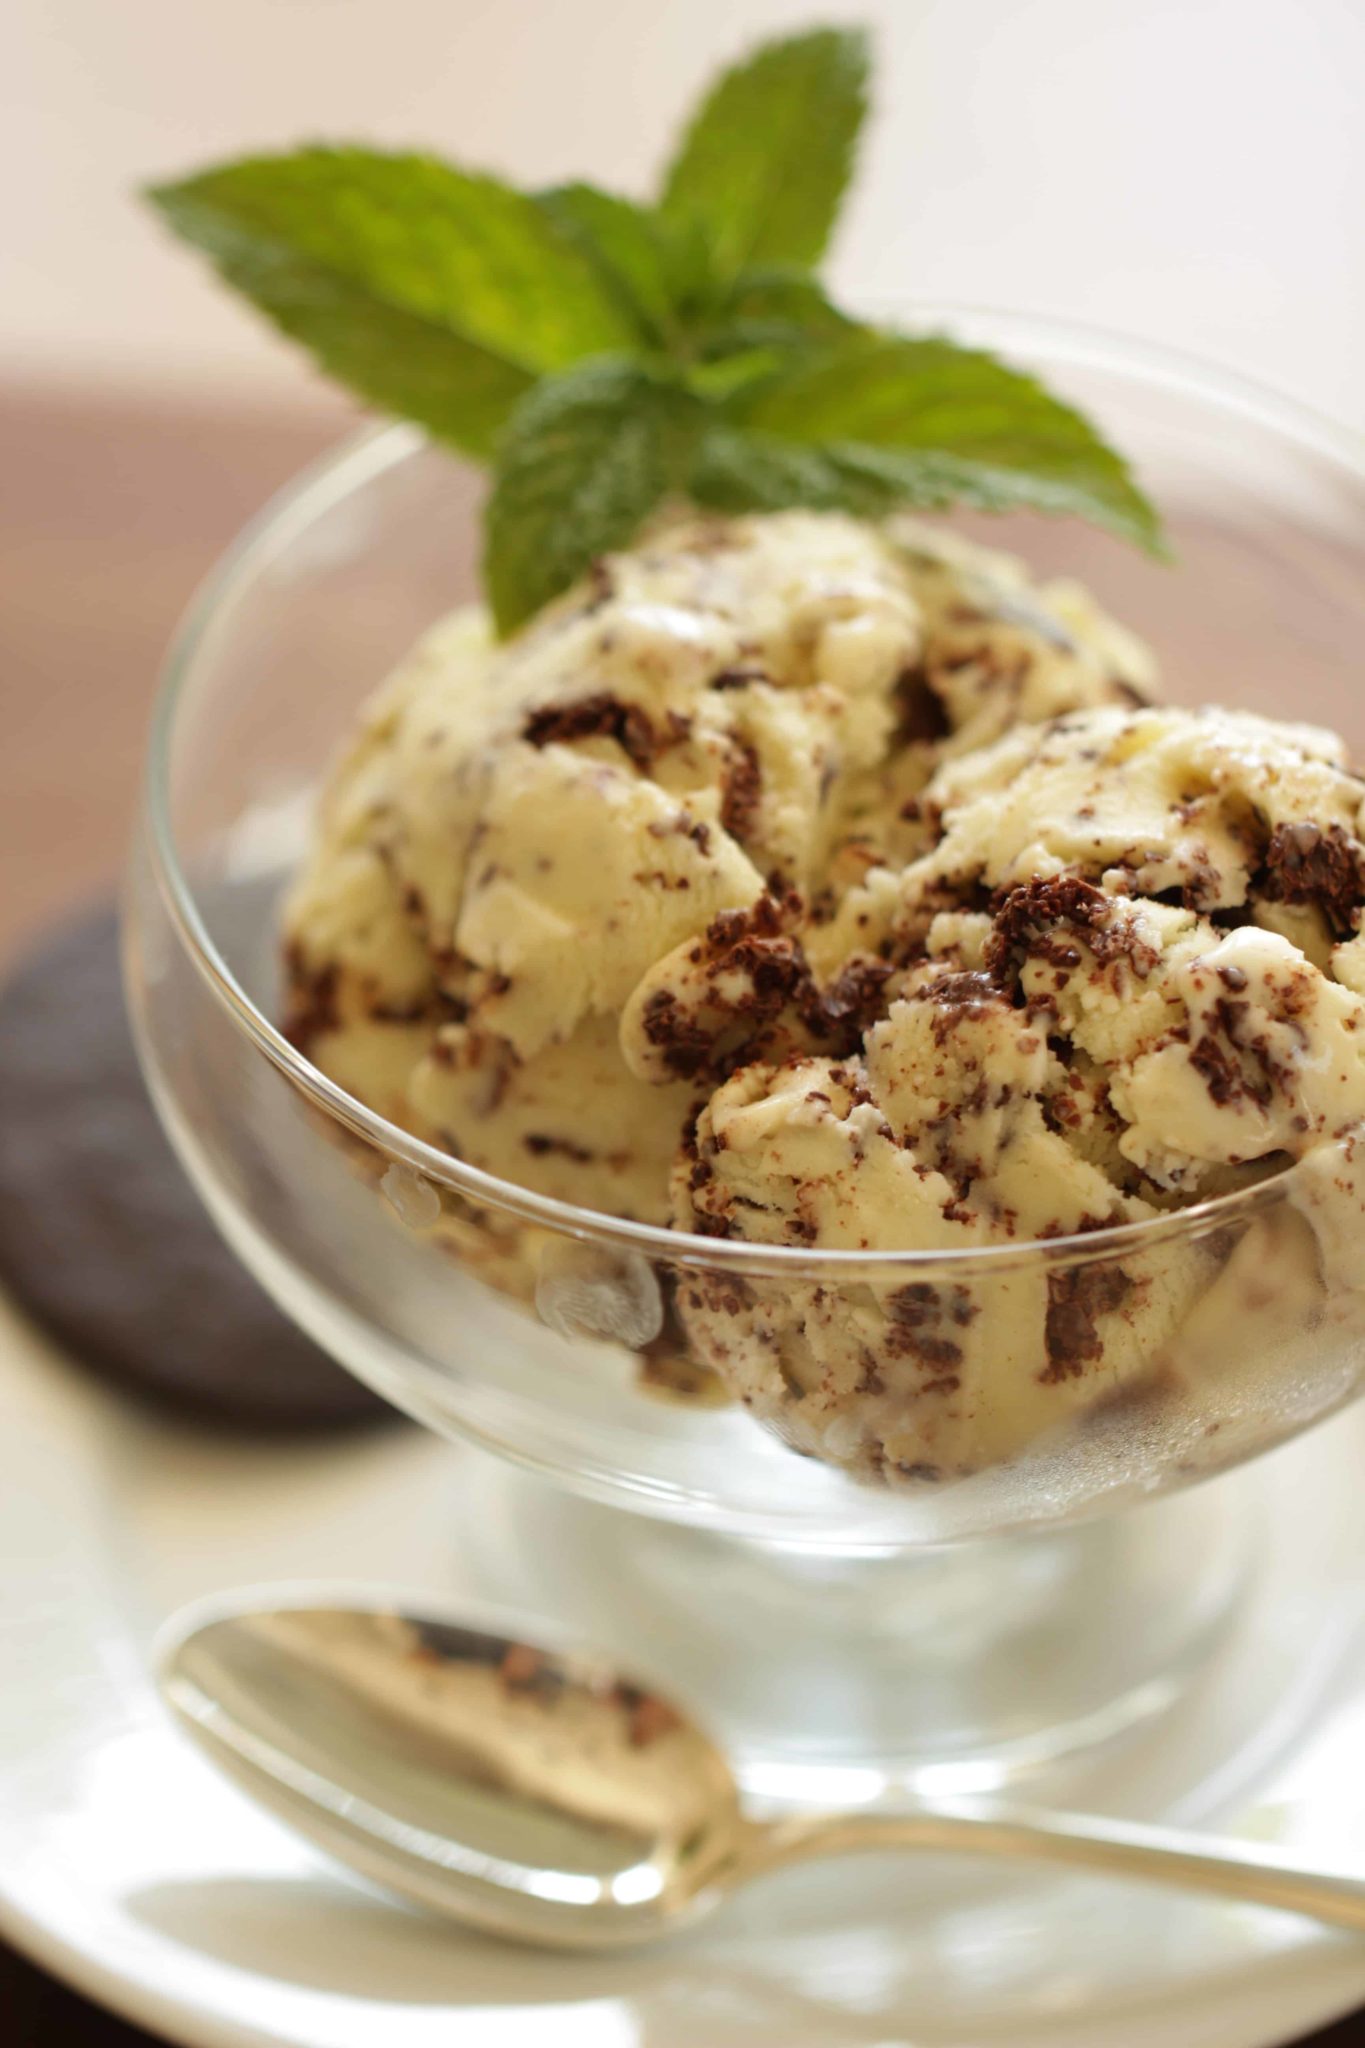
Mint Chocolate Chip Ice Cream
SHARE THIS RECIPE!


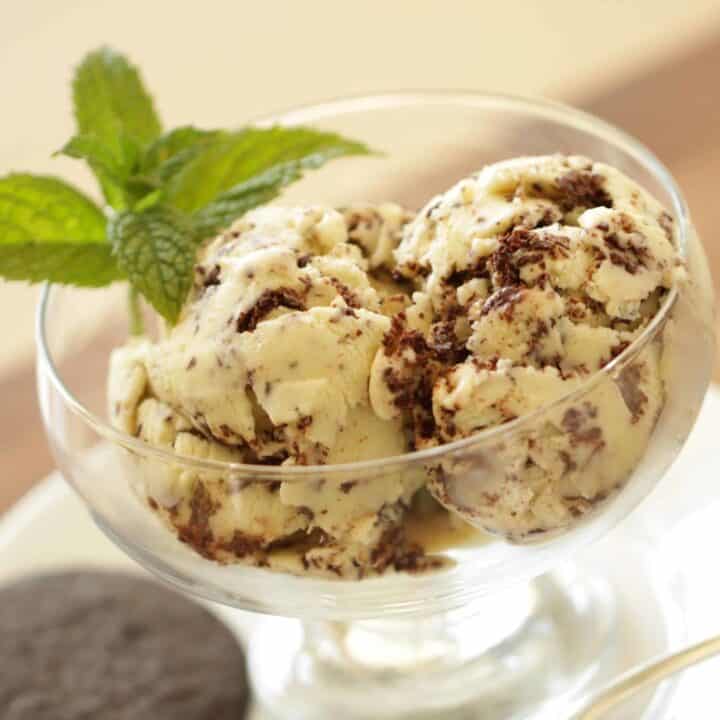
Learn how to make the Best Mint Chocolate Chip Ice Cream from scratch. It’s the perfect little summer dessert recipe to enjoy all summer long.
No food dyes or any other trickery, this mint ice cream is made from the real deal, fresh mint! Giving it the best, most natural mint flavor.
What Makes Mint Chocolate Ice Cream Green?
- Traditionally, mint chocolate chip ice cream gets its green color from either artificial food coloring, or spearmint or peppermint flavoring.
- But for me, I prefer using fresh mint for the best flavor. And using fresh mint will impart a beautiful pale green to your ice cream.
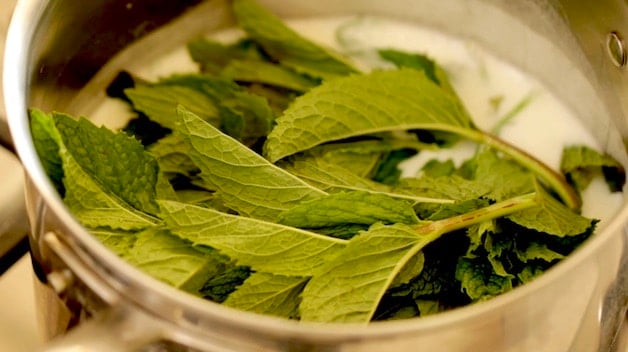
- Essentially, you’ll create a “mint infusion” by heating milk and heavy cream in a saucepan, then add the fresh mint, steeping until the desired mint flavor is achieved.
- It’s sort of like making mint tea, only with milk and cream. The longer you let it steep, the more pronounced the mint flavor will be, and the darker the shade of green.
- Personally, I go a full hour of steeping to achieve the results you see here.
If you enjoy making Ice Cream from scratch you might also like my Salted Caramel Ice Cream , my Nutella Ice Cream or my Double Chocolate Chunk Ice Cream Recipes. And don’t forget the homemade waffle cones!
What kind of mint is used in mint chocolate chip ice cream?
- I find fresh mint is best, and the bigger and leafier the greens even better! Really any type of fresh mint purchased at your local grocery store will be fine.
- If you have the choice between fresh mint sold as a bunch in the produce aisle vs. fresh mint in a plastic container, go for the fresh bunch! It always has more flavor than the kind you find in plastic containers.
- You can also throw in the mint stems and all, since the full plant is filled with mint flavor, and picking off the leaves I find is a tedious, unnecessary step.
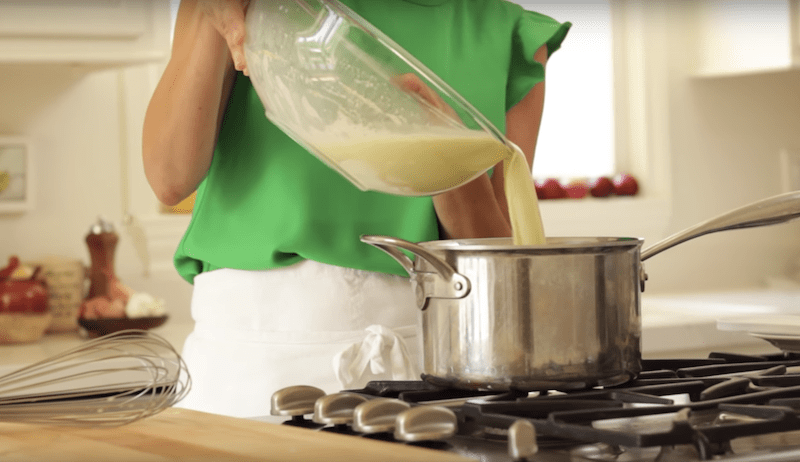
- Then you’ll combine the mint infusion with the egg yolks and cornstarch and cook the custard until thickened and reaches a temperature of 175-180F degrees.

The Importance of Cooking an Egg Base Ice Cream
- It’s important to reach this temperature so that you cook off any bacteria in the eggs. This will make it safe to eat.
- You can make ice cream without eggs, but personally, I find the egg-based custard recipes will provide the creamiest texture.
- Then once you cool it down you’ll place it in an ice cream maker to process et voila!
Checking for Doneness
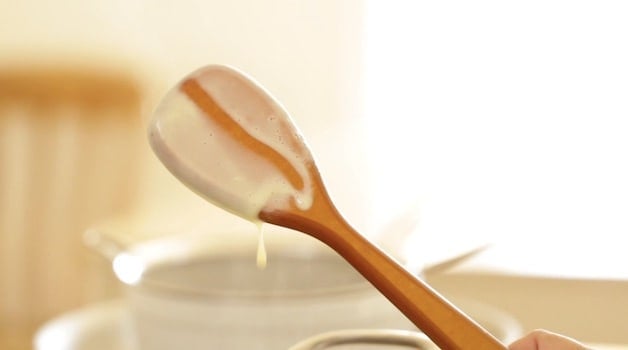
You’ll know your custard is thickened to the right consistency when it will leave a stripe on the back of a wooden spoon. Then use a candy thermometer to assure the custard has reached the right temperature.
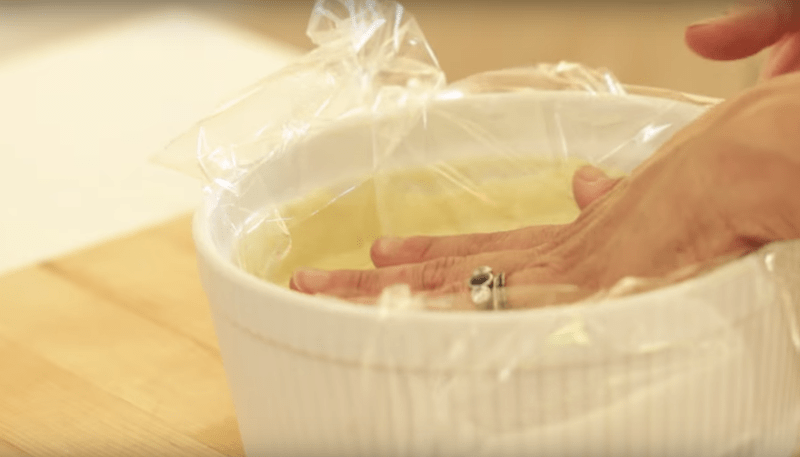
Before refrigerating the custard be sure to place plastic wrap tightly in the bowl making contact with the custard. This will prevent a skin from forming.
How long to churn ice cream in an ice cream maker?
It really depends on your machine but with most models, it should churn for at least 30-40 mins. See the shopping guide below for my favorite model.
Adding The Chocolate to Form the Chips
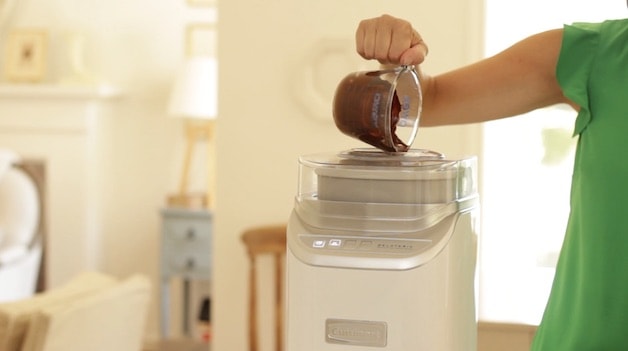
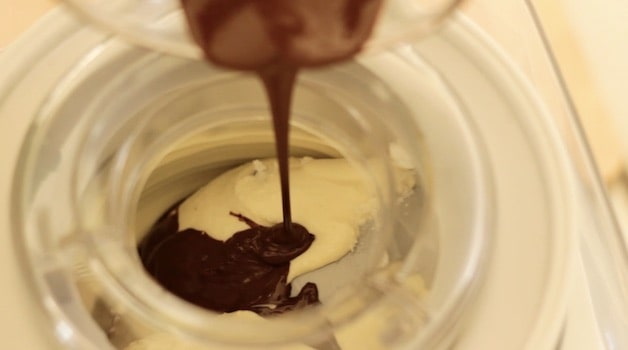
- Once your ice cream begins to reach its last few minutes of churning, add the melted chocolate and allow it to churn to create the “chip” effect.
- As the melted chocolate hits the cold ice cream it will create ribbons of chocolate in the ice cream.
Serving Tips:
- Once the ice cream is frozen these chocolate ribbons will create beautiful ribbons of chocolate that not only look beautiful but tastes delicious too since the chocolate flavor will be equally distributed throughout the ice cream.
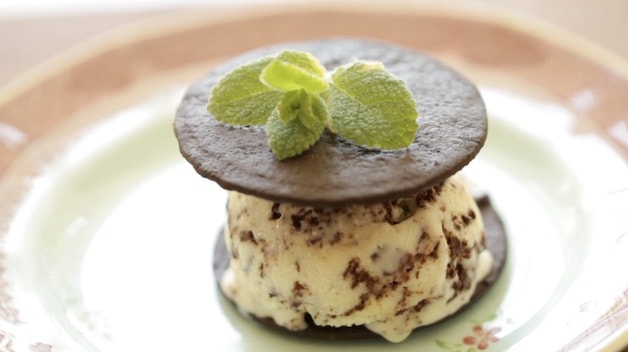
- I love this recipe because it’s not overly sweet and dotted with just the right amount of bittersweet chocolate. It also makes for great Ice Cream Sandwiches too!
- Simply place a scoop of Mint Chip Ice Cream in between two chocolate wafer cookies and you’ll have the cutest, little mint chocolate chip sandwich. The smaller size is also great for kids!
More Summer Recipes!
- Homemade Lemonade
- Classic Blackberry Crumble
- Edible Ice Cream Bowls with Strawberry Sauce
- Triple Berry Cobbler
Please let me know if you make this Recipe
by leaving a rating and review below!
Mint Chocolate Chip Ice Cream
This Mint Chocolate Chip Ice Cream is so easy and delicious! No food dyes or artificial coloring, just fresh mint! It's the perfect little summertime treat to enjoy while entertaining this year!
Ingredients
- 5 egg yolks
- 2 tbsp (30 ml) of cornstarch
- 2 1/2 cups (600 ml) of milk
- 1 cup (240 ml) of heavy cream
- ¾ cup (150g) of sugar
- ¼ tsp (1.25ml) salt
- 2 cups (480 ml) fresh mint
- 4 oz (113 g) of melted bittersweet chocolate
Instructions
- Place the milk, cream , sugar and salt in a medium size pot and heat until simmering. Add the fresh mint and turn off the heat. Cover and allow to “steep” for 1 ½ hours.
- When time is up, remove mint leaves and discard.
- Then prepare an ice bath. I like to use a large sauté pan and fill it with ice. The metal of the pan, keeps the ice from melting. Set a medium size bowl on top, and top that with a fine mesh sieve. Set this aside, you’ll need it in a minute.
- Place 5 egg yolks in a large heat safe bowl and whisk together with the cornstarch. Add the mint cream and whisk to combine. Place this new mixture back into the sauce pan and heat on medium, stirring all the while, to cook the eggs and thicken the mixture.
- As soon as the mixture coats the back of a wooden spoon, it’s done.
- Transfer mixture through a sieve into the medium bowl, Stirring mixture to cool it down.
- Cover and refrigerate for at least 2 hours until well chilled, or overnight.
- Then pour your mixture into your ice cream maker and begin to process according to your machine’s instructions.
- In the final moments before your ice cream is done churning (about 5 mins before), pour the melted chocolate into the machine’s feed tube in a thin stream which will create an instantly hardened chocolate ribbon. ☺
- When ice cream is done, transfer to a freezer safe container and freeze overnight.
- Ice cream will keep in your freezer for at least 5 days. (If you can keep it around that long!)
- Garnish ice cream with fresh mint and serve with chocolate cookies (like Famous Chocolate Wafers, so good!)
Notes
If you have the choice between fresh mint sold as a bunch in the produce aisle vs. fresh mint in a plastic container, go for the fresh bunch! It always has more flavor than the kind you find in the plastic containers.
Nutrition Information:
Yield: 6 Serving Size: 1Amount Per Serving: Calories: 403Total Fat: 17gSaturated Fat: 10gTrans Fat: 0gUnsaturated Fat: 7gCholesterol: 168mgSodium: 70mgCarbohydrates: 51gFiber: 4gSugar: 1gProtein: 9g

Hi Beth! Just made this – it is so delicious! The fresh mint flavor is really refreshing and different from store-bought mint chip ice cream. One question – when I was pouring in the melted chocolate, it immediately froze upon contact with the ice cream and created huge chunks of chocolate (that prevented the ice cream maker from churning well) instead of being evenly distributed throughout. Any tips to avoid this for next time? Perhaps the chocolate should be at a warmer temp, and I should pour it slower… anyways, thank you so much! Love from Minneapolis, MN.
So glad you enjoyed it! Sorry to hear you had trouble with the chocolate. Yes, it should be warmer perhaps, in a pourable state so that it pours in slowly and will create ribbons in the ice cream. But alternatively you could also just chop some bittersweet chocolate chards and throw those in too! That may be easier 🙂 So glad you enjoyed it! 🙂
Hi Beth, I have been waited to try this recipe if yours but I don’t have an ice cream machine. Can I stop at the part where you put the ice cream to the fridge, and put the ice cream to the freezer instead and consider myself getting some nice mint ice cream next day?
Thanks and hope to get your reply soon!
Well, you could try that, and I’m sure it would taste good, but the texture would be pretty flat and hard :(. That’s the thing that I’ve learned about homemade ice creams is that the machine adds all the air into them so that they scoop out like storebought ice cream and have that wonderful texture. But you certainly could try it and let me know how it goes! 🙂
I am eager to try this ASAP! My family enjoys ice cream socials during the summer months and mint chocolate chip is my favorite flavor. However, in have never made it. Beth, thank you for posting this!
I hope you enjoy it! It’s really easy to make and SO yummy too!