Brown Butter Chocolate Chip Cookies with Sea Salt
Just when I thought I had my go-to chocolate chip cookie recipe, I discovered Brown Butter Chocolate Chip Cookies! This is one of my new favorite cookie recipes!
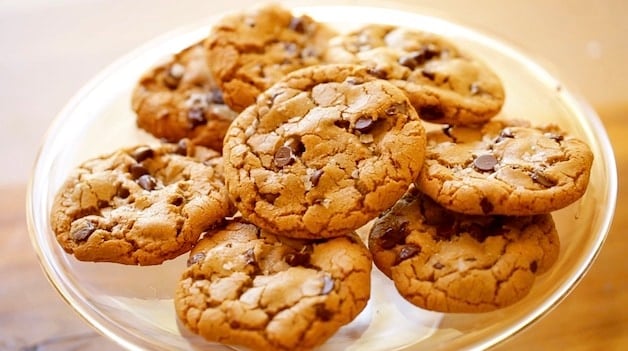
Why You’ll Love This!
- The brown butter makes them rich and flavorful and creates a fantastic texture too.
- They are crispy on the outside and soft and chewy on the inside. My kind of cookie!
- You’ll also love the combination of semi-sweet chocolate and a touch of sea salt!
Watch a Video Demo of this Recipe Below!
Subscribe To My YouTube Channel and Never Miss a Video!
Step#1: Brown the Butter
In a large, deep skillet melt the butter. I like to use a skillet because it gives the butter a wider surface area in which to melt and brown. It goes a bit quicker this way than in a saucepot.
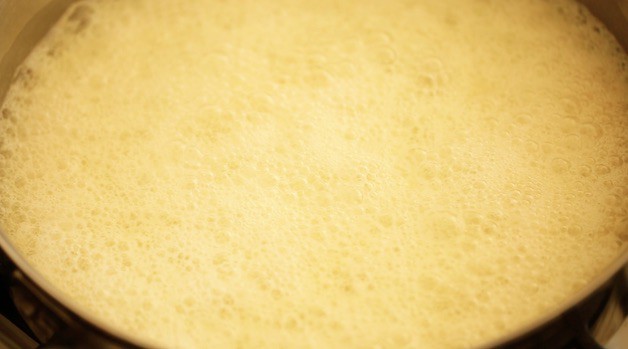
The butter will first melt and then foam. It will look like this.
When You’ll Know The Butter Is Ready?
- After the foaming stage, it will begin to turn brown.
- Swirl it around with a whisk until it turns a deep amber color.
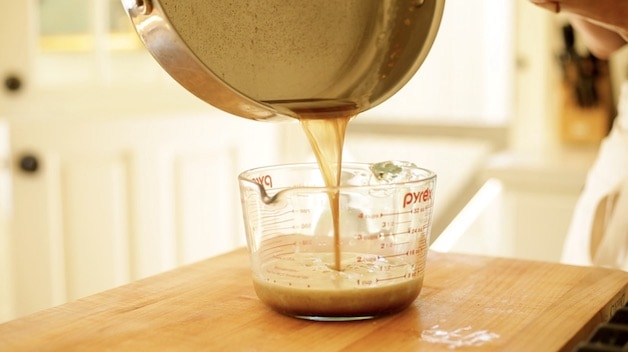
- Then transfer it to a heat-safe pitcher to cool. I don’t strain it since I find the brown bits left at the bottom add great flavor to the cookies.
- As the butter cools and settles it will look like brown “sludge” but trust me your cookies will thank you for it, the flavor is fantastic!
How to Get the Cracks in Your Cookies?
If your cookies don’t achieve the cracks, here are some reasons that could be factors.
- Allow the butter to cool before adding it to your mixer. Otherwise, if it’s too hot, it will force your cookies to spread out too much and you’ll have cookies that look like flat pancakes, without any cracks.
- Don’t over-mix the dough. Overmixing will develop the gluten in the flour too much, creating a denser cookie. You need lightness in the dough to achieve the cracks.
- Your oven may not be hot enough. Ironically, most ovens do not run at the temperature you set them for. For example, you set your oven for 350F, but it’s only heating up to 325F.
- An oven thermometer will help. If it’s “running cool” you can compensate by setting your oven a bit higher so that it will in fact reach 350F.
- Baking Soda Lost Its Potency. These cookies call for Baking Soda. If you swap with baking powder you won’t get the cracks. And if your baking soda is opened and over 6-months old, it will be hard to get the cracks.
How To Test if Your Baking Soda is Still Good?
- Place a teaspoon of baking soda in a glass of 2 inches of vinegar.
- If it creates a fizzy solution it’s good! If not, best to replace it with a fresh supply.
Step#2: Measure the Dry Ingredients
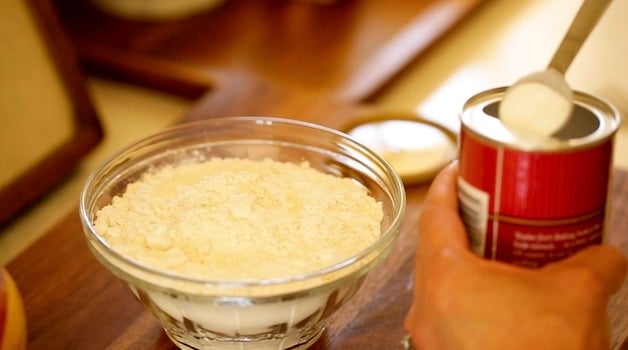
I don’t use a lot of flour in these cookies because I find that’s what keeps them nice and chewy! And yes, this is actually baking soda I’m using even though it looks like a can of baking powder. The Trader Joe’s brand of baking soda comes in a can and always confuses people when they see it in my videos ha! So just clearing that up ahead of time in case you were wondering the same thing.
Step#3: Add the Sugars & The Cooled Butter
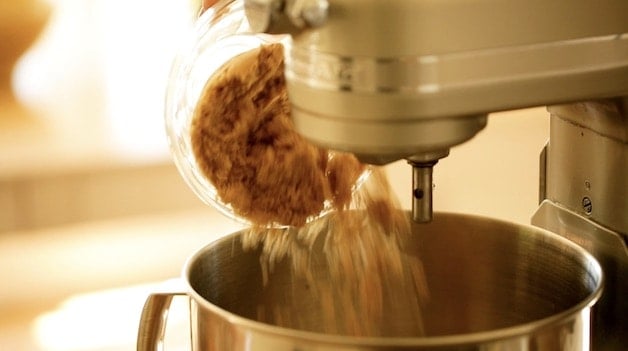
Once your butter is cooled, you’ll add brown sugar and white sugar to your mixer.
Why You Need Brown Sugar and White Sugar in Chocolate Chip Cookies
- The brown sugar keeps the cookies chewy and flavorful.
- It also prevents the need for chilling the dough ahead of time since the brown sugar contains molasses which makes it denser.
- I find by using a majority of brown sugar you can just “make and bake” the cookies right away!
- But then I also like to add just a 1/4 cup of white sugar to keep those edges nice and crispy. This is the thing white sugar will always contribute to a chocolate chip cookie, crispiness.
Step#4: Add the Eggs
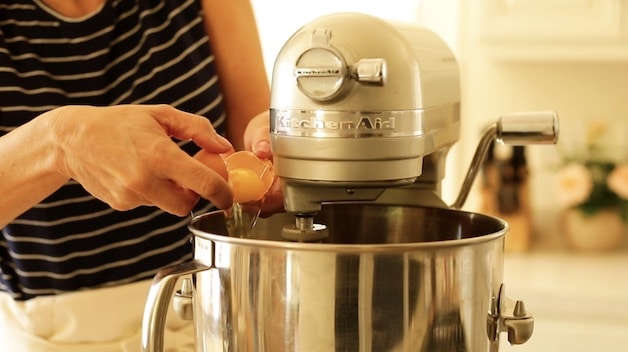
OK. let’s talk about the eggs. I find the perfect ratio is 1 whole egg, plus 1 egg yolk. I think this gives the cookie the best chewy texture without being too cake-like! This is what I found to be the case when using 2 whole eggs. Too cakey! Not enough chew.
Step#5: Fold in the Chocolate Chips
When it comes to chocolate chips, I use either semi-sweet or dark chocolate. Personally, I like dark chocolate chips because I find it balances out the sweetness of the cookie base.
What are the Best Chocolate Chips for Chocolate Chip Cookies?
I know this is personal preference but here’s my pick!
- Ghirardelli semi-sweet chocolate chips. These are also great in my Homemade Hot Fudge Sauce recipe too!
- Ghirardelli dark chocolate chips (these are really fantastic in myMarigoon Cookies too!)
- Nestle Tollhouse Chocolate Chips are semi-sweet and their new dark morsels are fantastic! I use them in my Oatmeal Chocolate Chip Cookie recipe and they are SO good!
Can You Use Chocolate Chunks Instead of Chocolate Chips?
- You can use chocolate chunks if you don’t mind your cookies spreading out a bit. If you go this route then I would recommend refrigerating the dough for an hour to firm up a bit.
- But if you want them to look like mine, I would recommend sticking to the chips.
- Chocolate chips are designed not to melt completely in the oven when baked, thanks to stabilizers. This is what allows them to retain their “chip-like” shape after they are baked.
Make Sure Your Butter Is Cooled!
It’s important the butter was cooled before adding it to the mixture, otherwise, if it’s too warm when you mix in the chocolate chips it will melt your chocolate chips!
Step#6: Scoop the Dough
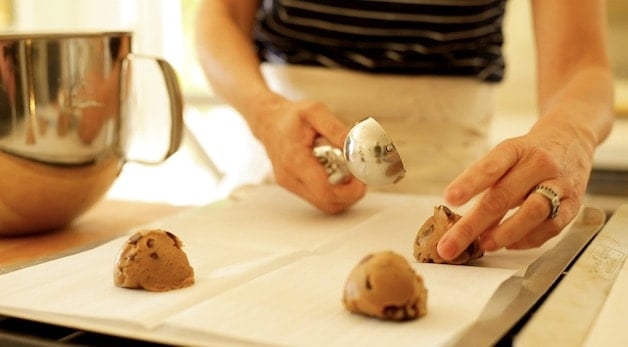
I like to use a 2″ ice cream scoop for these. I think that makes the best-sized cookie. I would also bake them on a parchment-lined cookie sheet to avoid over-browning the bottoms.
Step#7: Baking Tips
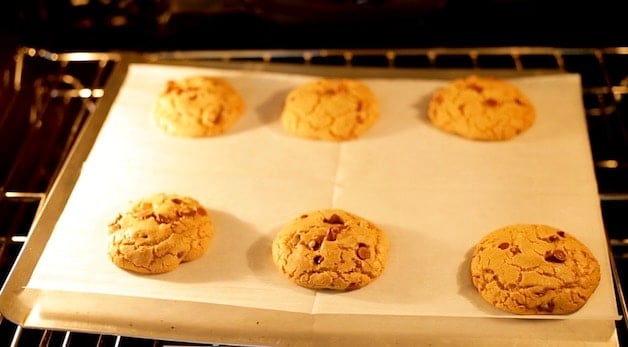
- Bake your cookies for 15 minutes and do not remove them until you see the cracks form.
- That’s how you will know that they are fully baked inside.
- Otherwise, if you take them out sooner, they will be crispy on the outside but pretty doughy inside.
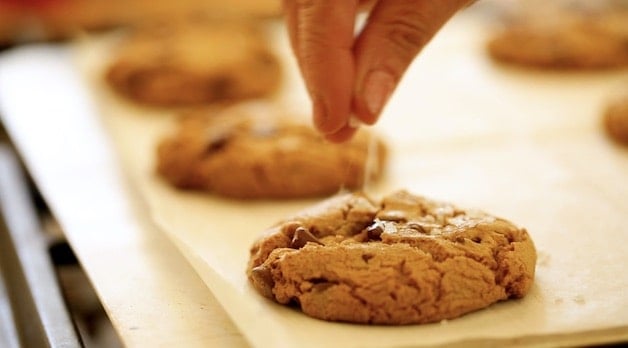
Step#8: Add Fleur de Sel Sea Salt
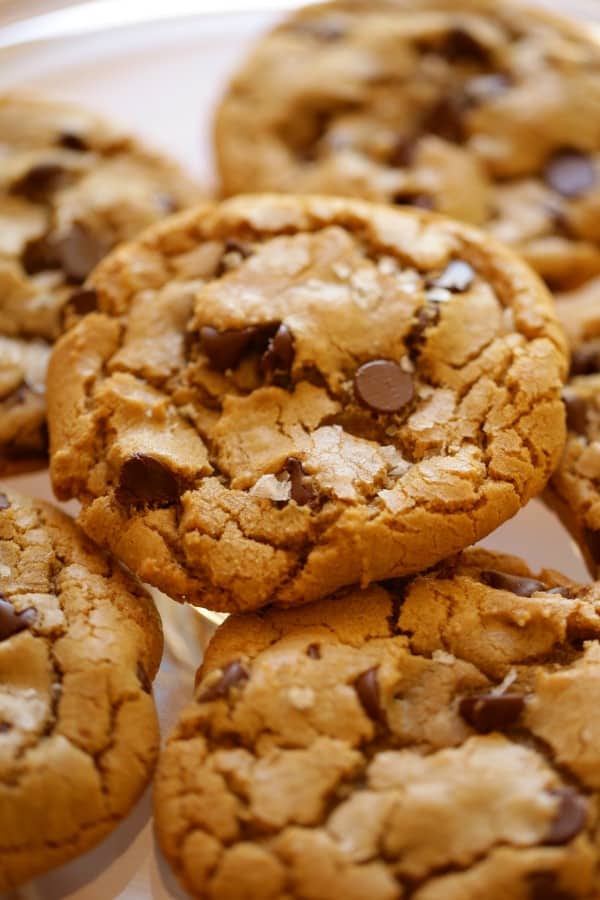
The cracks are also handy when it comes to adding flakes of Fleur de Sel sea salt on top. Since as the cookie deflates the sea salt gets trapped inside the cracks.
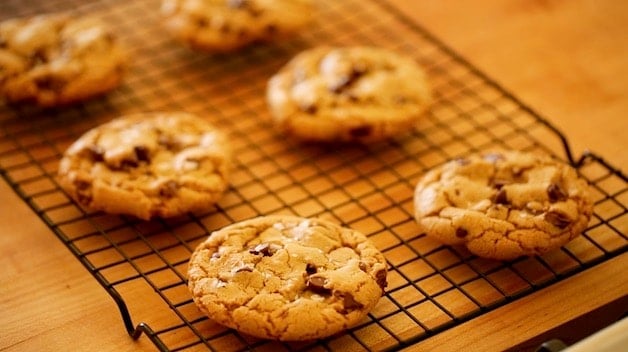
Allow the cookies to cool slightly and they will get all crackly and chewy as they cool.
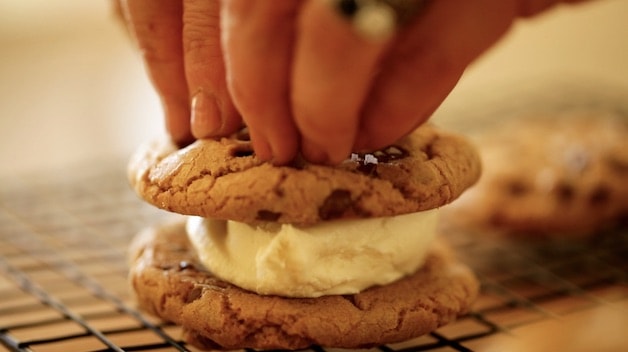
Step#9: Assemble into Ice Cream Sandwiches
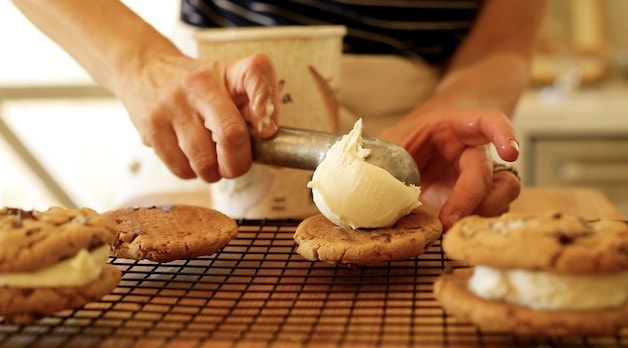
If you’d like to turn these cookies into ice cream sandwiches, be sure the cookies are cooled completely. They will be less fragile that way and won’t melt the ice cream.
Be sure the ice cream is also very soft which will allow you to gently press the top cookie down and spread the softened ice cream across the bottom cookie, just with the pressure of the press.
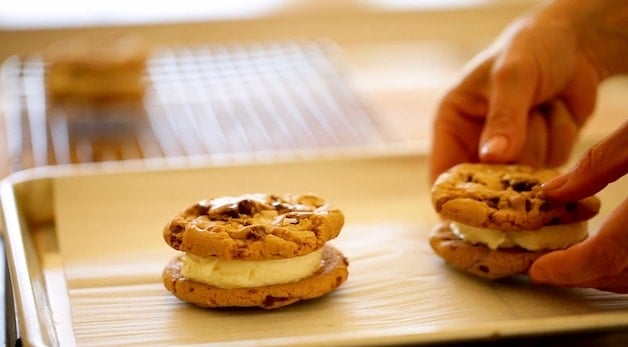
Then place your cookie sandwiches on a parchment-lined cookie sheet (so they don’t stick) and pop them in the freezer until ready to serve!
TIP: I love to serve these Ice Cream Sandwiches along with my Ginger Molasses Ice Cream Sandwiches for a great flavor combo! I piled them both on a large cutting board and then cut them in half or quarters so everyone can try each!
More Great Dessert Recipes!
- Best Mint Chip Ice Cream
- Banana Bread Pudding with Chocolate Chips
- Chocolate Banana Bread
- French Madeleines
If You Enjoyed These Cookies
Please Leave a Rating and a Review Below!

Brown Butter Chocolate Chip Cookies with Sea Salt
These Brown Butter Chocolate Chip Cookies with Sea Salt are a delicious weeknight treat if you are craving something sweet! Or save them for the weekend and turn them into fantastic ice cream sandwiches!
Ingredients
- 1 cup (240g) of unsalted butter, browned
- 1 ¼ cup (225g) brown sugar
- ¼ cup (50g) white sugar
- 1 egg
- 1 egg yolk
- 2 1/2 tsp (12.5ml) vanilla extract
- 1 ¾ cup (210g) flour
- 1 tsp (5ml) baking soda
- ½ tsp (2.5ml) salt
- 1 12-oz (340g) bag semi-sweet chocolate chips
- 1 tsp (5 ml) fleur de sel sea salt flakes
Instructions
- Preheat oven to 350F (175C).
- Melt butter in a deep skillet, once it starts to foam, whisk it around and it will begin to brown. Remove from heat when it’s a nice caramel color. Allow it to cool.
- Meanwhile, whisk together the flour, baking soda and salt. Set aside.
- Add the sugars to a stand mixer, or to a bowl for use with a hand mixer. Add the brown butter. Beat together until combined. Add the vanilla. Then add the egg and egg yolk, one at a time beating in between each addition until the batter is smooth.
- Add the flour mixture in thirds beating in between each addition and scraping down the bowl.
- Remove the bowl from the mixer and stir in the chocolate chips with a wooden spoon.
- Scoop out batter with a 2” (5cm) ice cream scoop onto baking sheets lined with parchment paper. Placing 6 scoops on the tray to allow from for the cookies to spread.
- Bake at 350F (175C) for 15 minutes or until you see that cookies are set and begin to crack. Don’t remove them until they begin to crack!
- Remove cookies from the oven, sprinkle with a few sea salt flakes while warm and then allow them to cool and deflate, this is how they get chewy. They will become thin and crackly looking.
- Serve with a glass of cold milk or sandwich between softened ice cream for the ultimate ice cream sandwich! Keep sandwiches in freezer until ready to serve for an easy summer dessert idea!
Notes
Be sure your butter is cooled before adding it to your mixer. Otherwise, it will make the dough too runny and your cookies will spread out too much. The dough will also be too warm and will melt your chocolate chips before they hit the oven.
Bake your cookies for 15 minutes and do not remove them until you see the cracks form. That's how you will know that they are fully-baked inside. Otherwise, if you take them out sooner, they will be crispy on the outside but pretty doughy inside.
Nutrition Information:
Yield: 12 Serving Size: 1Amount Per Serving: Calories: 236Total Fat: 14gSaturated Fat: 8gTrans Fat: 0gUnsaturated Fat: 5gCholesterol: 33mgSodium: 61mgCarbohydrates: 31gFiber: 2gSugar: 27gProtein: 3g



I know this recipe was posted years ago, but it’s brand new to me! Your description of exactly what browning butter should look like is SUPER helpful. I was wondering what would happen if I froze the dough balls and baked as needed? Thank you SO much!
Oh sure you could freeze them, but they wouldn’t spread out as much and get crackly like they do when freshly baked from the dough that’s just made. What I do instead is bake all the cookies, and freeze the leftovers in a ziploc bag, and then when I want one, wrap it in a paper towel and pop in the microwave for :15-:30 and just they’ll be warm and gooey just like fresh baked 🙂 Hope you enjoy!
I really love this cookie, but I cannot get mine to crack. I think there are so many variables involved in getting the crackle look. I just have not discovered what works best for me. I tried upping the oven temperature to 375 thinking if the top set quickly that the rising would cause cracks. Nope!
I do not make the large cookies because they are just too big for my liking, but I don’t think the size has anything to do with it. I may be wrong …….love the cookie taste and texture…..lI will keep trying. Wish we could post photos of our cookies to get opinions from others.
I am looking for that “crackle” look too. And you are so right that there are sooo many variables to get that look. Are you able to finally figure it out what works for you?
I don’t get the cracks like you do, but these cookies are wonderful. Crunchy and soft in the middle. I wish I could share a photo. One time the came out pretty flat and then yesterday beautifully round. I’m guessing my dough was warmer with the flat ones. They all taste greaaaaat!
How do you Recommend storing cookies
If they are to be eaten quickly I just store them in an air-tight container on my countertop. Eaten in a few days, I pop them in the refrigerator. Longer than that you can freeze them! They freeze beautifully in a ziploc bag, then wrap them in a paper towel and microwave for :30-40 yummy! Just like freshly baked 🙂
240 grams of butter is quite a bit more then 1 cup.
Yay I finally got crinkles on my cookies. This is my absolute favorite chocolate chip cookie recipe so I would not give up. I followed the recipe exactly using the gram weights …….240 g of butter is about a good tablespoon more than two sticks of butter, so I think using the gram measurement does make a difference .
Hi Beth,
For this recipe can I do this by hand or do I have to use a mixer?
Ashley Joh
These cookies are so so yummy! I put them out for everyone and I blinked and they were gone. I’m telling you these are snooze you loose cookies!! Fantastic cookie Beth!
Ha! Aww so glad they were a hit! 🙂
I have made these cookies to the raves reviews of my family and friends. They are the most delicious chocolate chip cookies and everyone
tries to figure out what is it that makes them so good!? I’ll never tell! The cookies will crack as they cool and this makes them look so professional! Thank you Beth for another recipe that makes me a star!
Hello! I love yout recipe and made it a lot of times! Could you tell me the perfect temperature for the butter?
Thank you very much!
Maria
Sure I would say “just warm to the touch” or about 90F/(45C) if that helps too. If it’s too hot it will melt the chocolate too much and make the dough harder to work with. So glad to hear you are enjoying the recipes! 🙂
Just made these
Perfect!!!
So glad to hear they were a hit! 🙂
these are delicious, buttery, caramel like flavor. i was disappointed that they didnt crackle like yours. i baked them for the full 15 minutes and they were very brown so i took them out of the oven. i didnt want them to burn.
should i have left them in longer?
Actually cracks in the cookies are caused by a bunch of different factors. In this case you were right to pull them out, leaving them in longer wouldn’t have helped. This article explains it well! Hope it helps for next time 🙂
Does this cookie recipe stay soft even after a few days or does it turn hard and crunchy if i bake it and only ate it like 4 days later?
Hmm after 4 days it would probably get a bit crunchy. Best eaten 1-2 days after baking 🙂
AMAZING! I followed the recipe exactly and the cookies turned out amazing! My family loves it! I can’t wait to bake it again. Definitely a must try!
Beth, these are the best cookies! I love all your recipes! Thanks for sharing 🙂
Aren’t they good!? Ha! One of my favorites! I’m so glad you enjoyed them too! 🙂
I follow each and every step, unfortunately my cookies were so flat and it start to bake, do you know why it happens?
Mine became flat too! And they turned out crunchy throughout. Tried refridgerating the dough for 30 mins but still turned out crunchy. Flavor was good though!
Hi Gemma. These look delicious. I prefer my cookies a bit more cakey. But I do want to give the brown butter flavor a try. Would adding a bit more flour achieve that?
Yes of course. Add about 1/4-1/3 cup more flour to achieve a cakey texture. Hope you enjoy!
I just made this cookies. It’s delicious but the problem is they didn’t crack as your advice. I don’t know the cause of this result since I did measure all recipes as your instruction. May be has any secret recipe that might not post!!!
I’ve found they only crack at the last few minutes of baking. So if they didn’t crack it may be they needed a minute or two more in the oven? It’s also important to make sure to use baking soda and not baking powder. It’s the soda that also helps them to rise and then crack. Doesn’t work as well with the powder. Hope that helps for next time! But glad to know they tasted good! 🙂
I just made these cookies and they are absolutely delicious! I used Trader Joe’s semi-sweet chocolate chunks. Try these cookies you won’t be sorry.
So glad these were a hit! You must try them as Ice Cream Sandwiches! Seriously to die for!! Ha!
Hi Beth, I recently made this recipe using the gram measurements that you have provided and the cookies were spreading like crazy while baking it. I think 210g of flour is not enough.. And a cup of butter usually ranges from 200g to 227g only. 🙁 will try to make this again and adjust some measurements. It taste really good though 😊
Hi Florence! So sorry you had those issues! This is the site I use for my Metric Conversions which says 240g for 1 cup? But if you think you need a bit more flour, by all means, add it! 🙂 I also find if the butter is not cooled when adding it will make the cookies spread out a lot too. YOu can even pop it in the fridge for a bit to cool down while you prep the rest of the ingredients. So glad they taste good though! Ha! Keep me posted on your adjustments 🙂