Beet Hummus Recipe
SHARE THIS RECIPE!

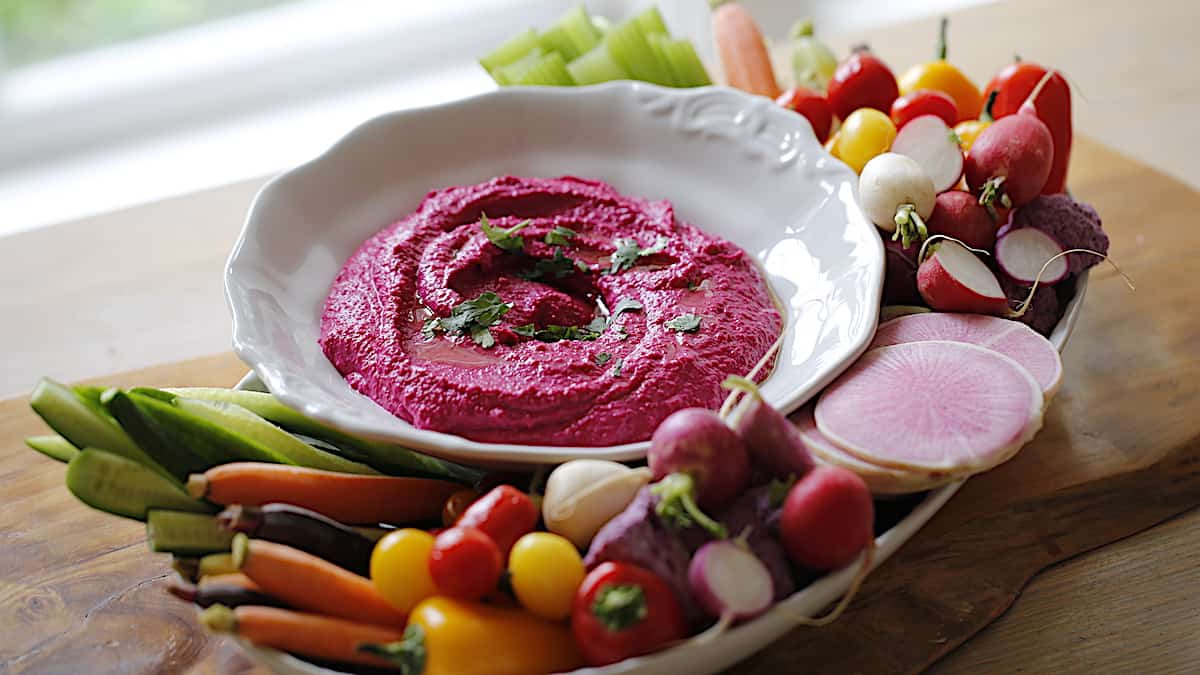
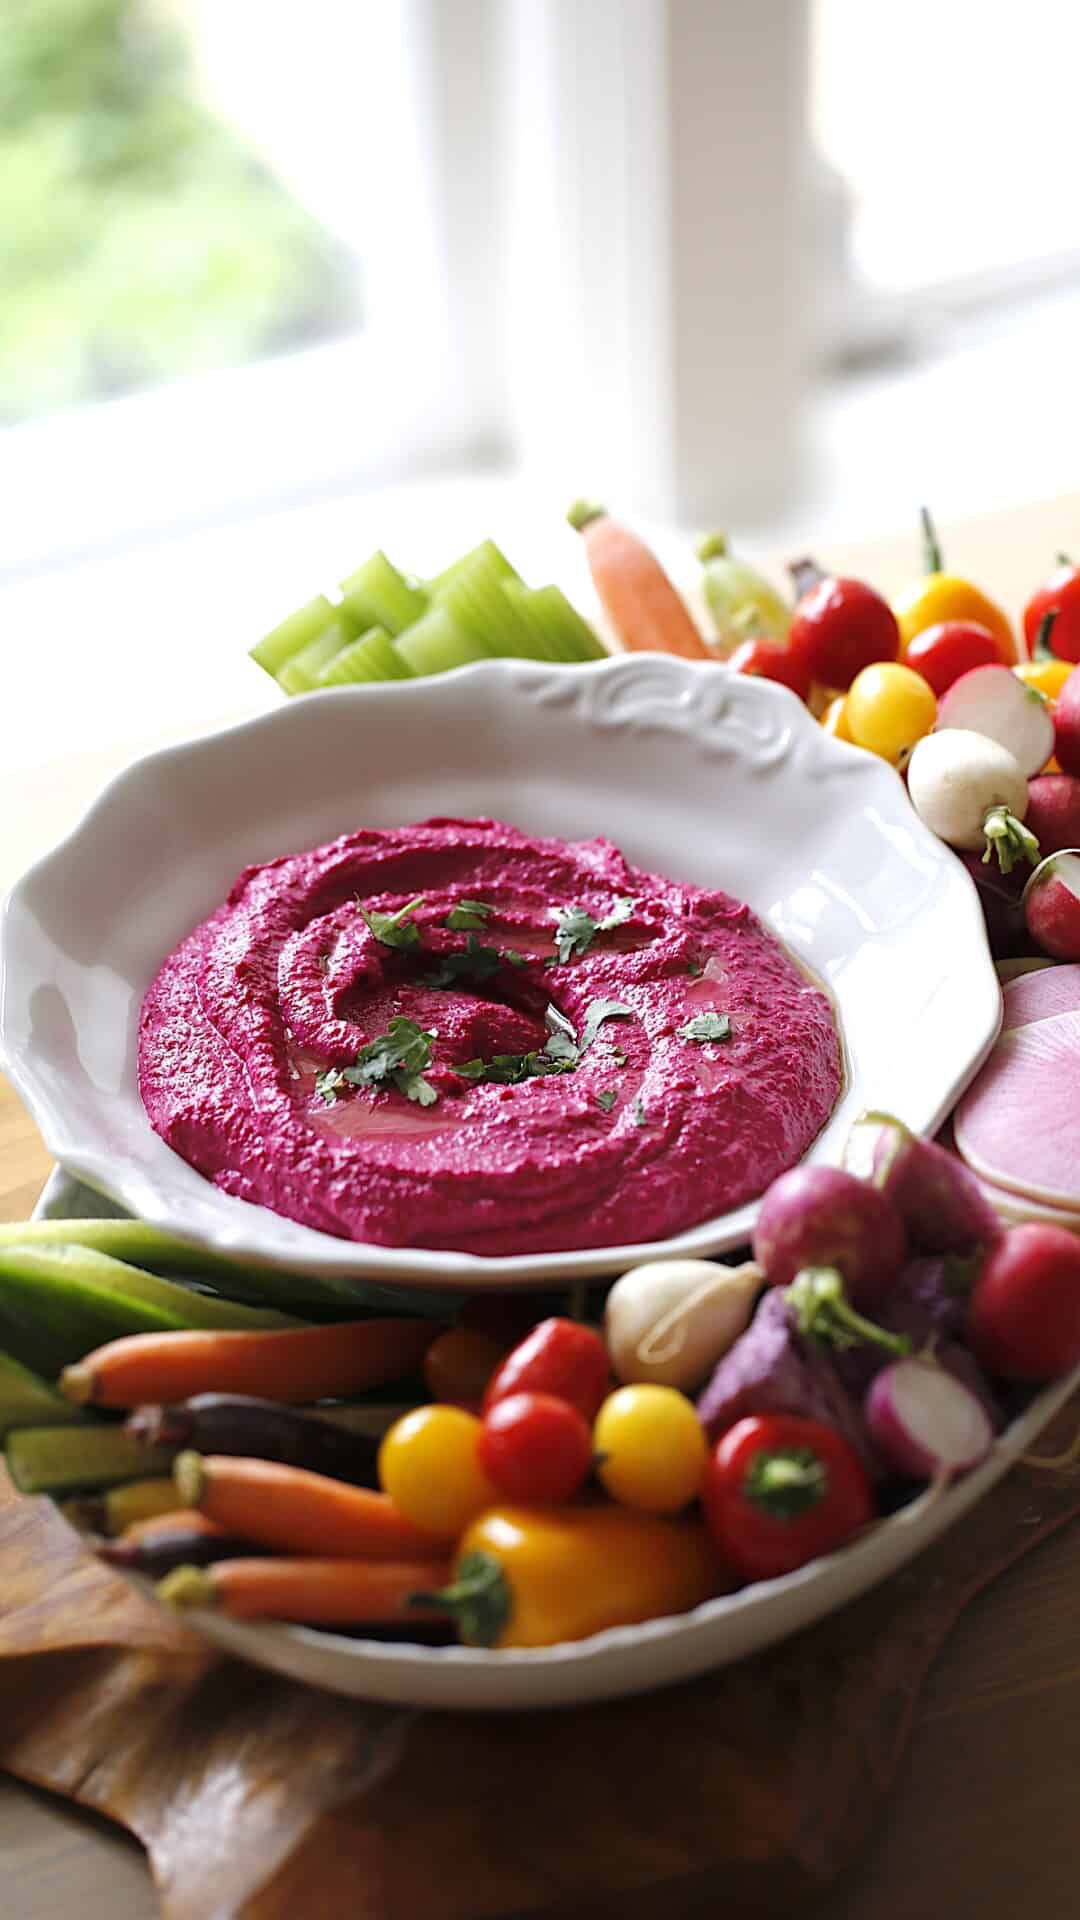
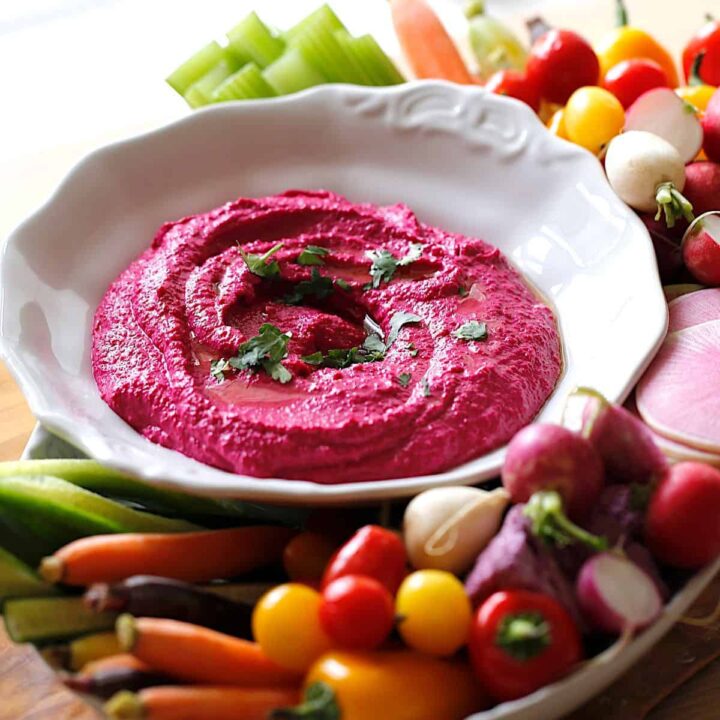
This Beet Hummus Recipe is very similar to my Traditional Hummus Recipe but instead, it incorporates roasted beets. The result is a fantastic tasting pink hummus for spring with a color to match the season.
Because it is such a beautiful, festive color it makes for a wonderful appetizer recipe for an Easter Sunday or a Mother’s Day. Pair your beet hummus with an assortment of brightly colored vegetables for a Farmer’s Market-inspired start to your party.
Would you like to save this?
Why You’ll Love This:
- All the traditional creaminess and flavor of classic hummus
- The color itself is a conversation piece!
- You can roast the beets 2 days before and make the hummus a day before
- The vegetables can also be prepped a day ahead making this a “set it” and “forget it” appetizer tray the day of your event.
Watch My Video Demo of this Recipe Below
Subscribe to My YouTube Channel and Never Miss a Recipe!
This video also includes recipes for my Rose Pamplemousse Cocktails, Artichoke and Spinach Chicken Bake, and my Lemon Bar Brownie Pie with Raspberry Swirl.
Step#1: Roast The Beets
Beet hummus only has a very slight beet flavor. It tastes a lot like regular hummus, just with a slightly sweeter taste. And the best way to bring out a beet’s flavor is to roast them, it also helps preserve their deep pink color too.

Step#2: Pulse the Chickpeas and Beets
Be sure the chickpeas have been drained and rinsed and your beets have been peeled and quartered and then pulse them up in the food processor with the water.
At this stage, it won’t be creamy yet (that’s where the tahini comes it) this step is really more to just puree the main ingredients.
Step#3: Add Tahini and Seasonings
The tahini is essentially sesame paste that you’ll find in the nut butter section of your grocery store. It will give the hummus a wonderful creaminess. You could leave it out if you prefer, but your hummus would be a bit grainier.
Then you’ll add the lemon juice, garlic, salt, and cumin. The quantities listed are really just a starting point. You can dial-up, or down the lemon juice, garlic, and cumin as desired.
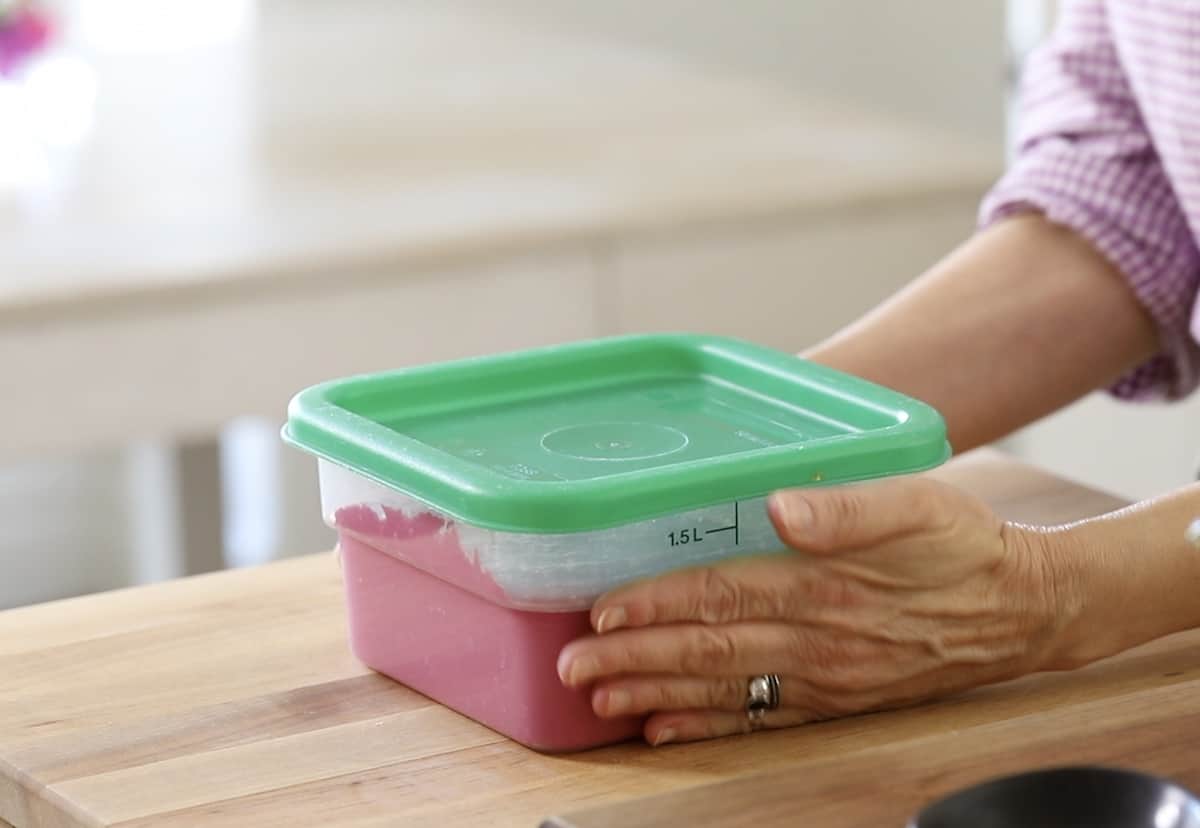
Step#4: Store and Refrigerate
The best thing about hummus, aside from how easy it is to make and delicious to eat, is how you can prep it in advance. For every party, I throw I always like to have an appetizer platter that can be made in advance and just set out as soon as guests arrive and hummus is a great one for that!
Step#5: Prep the Veggies
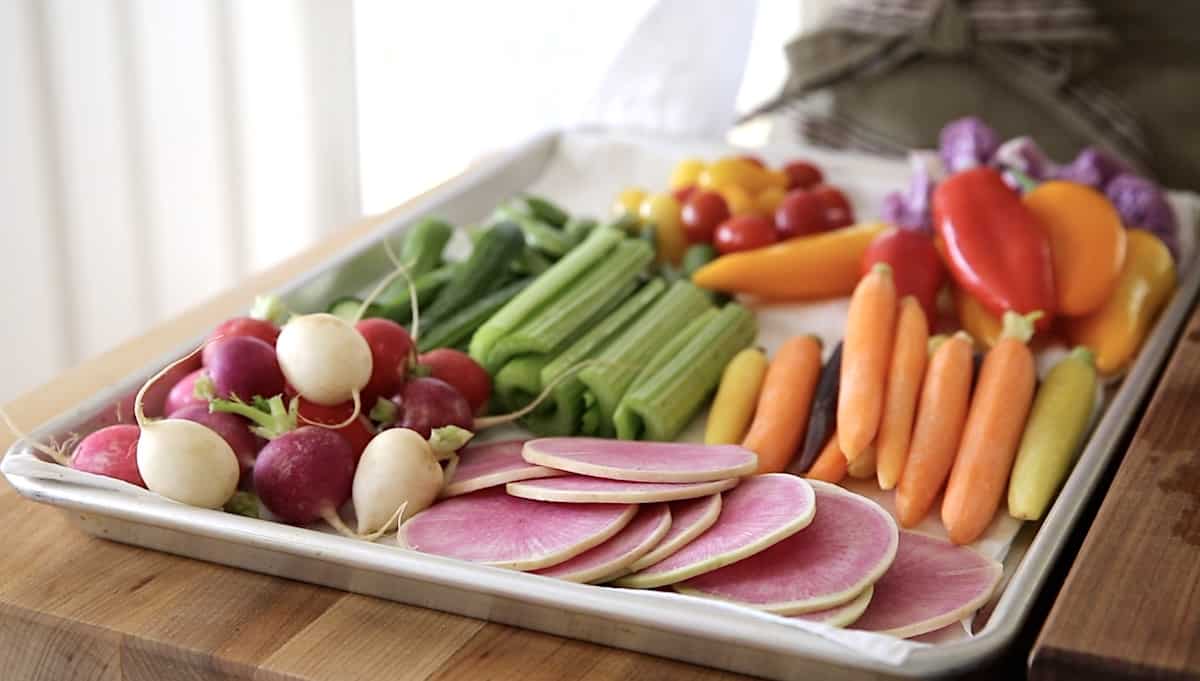
In the warmer months, there are so many beautiful vegetables to use for a platter like this. I usually decide the day I go shopping and look to see what looks the most colorful and interesting! I also decide based on what can be eaten raw and doesn’t need to be blanched, because let’s face it who needs one more step!

I typically find these are my favorites since they span the colors of the rainbow.
- Celery
- Cucumber
- Carrots
- Bell Peppers
- Cherry Tomatoes
- Multi-colored cauliflower in purple or Orange
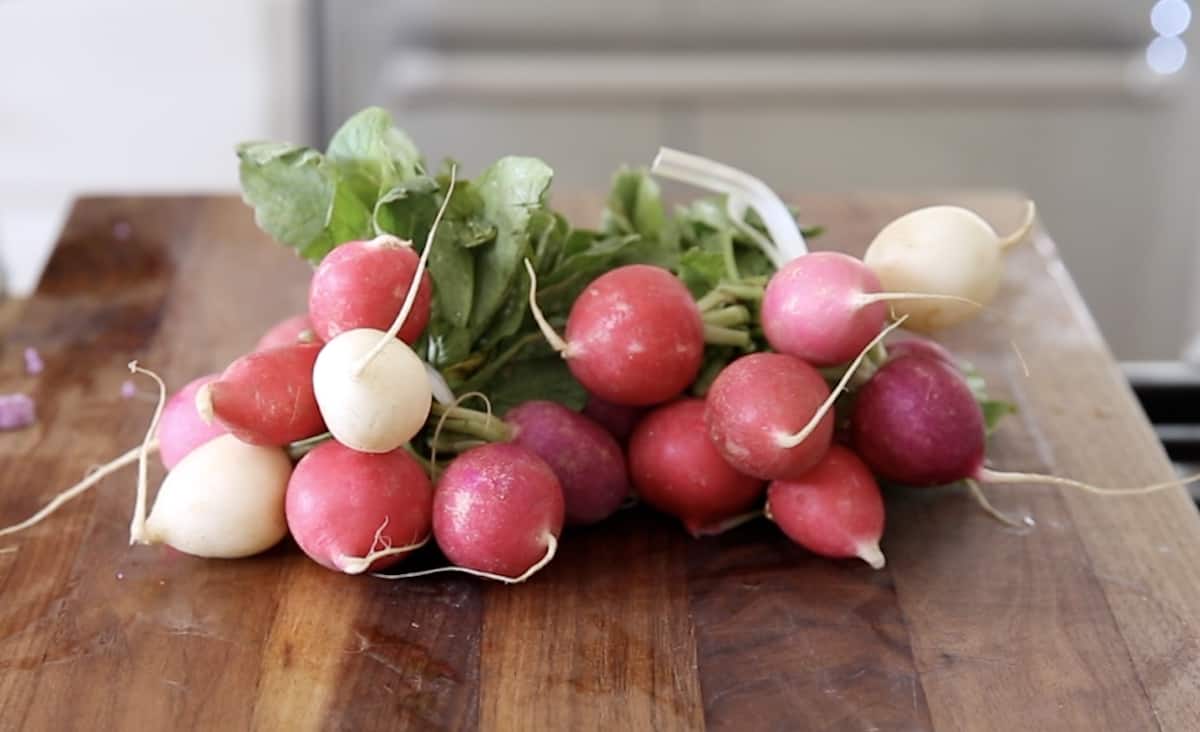
- Easter Egg Radish
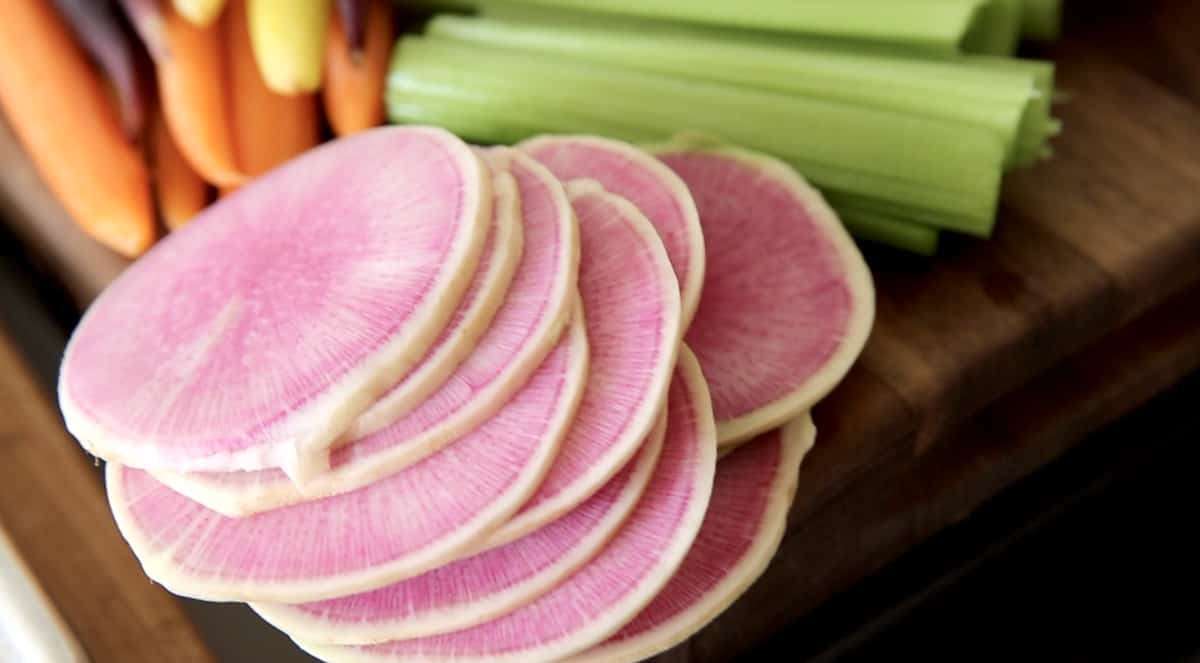
- Watermelon Radish
The Beauty of a Watermelon Radish
If you can find them, watermelon radish really steals the show! They don’t look like much from the outside, but once you slice into them, they are a sight to behold. A spectacular shade of pink, with a light green rim. They taste just like a regular radish, but are way more fun to eat!
Easter Egg Radish
If you can’t find the Watermelon radish, look for Easter Egg Radish. They are popular in the spring and are also beautiful for a vegetable platter because they come in an array of pastel colors.
Make-Ahead Tip:
- You can place your vegetables on a sheet tray lined with a damp kitchen towel with a second towel placed on top.
- And place them in your fridge overnight.
- The towels will keep the vegetables fresh and crisp and prevent them from drying out.
Step#6: Assemble and Serve
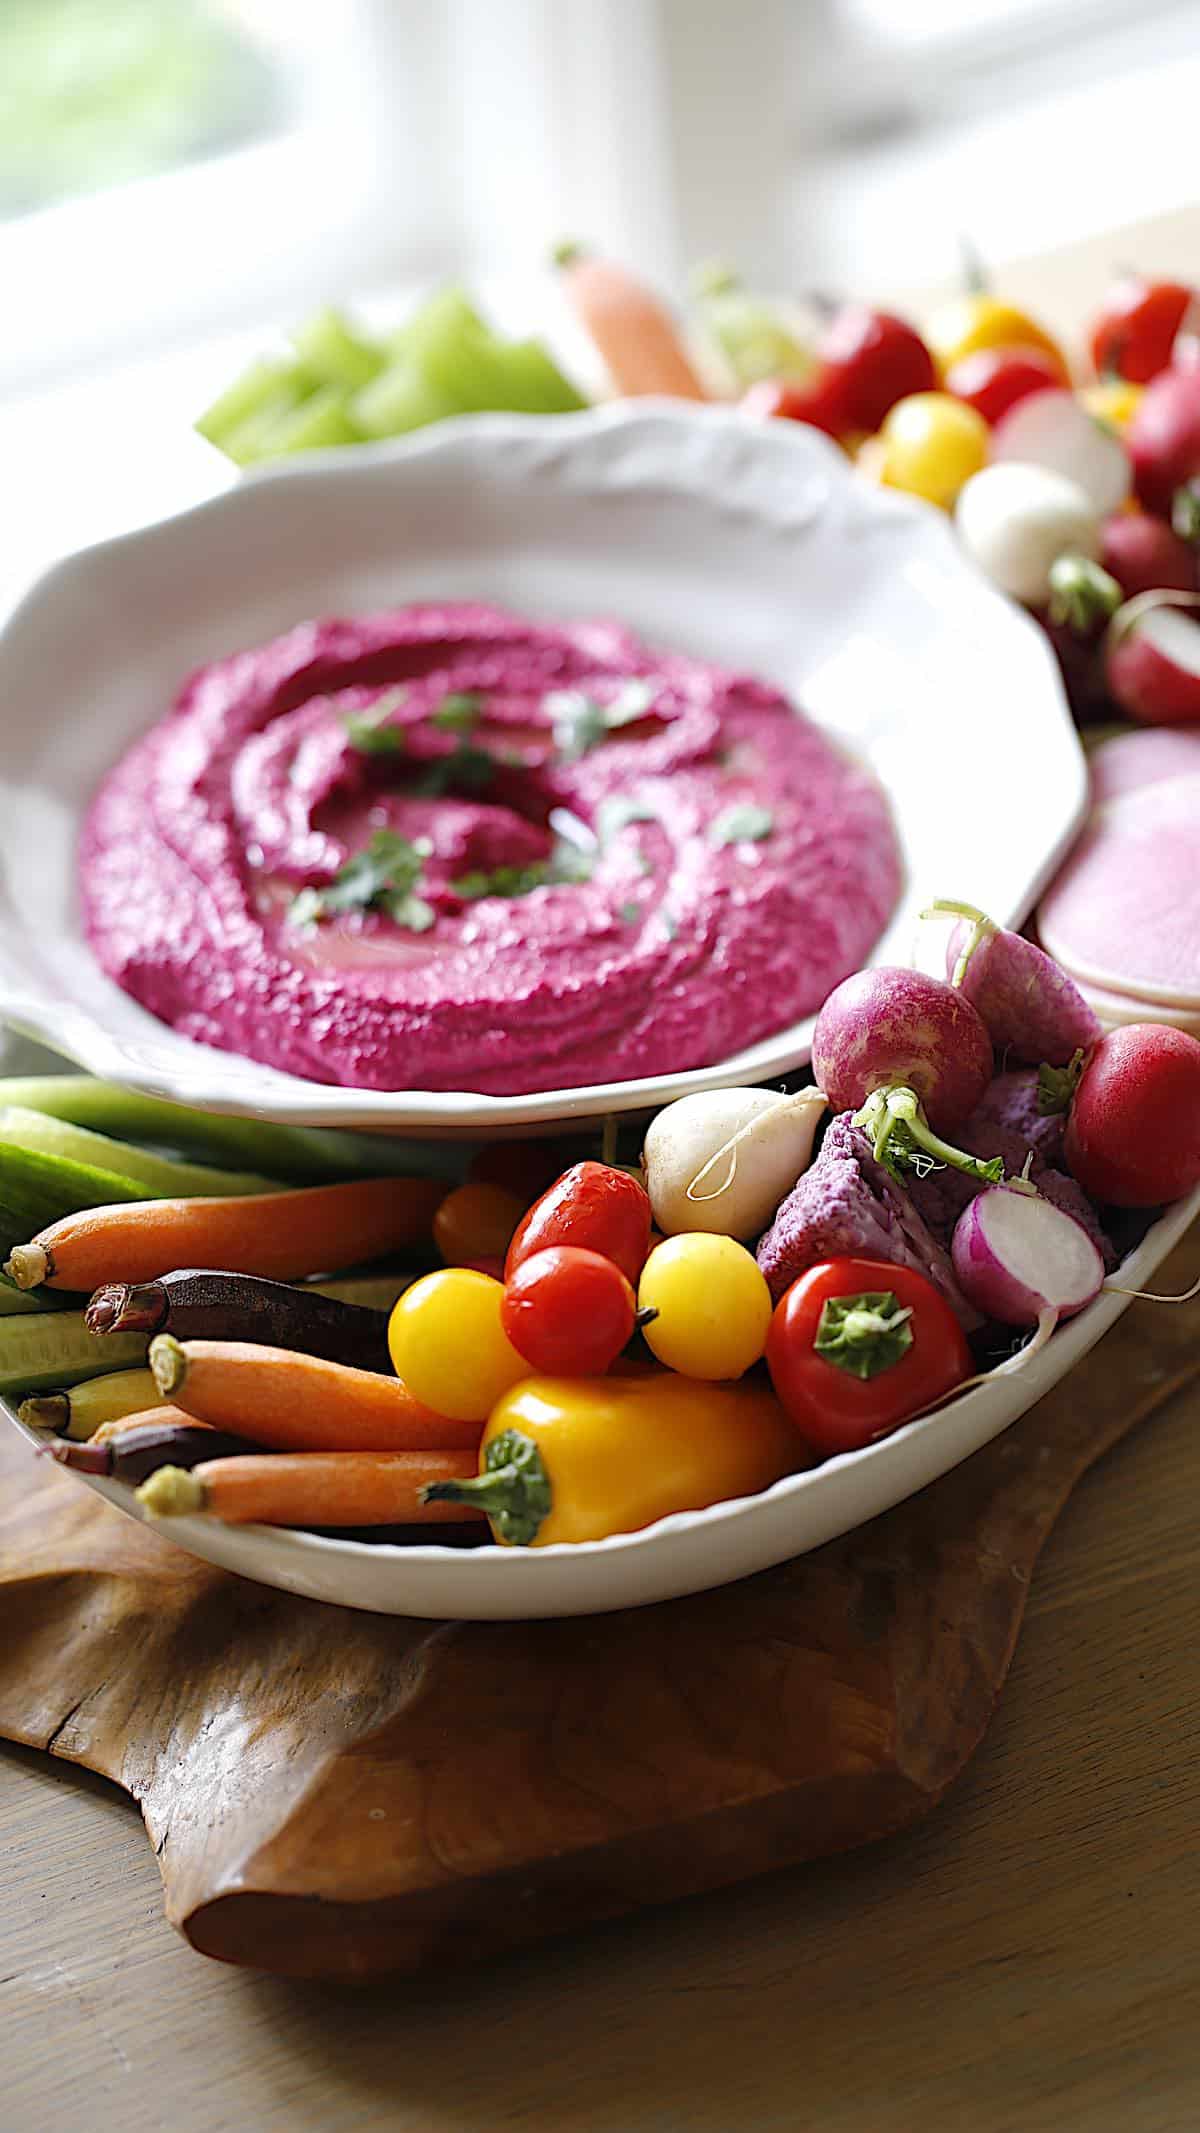
All you have to do on the day of your party is assemble and serve! I like to use a serving bowl on top of a serving platter because it allows for room around the platter to add the pretty vegetables. A tighter display where the vegetables are packed in will create a pretty presentation.
More Spring Recipes You’ll Love:
- Creamy Cucumber Dill Salad
- Couscous Salad with Dried Fruits, Nuts, and Mint
- Strawberry Pistachio Tart
- Seared Salmon with Beurre Blanc Sauce
If You Enjoyed This Recipe
Please Leave a Rating and a Review Below!
Beet Hummus Recipe
A delicious twist on a classic hummus recipe accented with roasted beets. Serve with a vegetable platter or grilled pita bread.
Ingredients
- 30 ounces (880g) chickpeas, drained and rinsed
- 3 medium-sized beets, roasted and peeled (1 1/2 cups worth)
- 3/4 cup (180ml) water
- 3/4 cup (180ml) Tahini
- 1/2 cup (120ml) lemon juice
- 2 garlic cloves, minced
- 1 1/2 tsp (7.5ml) salt
- 2 tsp (10ml) ground cumin
- 1/2 cup (120ml) of olive oil
Garnish:
- Drizzle Olive oil
- 1 Tbsp (15 ml) Fresh Chopped Parsley
- or some edible flower petals
Vegetables
- Serve with your favorite assortment! I'd recommend:
- Celery
- Cucumber
- Baby Bell Peppers
- Sugar Snap Peas
- Radish (Easter Egg, Watermelon Radish, or French Breakfast)
- Baby Carrots
- Cherry Tomatoes
- Endive
Instructions
- Preheat oven to 400F.
- Wrap beets, unpeeled, in foil. Place on a baking tray.
- Roast for 30-40 minutes until tender. Allow to cool. Then peel beets, and quarter. Set aside.
- Place the chickpeas, beets, and water in a food processor. Pulse until pureed.
- Add the tahini and pulse to combine
- Add the lemon juice, garlic, salt, and cumin, pulse to combine.
- Scrap down the bowl as needed.
- Then slowly add the olive oil in a steady stream, pulsing all the while until combined.
- Transfer the hummus to a serving bowl. Create swoops and swirls with a spatula. Drizzle with olive oil
- garnish with freshly chopped parsley or editable flowers.
- Serve with assorted vegetables
Notes
- You can roast the beets up to 2 days ahead, place them in an air-tight container and refrigerate.
- You can make the hummus a day ahead and cover and refrigerate
Nutrition Information:
Yield: 10 Serving Size: 1Amount Per Serving: Calories: 45Total Fat: 2gSaturated Fat: 0gTrans Fat: 0gUnsaturated Fat: 2gCholesterol: 0mgSodium: 32mgCarbohydrates: 6gFiber: 1gSugar: 4gProtein: 1g
