Strawberry Scone Recipe
SHARE THIS RECIPE!


These Strawberry Scones are a fantastic breakfast treat to make for Valentine’s Day! They are light and flakey and melt-in-your-mouth delicious!
I’m a firm believer in a scone for all seasons! It’s just so easy to switch out the flavorings once you get the recipe for the base. When it’s summer I make my Blueberry Scone recipe, in spring it’s my Lemon Poppy Seed Scone Recipe and in fall I crave my Pumpkin Scone Recipe with Chai Glaze.

Would you like to save this?
Why You Will Love This!
- You can make the scones a day ahead, cut them and place them on a baking tray and refrigerate.
- Then all you have to do the next day is bake!
- Or you can bake them and freeze them; they reheat beautifully in the microwave, wrapped in a paper towel. Freshly baked scones anytime!

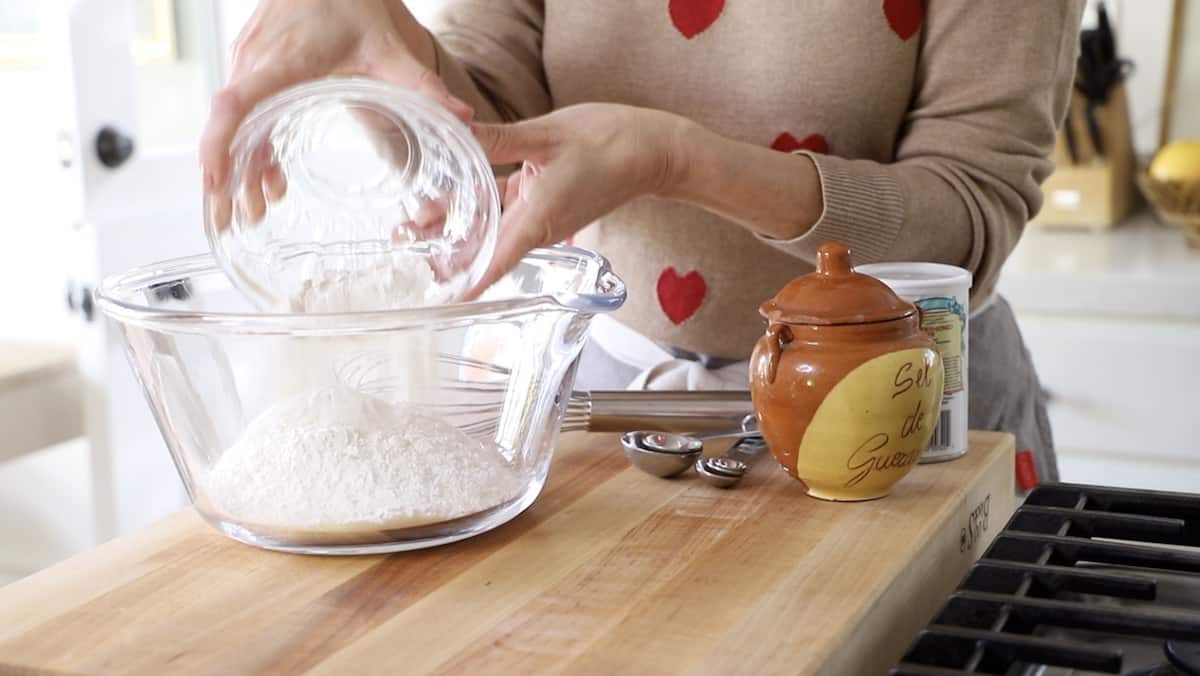
STEP#1: Mix the Dry Ingredients
- Whisk together the dry ingredients until combined.
- Personally, I think all-purpose flour is the best flour to use for scones.
- There’s no need for any fancy bread flours, self-rising, or pastry flours.
STEP#2: Work in the Butter
- The secret to a flakey scone is the butter! Make sure the butter is cut into small cubes, this will make it easier to combine with the flour.
- The flour and the butter should be worked in with your fingertips, pressing the butter into the flour until you have a coarse meal.

How To Create a Flakey Texture
- Avoid using your food processor for scones. It processes the butter too much and you’ll lose the buttery crumbles in the scone mixture.
- These buttery crumbles melt in the oven as the scones bake, leaving air pockets in their place.
- These air pockets create the light, flaky texture of the scone.
STEP#3: Add the Heavy Cream Mixture
- After the strawberries have been whisked in, you’ll create a well in the center for the cream.
- This will help incorporate the cream mixture with the dry ingredients without overmixing.
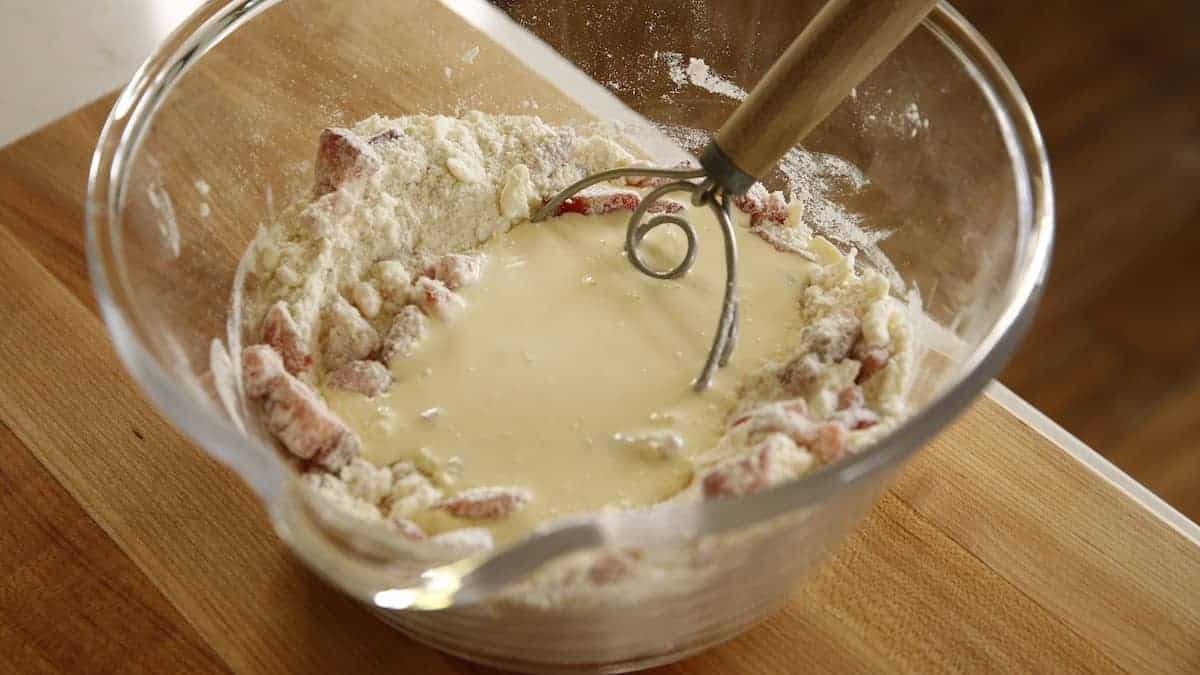
Do Not Overmix the Dough
- Anytime there’s dough to mix, it becomes a sensory sensation primed for “overmixing.” I get it.
- But scone dough is fragile. If it’s overmixed, it will create a dense, tough scone that won’t have the lightness and flakiness of a gently mixed scone.
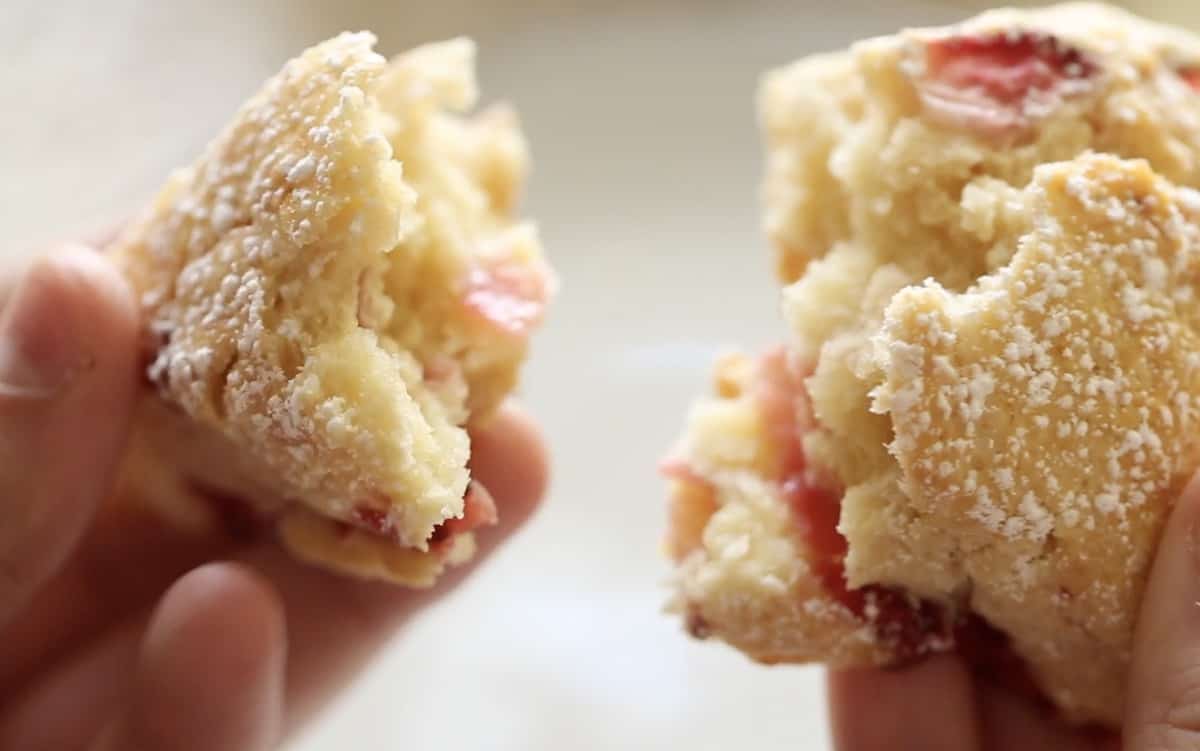
STEP#4: Form and Cut
- There are many different ways to cut scones, but my preferred method is to cut them into triangles.
- I like this shape best because it’s the easiest and requires less dough handling. More dough handling means tougher scones.
- I just press it into a square and gently roll the top to smooth it out.
- Cut it in half, then quarters, and then cut each quarter on the diagonal to make the triangles.
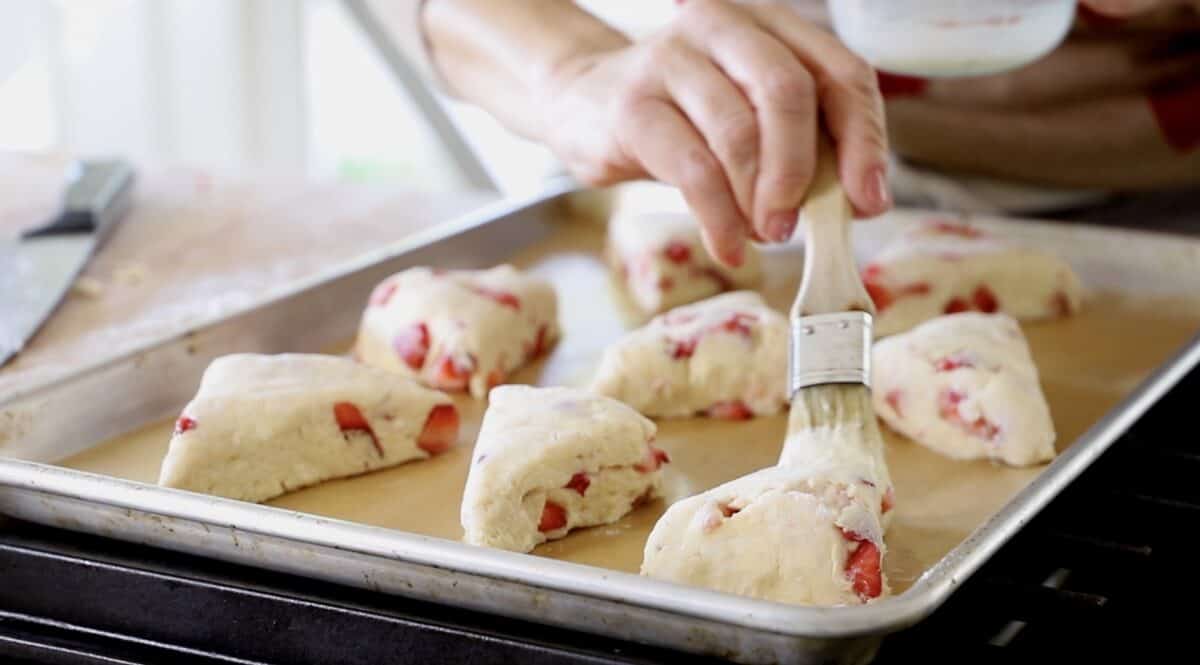
STEP#5: Brush with Cream and Bake
- Scones tend to crack and split when baked. A little cracking is always nice, but with fruit scones, you want to make sure they don’t split apart and cause the berries to fall out. Brushing a little heavy cream on top will keep them together.
- Then pop the tray in the freezer for 5-10 minutes to firm up. This will also help the scones retain their shape. If you bake them right away and the dough has already come up to room temperature and caused the butter to soften, the scones will start to melt in the oven first instead of rising. This can also affect their actual ability to rise too!
- So it’s best to give them their freezer time. If the baking tray won’t fit in your freezer, you can also refrigerate it for 20 minutes.
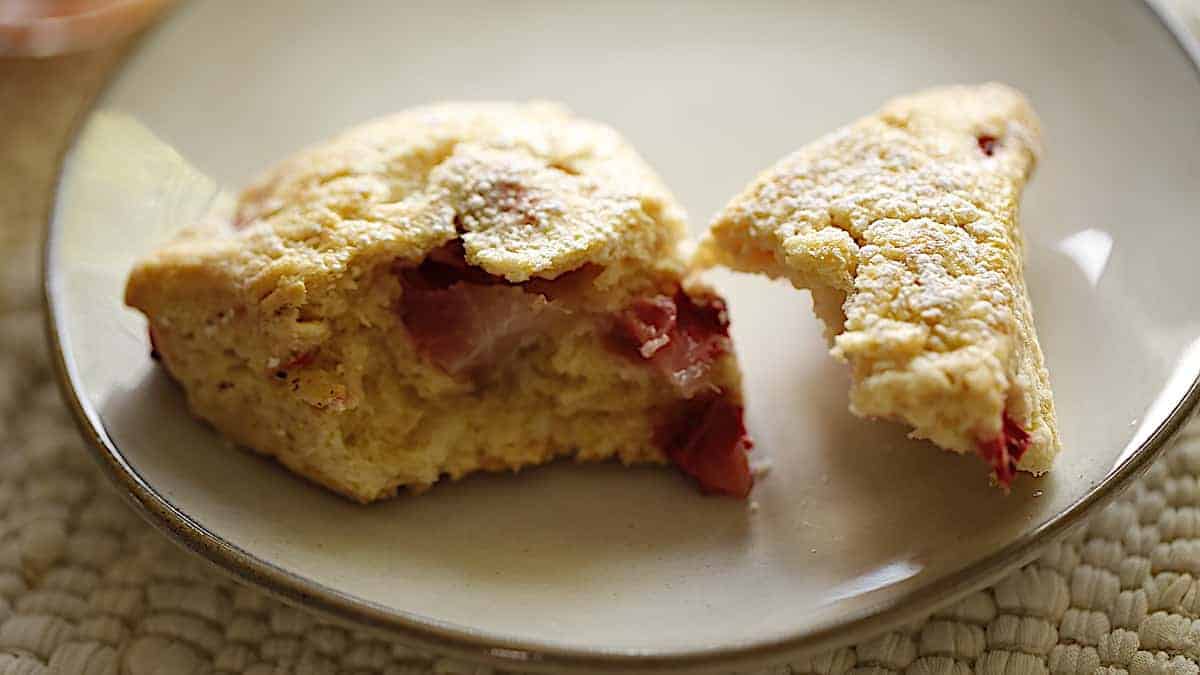
STEP#6: Garnish with Powdered Sugar
I think a little dusting of powdered sugar looks really pretty for Valentine’s Day, and because scones aren’t as sweet as muffins I find it’s the perfect little addition of “extra sweetness” on top.
If You Enjoyed This Recipe
Please Leave a Rating and a Review Below!

Strawberry Scone Recipe
A delicious light and flakey strawberry scone recipe that melts-in-your-mouth! Easy to make the day ahead and refrigerate and bake the next day!
Ingredients
- 2 cups (240g) flour
- ¼ cup (50 g) sugar
- 2 tsp (10 ml) of baking powder
- ½ tsp (2.5 ml) salt
- 10 tbsp (150 g) cold unsalted butter, diced into cubes
- ½ cup (120 ml) heavy cream
- 1 egg
- 2 tsp (10ml) of Almond Extract
- 1 cup (150g) strawberries, diced
- Powdered sugar for garnish
Instructions
- Preheat oven to 350F (175C).
- Line sheet pan with parchment paper.
- In a bowl combine flour, sugar, salt, and baking powder. Add butter and work by hand until dough resembles a coarse meal. Stir in the strawberries.
- In a small bowl whisk together the cream, the egg, and almond extract. Create a well in the center of the dry mixture and pour the wet mixture into the well. Reserve the pitcher or bowl you mixed the cream mixture in, whatever is left at the bottom of the bowl can be used to brush the scones with after they are cut. So don’t wash it out yet!
- Gently mix with a fork or Danish whisk until combined, and then grab dough with floured hands. Turn dough out onto a floured surface. Shape dough into a square, cut into 4 squares, and then cut the squares into triangles. You will have 8 triangles. Place the cut scones on a baking sheet lined with parchment paper. Brush each scone lightly with the leftover cream mixture.
- Pop the tray of scones into the freezer for 5 mins to firm up, (or fridge for 15 mins) and then bake for 20-25 mins until golden brown. Dust with powdered sugar.
Notes
It's really important to pop the tray in the freezer for 5-10 minutes to firm up before baking. This will also help the scones retain their shape.
If you bake them right away and the dough has come up to room temperature, causing the butter to soften, they will start to melt in the oven first instead of rise. This can also affect their ability to rise. So it's best to give them their freezer time. Or you can also refrigerate for 20 minutes if the baking tray won't fit in your freezer.
Nutrition Information:
Yield: 8 Serving Size: 1Amount Per Serving: Calories: 205Total Fat: 16gSaturated Fat: 10gTrans Fat: 0gUnsaturated Fat: 5gCholesterol: 64mgSodium: 134mgCarbohydrates: 16gFiber: 0gSugar: 15gProtein: 1g

Beth, as soon as farmers in my area have ripened strawberries, I am going to make this recipe. Right now the strawberries in stores taste like cardboard. I will definitely rate these as soon as I make a batch. My family loves scones (and strawberries)
I have a question regarding a mandoline slicer I saw you using in one of your videos when I was browsing some of your recipes. Where did you buy it? I like it because it has an adjustable thickness graph on the side of the machine. So much easier than guessing. Thanks for your response.
Oh sure I absolutely LOVE that Mandoline Slicer. It’s so easy to use and has some nice safety features too! You can find it on Amazon. It’s the OXO Mandoline enjoy!
Very happy with this recipe!! My almost 3 year old grandson and I enjoyed making these (and eating them) together.
Aww that’s the BEST part! So glad to hear you both enjoyed them! One of my family’s favorites too!
I just finished making these for a teatime this afternoon, I followed the recipe precisely using the grams and ml , but unfortunately there was too much liquid to the amount of flour dough and they turned out a sloppy liquid mess impossible to shape. Rather sad as I had made a double batch ( in two deperate attempts) for Valentines … Any ideas what went wrong ?
Oh no! OK 2 things come to mind. 1.) Doubling recipes is always tricky because even the most conscious cooks can skip a double or double something more than twice. Happens to me too! So I always recommend making 2 batches over doubling. But it sounds like there wasn’t enough flour? Or too much cream added if you were not able to form the scones 2.) It could be there was an issue with the imperial/to metric conversions? But I have always used this site without issue since 2012, so not sure why it would be off now? Unless you see something that doesn’t translate? I would try it again, just one batch and I bet you’ll have better success! 🙂
Perfect recipe! Very light scones and I like that they aren’t too sweet. These freeze beautifully and are ideal for keeping on hand to pop in the oven for a special breakfast or tea time treat. As always your recipes are so on point Beth!