Beth’s Ultimate Chocolate Chip Cookie Recipe
SHARE THIS RECIPE!


There are a few things in life that we all need an awesome recipe for; the Perfect Omelet, a Fudgy Brownie, and of course the ultimate chocolate chip cookie recipe. It’s one of life’s essential skills if you ask me. And these cookies fit the bill!
Why You’ll Love These Cookies:
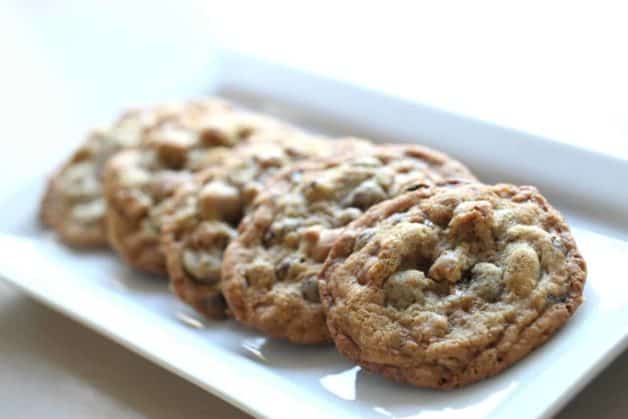
- Soft and chewy on the inside, yet crispy on the outside.
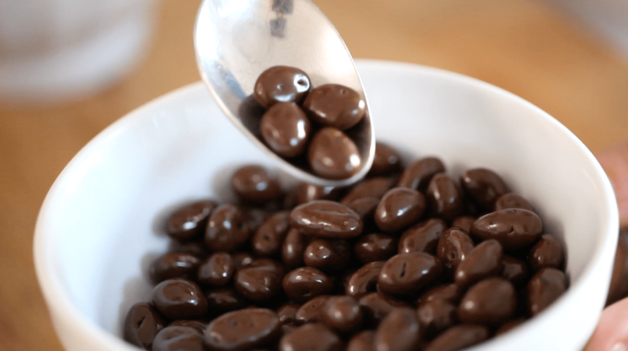
- Loaded with unexpected mix-ins like toffee bits and chocolate covered raisins for wonderful texture and chewiness
- For a twist on this classic that is equally good, try my Oatmeal Chocolate Chip Cookies or my Brown Butter Chocolate Chip Cookies.
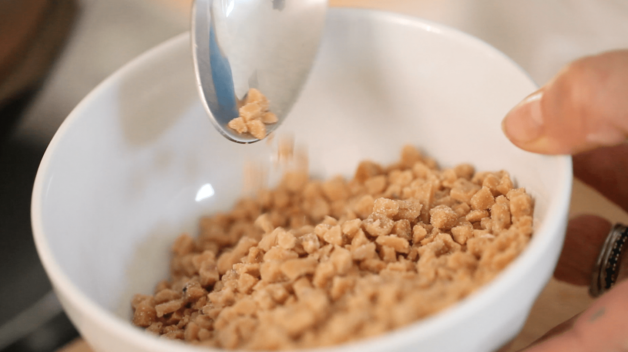
For the toffee bits, I use Heath’s Toffee Bits but you can also buy a Health bar and crush it up too. The toffee contributes this delicious caramel flavor to the cookie that is oh so good!
Watch My Video Demo of This Recipe Below!
Subscribe to my YouTube Channel for more recipe videos!
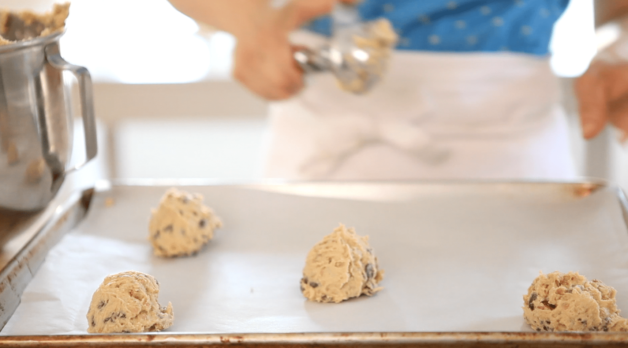
Use a Full-Size Ice Cream Scoop
- Don’t skimp on the scoops, be sure to use a regular-sized ice cream scoop. That way everyone is assured enough of the goodies inside!
- Also, use parchment paper to line your cookie sheet. This will assure even browning around the edges and prevent burnt bottoms from occurring.
Why Aren’t My Cookies Spreading?
- This might be the most common cookie question I receive when it comes to this recipe. If this is happening to you it could be caused by a few reasons.
- First, assure you are using real butter, not margarine or butter substitute
- Make sure your butter is softened at room temperature. Butter that is too cold will not spread easily in the oven.
- Do not chill the dough! Place them in the oven right after mixing. Chilling the dough will prevent them from spreading.
- And lastly, be sure you beat the butter and the sugars to a super fluffy consistency, and pale yellow color. This process should take at least 4-5 minutes with an electric mixer.
- This will add air and volume to the cookie, giving you a nice texture (as opposed to a dense texture) all while helping your cookies spread at the same time.
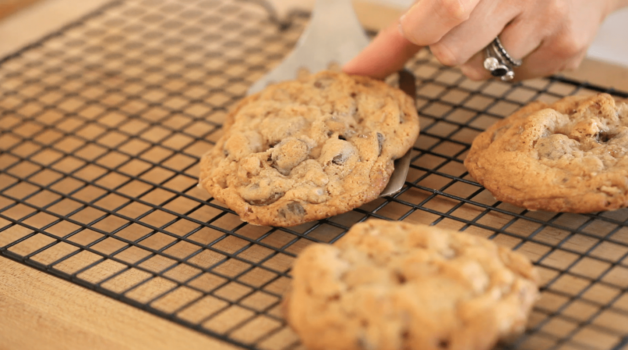
Allow the Cookies To Cool
As difficult as it may be, allow your cookies to cool for at least 15-20 minutes on a cooling rack. This will help the cookie set up and be less fragile. Especially with so many mix-ins like the chocolate-covered raisins, and walnuts, the cookie can be fragile and a bit crumbly when it’s still hot.
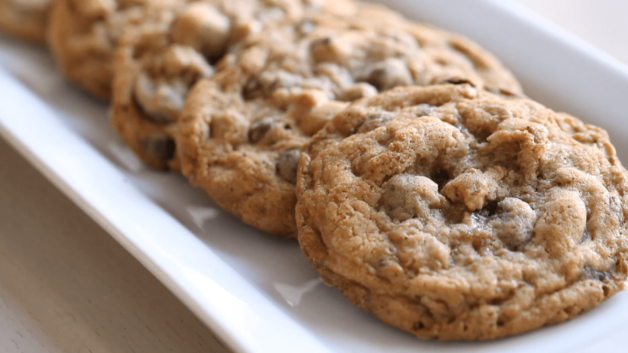
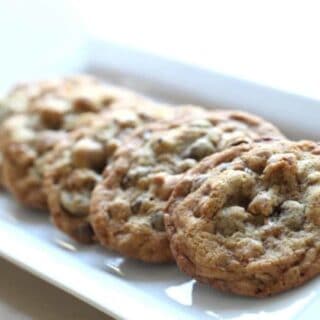
But Don’t Wait Too Long!
But really these are best eaten slightly warm when the chocolate and toffee will just melt into your mouth! Line them up on a rectangular platter and watch them disappear in minutes!
More Cookie Recipes You’ll Love
- Foolproof French Macaron
- Pumpkin Spice Biscotti
- Chocolate Hazelnut Linzer Cookies
- Chocolate and Vanilla Sugar Cookies
Please let me know if you make this recipe
by leaving a rating and review below!
Beth's Ultimate Chocolate Chip Cookie
The best chocolate chip cookie recipe! Loaded with chips, nuts and raisins! Soft and chewy yet crispy on the outside.
Ingredients
- 1 cup (240 g) of unsalted butter
- ¼ (50 g) cup white sugar
- ¾ (135) cup brown sugar
- 2 eggs
- 1 tbsp (7.5ml) vanilla
- 1 1/2 cup (180g) flour
- 1 tsp (5 ml) salt
- 1 tsp (5 ml) baking soda
- 1 cup (150 g) milk chocolate covered raisins
- 1 cup (150 g) semi-sweet chocolate chips
- 1 cup (150 g) candied walnuts
- 1 cup (150 g) of toffee bits
Instructions
- Preheat oven to 350F (177C).
- Beat butter and sugars on high for 5-7 mins until very light and fluffy.
- Add eggs one at a time, beating well between additions. Add vanilla.
- Combine flour, salt and baking soda in a bowl and whisk together. Slowly add flour mixture to butter mixture and beat until well incorporated.
- Add raisins, chips and walnuts, mix just until combined.
- Line a rimmed lined cookie sheet with parchment paper. Scoop out dough with an ice cream scoop. 5 to a tray.
- Bake for 13 mins, until golden around the edges and centers look dry.
- Let cool on tray on counter for 5 mins. They will set up and continue cooking on the hot tray.
- Transfer to cooling rack to cool completely
Notes
Why Aren't My Cookies Spreading?
- This might be the most common cookie question I receive when it comes to this recipe. If this is happening to you it could be caused by a few reasons.
- First, assure you are using real butter, not margarine or butter substitute
- Make sure your butter is softened at room temperature. Butter that is too cold will not spread easily in the oven.
- Do not chill the dough! Place them in the oven right after mixing. Chilling the dough will prevent them from spreading.
- And lastly, be sure you beat the butter and the sugars to a super fluffy consistency, and pale yellow color. This process should take at least 4-5 minutes with an electric mixer.
- This will add air and volume to the cookie, giving you a nice texture (as opposed to a dense texture) all while helping your cookies spread at the same time.
Nutrition Information:
Yield: 12 Serving Size: 1Amount Per Serving: Calories: 118Total Fat: 3gSaturated Fat: 2gTrans Fat: 0gUnsaturated Fat: 1gCholesterol: 35mgSodium: 18mgCarbohydrates: 22gFiber: 0gSugar: 21gProtein: 1g

I love the wonderful taste of these cookies but had troubles with the first batch. I could not get the center of the cookie to be done without the edges being overcooked. So I tried adding an additional 1/2 cup of flour to the recipe and they baked perfectly in my oven at 350 for 10 minutes. They are so good and yummy, my family just loves them. Hope this helps somebody else experiencing the same problem.
Hi beth!
I love all your recipes!
I am trying your chocolate chip cookie recipe; I only have 3/4 c chocolate raisins and no toffee bits. Should I increase the chocolate chips?
Thank you
Yes exactly increase the chocolate chips and nuts to compensate for the lack of toffee bits 🙂 Hope you enjoy!
thank you Beth!
these are absolutely delicios! My husband loved them and I used them to gift as well; thank you Bath!
I have a couple questions. These are baking completely flat with greasy bottoms for me after 5 or 6 trials but I’m assuming it’s me as I’m sure you’ve made them tons of times. I’m open to your suggestions, here’s where I am: I’m using a less than year old KitchenAid oven that was properly calibrated. Pure cane Domino sugars. Gold Medal AP flour which I weigh since that’s easy to get wrong. My baking soda is fresh. I’ve used room temp butter, slightly cool room temp butter, and cubed butter straight from the fridge creaming in a Kitchenaid stand mixer for both the 5 minutes and the 7 minutes you’ve mentioned. I’ve baked exactly as written. I’ve chilled parts of the different batches. Increased the oven temp to 375° and baked semi-flattened chilled dough to heat more surface space, put chilled and semi-flattened cookies in a 350° oven then immediately reduced the temp to 300° to go long. It’s winter in Cincinnati and we aren’t having snow or rain so no heat or humidity issues in the kitchen and I’m at a normal altitude. (I normally bake cakes, they’re finicky!)The dough is the best I’ve ever tasted so I do want to get this right. Other suggestions? I did change the raisins to more chocolate chips and white chips for nuts but that shouldn’t impact the dough itself. I’m all ears! And not discouraged, like I say the dough is amazing, I’m probably just one trick away from getting them right.
Ah OK a couple of thoughts here. First I would not weigh the flour because I didn’t weigh mine when developing the recipe, (so if you weighed yours we will have different amounts) but rather used the spoon-in method of measuring straight from the canister into the measuring cup, and then shake the cup to level out the measure. Then I would also not refrigerate the dough, personally, I find refrigeration is the arch-enemy of chocolate chip cookie dough. It affects the rise and the spread and I always find the cookies are much better when baked right after mixing. Also be sure to use parchment paper to line your baking sheets, be sure your oven rack is at the lower third rung of your oven, and only bake at 350F to allow the centers to set and the edges to become golden brown and crispy. Hope that helps and keep me posted on your results!
Thank you so much for the tips!! Especially over a holiday, I wasn’t expecting that so soon!
And I probably threw too much jumbled info at you, my bad! I’m a review reader and I love reading where people like me go wrong and how to make it right. LOL
A problem I left out, burned edges before center was no longer wet looking. Residual heat from cooling on the hot cookie sheet did not last long enough to finish baking the centers.
(1) All batches had a tray of room temp dough baked exactly per instructions at 350°.
Only parts of some of the batches were chilled to see if that had an impact, it did not. Changing the oven temp did not hurt or improve the outcome of any of the batches either.
(2) All were baked on parchment (because cleaning Silpat after buttery cookies…yuck!)
(3) I did bake center oven which is different than you recommend. I also tried using 2 racks trading and rotating halfway through. All flat, not fully baked centers, burned edges.
Tonight I used the lower third of the oven, results below.
(4) The flour measuring method was probably the big problem for me. In your recipe you have included weight measurements and Gold Medal AP flour measures 180 grams for 1 1/2 cups exactly as you have written. Going by weight is my norm. When I changed measuring methods tonight I dumped the results on the scale and indeed there was a bit more than 2 extra tablespoons of flour. Adding more flour will definitely change the results. The flavor too.
Tonight the 2 trays that were put in the ovens (double oven) immediately upon mixing both turned out flat with burned edges before center was set enough.
HOWEVER the tray that had to wait for an oven was different. They still baked flat and spread BUT they were nice and golden, fully baked centers, no greasy bottoms. An article on Bon Appétit website (“For the Love of Cookies, Please Don’t Skip This Step of the Recipe”) explained exactly the difference.
Thank you for your time, especially over a holiday!!!!
Be blessed!!!
Hey do I have to use brown sugar can I just use white?
You could use all white sugar, but you will have a crisper cookie. The brown sugar gives it a bit of chewiness 🙂
Hi Beth,
What are toffee bits and can you give me an example of the brand you would use? I’m assuming they are not the same as butterscotch chips. Could I chop up a Skor chocolate bar and use that?
Oh sure they are the Heath Bits but I think you could probably chop of the skor bits too! 🙂 Hope you enjoy!
Hi Beth, I am about to make these(they look SOOO good) but we just ran out of All-purpose flour so is bread flour fine? If not, is there anything I could just change in the recipe? Thank you 🙂
Hmm I’ve never used bread flour before so I’m not really sure what it would do in this recipe? But if you try it let me know if it worked because now I’m curious! 🙂
These are the best homemade cookies I have ever made!
YAY! So glad they were a hit!
Hi Beth
Can this recipe be refrigerated overnight before baking.
Actually I’ve found it’s better at room temp just after the batter is made, otherwise they don’t spread out properly.