Salted Caramel Ice Cream Recipe
SHARE THIS RECIPE!


This Salted Caramel Ice Cream recipe is one of those rich pleasures in life that is totally worth making from scratch, especially since it’s a flavor that can be hard to find in stores. The combination of the decadent texture with the salty kick is just sublime!
It’s much easier to make than you might think, and I find it’s not as sweet as those store-bought varieties too. That’s another reason I like homemade ice creams you can control the sweetness! Enjoy it on its own, or serve it on top of my Easy Pear Tart, or my French Apple Tart Recipe.

Recipe Pairing Ideas:
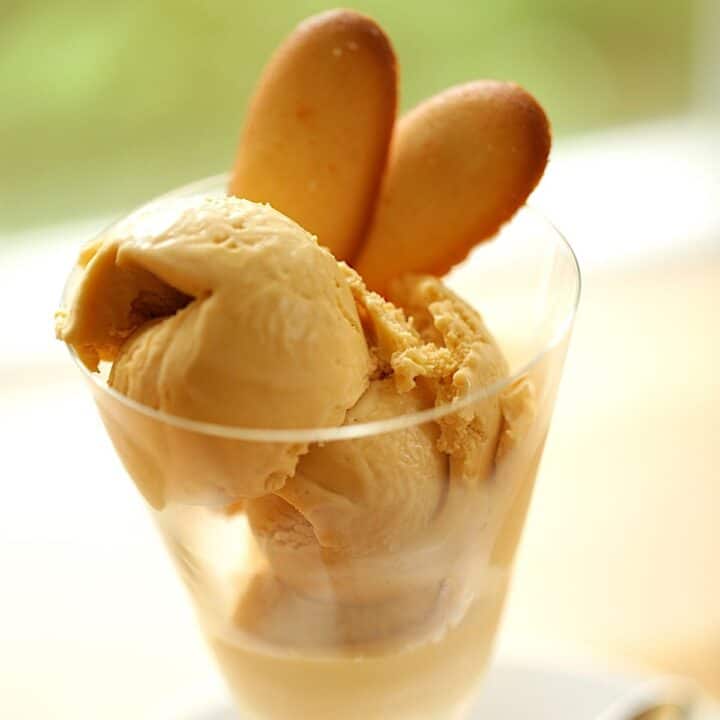
- Serve it with some tasty Langue de Chat cookies and you have a fantastic finish to any meal! This ice cream is also quite delicious when turned into ice cream sandwiches!
- Try sandwiching between my Classic Peanut Butter Cookies or my Brown Butter Chocolate Chip cookies for the ultimate summertime dessert idea!
- Or they would be pretty fantastic served in some Homemade Profiteroles too!
Watch My Video Demo of this Recipe Below
Subscribe to My YouTube Channel and never miss a recipe!
Step #1: Make the Caramel
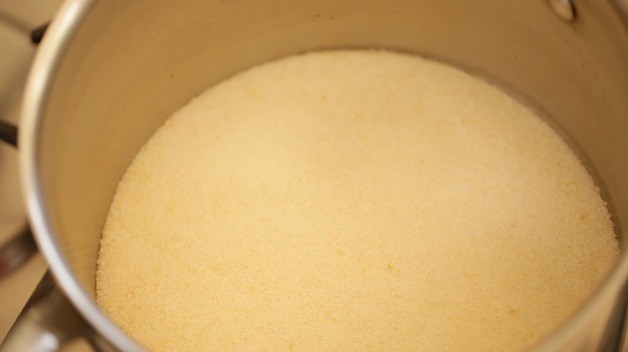
- The first step to making this ice cream is to make the caramel. Place the granulated sugar in the bottom of a heavy-bottom saucepot on medium-high heat until it starts to melt and turn amber brown.
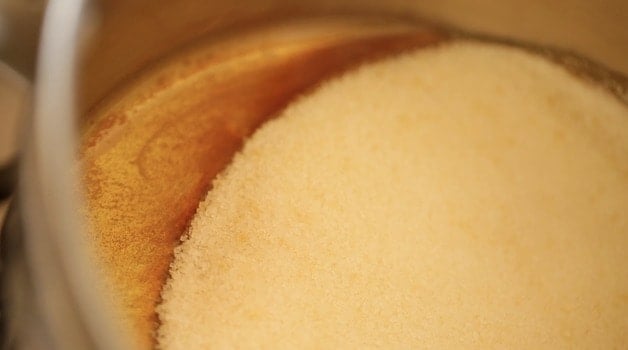
- Once it starts to look like this, start swirling the pan around and adjusting your heat as needed so that it doesn’t burn.
- This takes a bit of practice as you’ll find it’s a balance between the right amount of heat, swirling, and lifting the pot off the heat periodically to prevent it from burning!
Caramel Making Tips:
- It’s best to use a larger pot, than a smaller pot. That way you’ll have more surface area on which to melt the caramel.
- If the caramel starts to become too amber-brown too quickly, lower the flame or pick the pot up off the flame and swirl it to cool it down
- If your caramel starts to burn, and you will smell it if it does! It’s best to start again. You can’t really mask the taste of burnt caramel.
The Secret to Making Caramel is Patience
The best method is patience. Just keep swirling the sugar, resisting the temptation to stick a whisk in the caramel “to help it along” this will just force the sugar to seize up and stick to your whisk.
It will then take a day of soaking to remove the burnt sugar! Steady as she goes and eventually, it will look like this, a smooth amber color caramel.
Adding the Heavy Cream
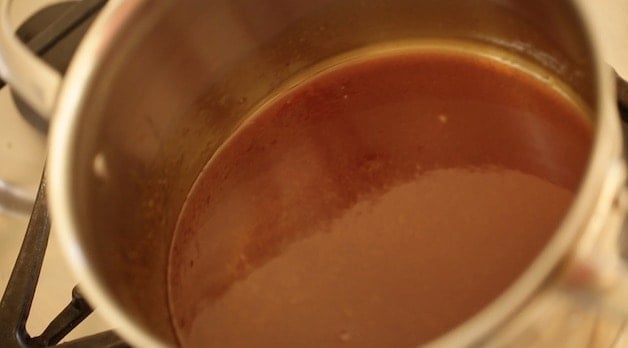
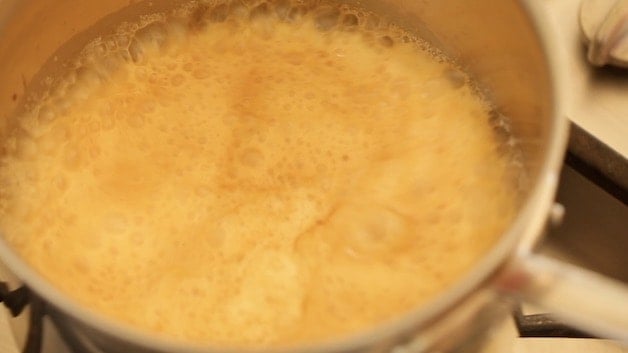
When you add the heavy cream. It should be room temperature or slightly warm because cold liquid going into hot caramel will just seize up and create a big sugar mass! The cream will make the caramel pliable and allow it to be stirred into the ice cream base.
After you add the cream it will bubble up and resemble a witches brew! For this, it helps to have a high-profile pot, nothing too shallow, so it doesn’t boil over. But just let it bubble and it will eventually calm down.
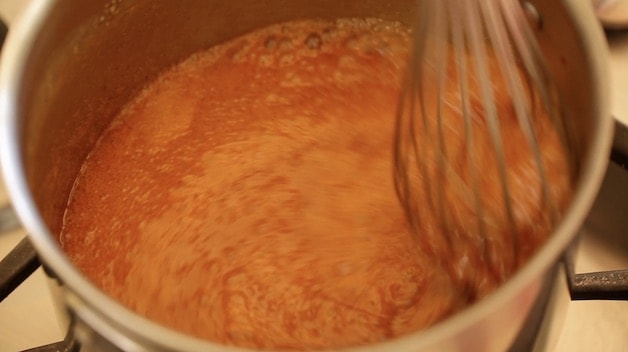
Once it does then put your whisk in it and whisk it up to smooth the mixture out. You’ll then add the butter to create a silky texture.
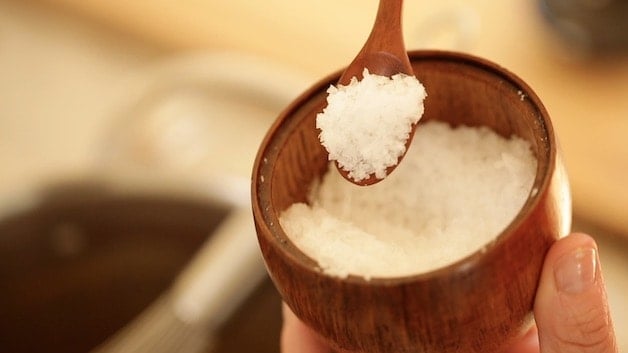
Adding the Salt
I like to use Fleur de Sel sea salt, which I find to be less salty than regular table salt and great in desserts like this. But if you don’t have any Fleur de Sel, you can also use a pinch of Kosher salt, which is also better than table salt for this recipe. Table salt is just too salty.
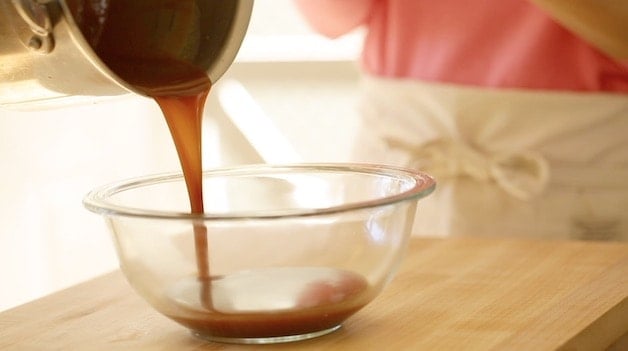
Then transfer your caramel to a heat-safe bowl (since it will be hot!) and set it aside while you work on the ice cream base. Once you master homemade caramel you can also use it for my Salted Caramel Puddings or drizzle over my Apple Cinnamon Crepes.
Step #2: Making the Ice Cream Base
This ice cream recipe uses a cooked egg base which I think adds to its rich and creamy texture. But you do need to cook the base to 165F in order to remove the bacteria in the eggs before processing your ice cream.
It doesn’t take long and once you take your first bite of this ice cream you’ll agree it was well worth the effort!
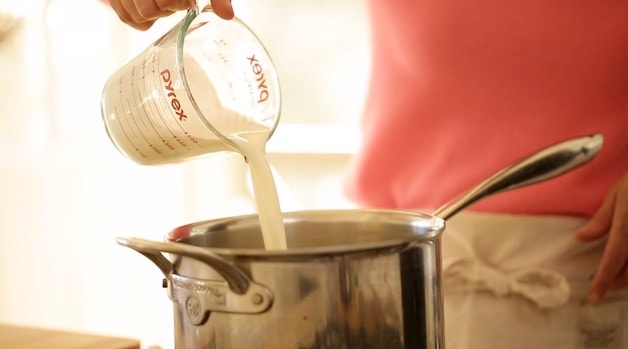
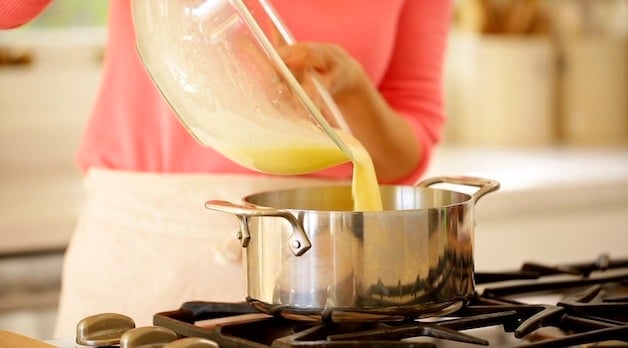
After heating the milk and cream in a pot, you’ll add it to your egg yolk and cornstarch mixture. Then place it in a clean saucepot to cook and reach 165F.
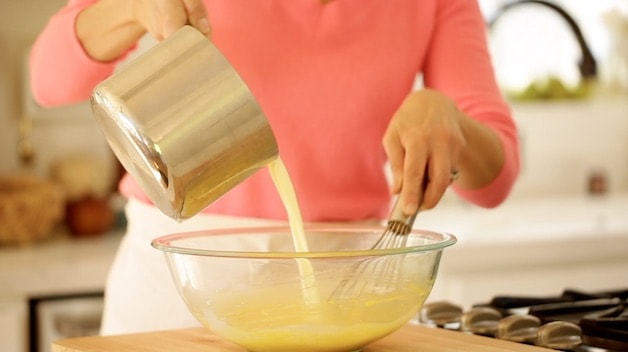
It’s important to use a clean pot so that no remaining residue from the “warming of the cream/milk” remains. Because that will create an environment for the custard to stick and eventually scorch while heating.
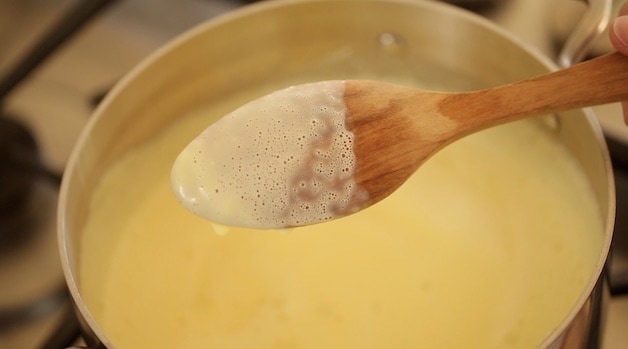
Assuring the Temperature with a Candy Thermometer
- As the custard cooks it will thicken and coat the back of a wooden spoon.
- Check the temperature with a candy thermometer and once it reaches 165F it’s ready!
- That way you know the bacteria in the eggs have been cooked off and it will be safe to eat.
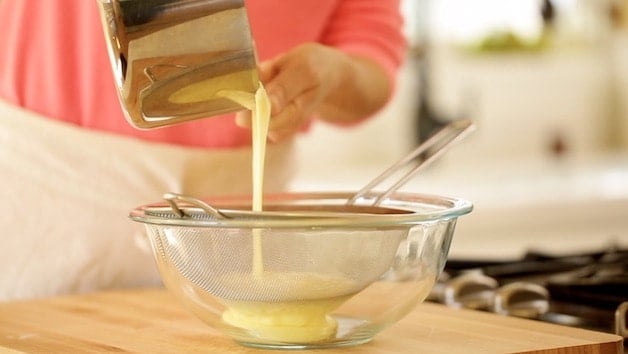
Strain the Custard
For the ultimate smooth and creamy texture, strain this mixture through a fine-mesh sieve into a large bowl. The straining will catch any bits of egg that overcooked and any lumps so that all you have left is a smooth silky ice cream base.
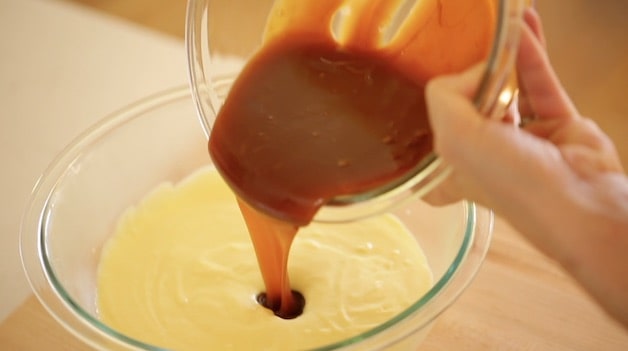
Add the Caramel to the Base
Then add the caramel into the ice cream base and stir to combine. Place the base in the refrigerator, covered, for at least 2 hours until well-chilled.
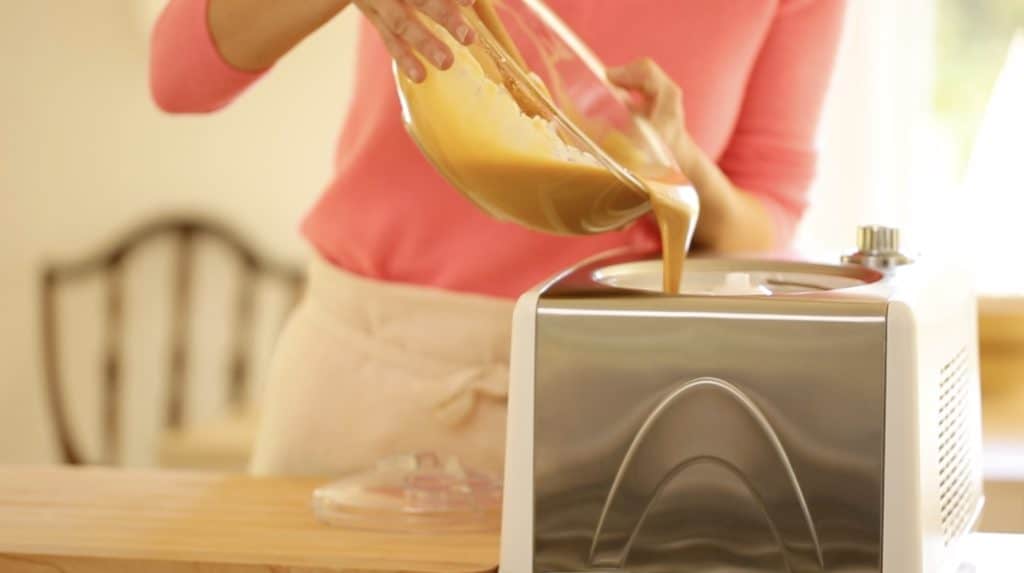
Step#3: Process the Ice Cream
Transfer the base to your ice cream machine and process it according to your manufacturer’s instructions. If you make a lot of ice cream at home as we do, I highly recommend an Ice Cream Machine that has an internal freezing mechanism.
This allows you the ability to whip up several batches of ice cream without having to refreeze the bowl in between batches, which is quite fun if you wanted to make a few different flavors for a party.
You could pair this ice cream with my Mint Chocolate Chip Ice Cream or my Nutella Ice Cream for an ice cream buffet which is always a big hit!

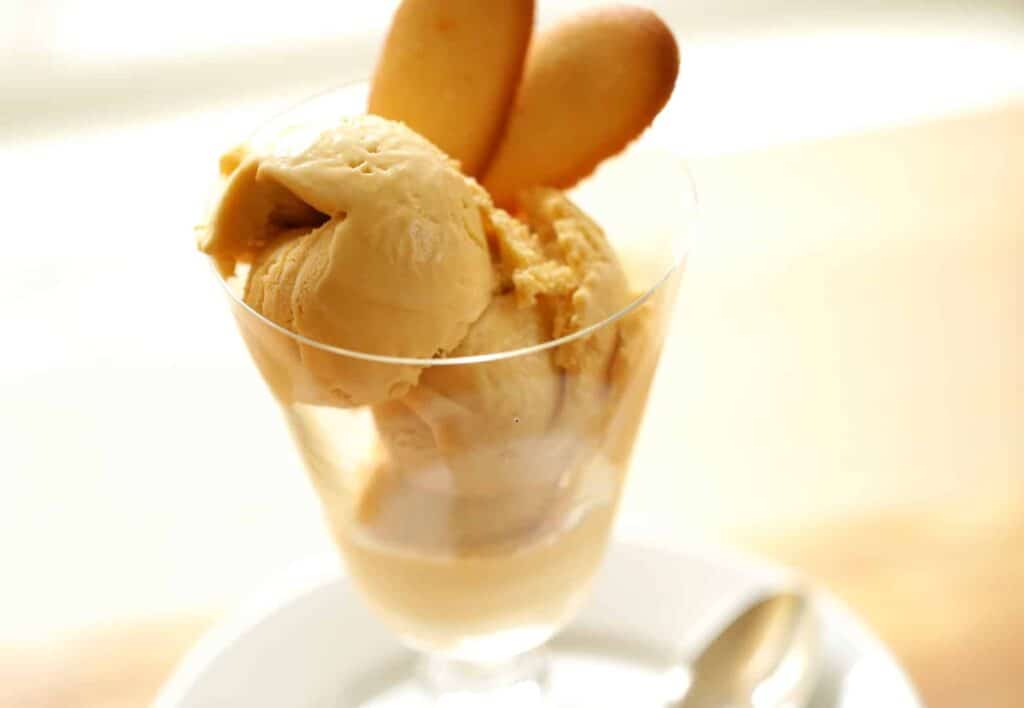
How To Know When It’s Done
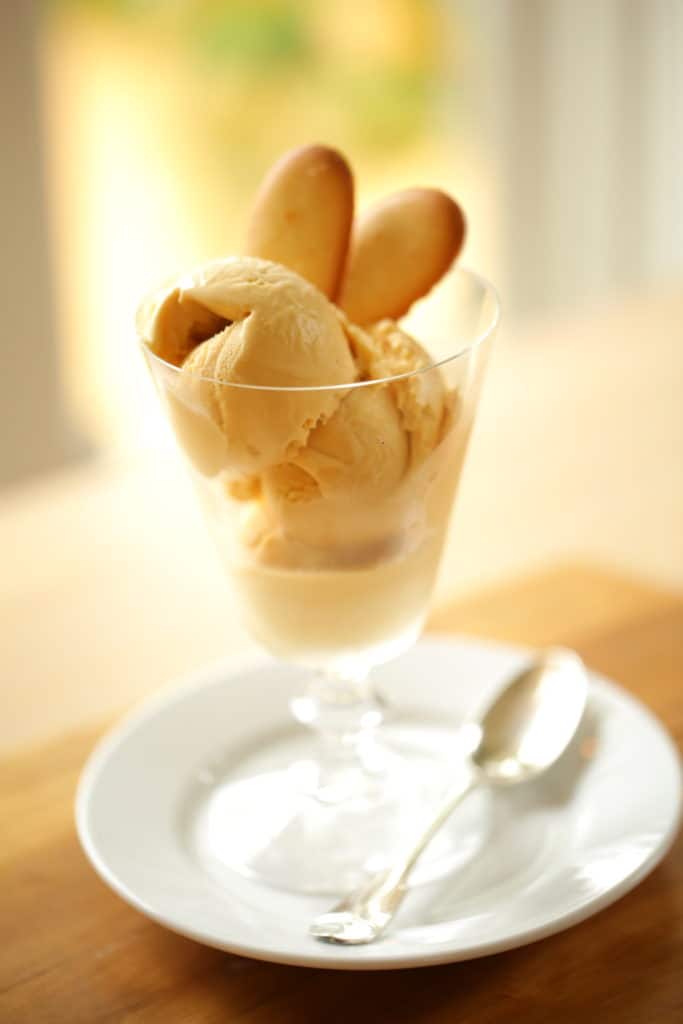
You’ll know that it’s done when it reaches the consistency of gelato. Then you can transfer it to a storage container and freeze it overnight. To make a nice presentation serve your salted ice cream in footed glasses with some of your favorite cookies on the side!
More Dessert Recipes
- Chocolate Pot de Creme
- Lavender Creme Brulee
- Homemade Pineapple Upside Down Cake
- Red, White and Blue Ice Cream with Homemade Waffle Cones
If You Enjoyed This Recipe
by leaving a rating and a review below!
This helps others discover and enjoy the recipe too!
Salted Caramel Ice Cream Recipe
Homemade Salted Caramel Ice Cream is one of those rich pleasures in life. The combination of the decadently smooth texture with the salty kick is truly sublime!
Ingredients
For Caramel:
- 1 1/3 cup (265 g) of sugar
- 1 cup (240 ml) heavy cream, slightly warm
- 1 tbsp butter (15 g)
- 2 tsp fleur de sel sea salt* (10 ml)
For Ice Cream Base:
- 6 egg yolks
- 2 tbsp (13 g) cornstarch
- 2 cups (480 ml) heavy cream
- 1 cup (240 ml) milk
- 2 tbsp (25 g) sugar
- 1 tsp (5 ml) fleur de sel salt
Instructions
- In a large saucepan, heat sugar on medium-high until it starts to melt and turn amber brown. Swirl the pan around the heat, being careful not to stir it, but allowing it to melt on its own.
- Reduce heat to low, add 1 cup of heavy cream, it will boil up but then settle down as you whisk it until smooth. Add butter and fleur de sel sea salt. Transfer to a heat-safe bowl and set aside.
- In a large bowl whisk, together egg yolks with cornstarch until smooth. Set aside. In a large saucepan heat cream, milk and sugar until sugar dissolves.
- Temper egg mixture by pouring a little of the warm cream/milk mixture into the eggs whisking all the while, adding a little at a time until everything is combined.
- Transfer base mixture back to the sauce pot and heat on medium-high, stirring until thickened. It should coat the back of a spoon and reach at least 165F.
- Then pour the cooked base through a sieve into a clean bowl. Stir in the caramel sauce until smooth. Refrigerate 2-4 hours until chilled. Process ice cream in an ice cream machine according to your machine’s operating instructions and freeze until firm.
- Scoop ice cream into fancy glasses and serve with Langue de Chat cookies.
Notes
*Fleur de sel sea salt is much less “salty” than table salt. If you can’t find it, use Kosher salt (better flavor than table salt) very sparingly (start with 1/4 tsp (1.25ml) to taste until desired saltiness in caramel is achieved.
Nutrition Information:
Yield: 6 Serving Size: 1Amount Per Serving: Calories: 94Total Fat: 9gSaturated Fat: 5gTrans Fat: 0gUnsaturated Fat: 4gCholesterol: 155mgSodium: 675mgCarbohydrates: 1gFiber: 0gSugar: 1gProtein: 2g

Hi Beth. I love your recipes (most recently, The BEST Raspberry Almond Cake 🙂
Do you know how much caramel this recipe makes? Trader Joes makes a Caramel Sauce that is excellent that I’d like to use to save time.
Oh sure you could try that! It probably makes about 2 cups of caramel 🙂 Hope you enjoy it!
Can the egg in the recipe be replaced?
Unfortunately not with this recipe. The egg is what gives the ice cream its structure. But I’m sure there are lots of egg-free recipes across the internet that would be developed for “egg-free” ice cream. I would go with a recipe like that, maybe search for Vegan Ice Cream, that would turn out better than omitting the egg here 🙂
Oh my goodness. This is very good. I had made caramel once before and I believe did use some water in the beginning. I have to say the caramel process was a bit more challenging than I expected and almost made me think I wouldn’t attempt this again but that was before I tasted the ice cream. It may just be worth the effort. I have only tasted it as I placed it into containers for freezing so I’ll have to see how it is frozen solid. I used 4 egg yolks just because 6 seemed like a lot. My freezer wouldn’t have held the extra volume so I believe I am ok with only the 4 egg yolks. I have been using an ounce or less of vodka in my ice cream to prevent the solid freezing but did not with this recipe in an effort to see how the corn starch works. Great recipe. If you try it, you won’t be disappointed. I will add for the novices, even with warm cream the caramel may seize up. I wasn’t able to get all of it to combine with the cream nicely but there was plenty of caramel flavor in the finished product. I’ll have to do a little more research on making caramel.
I had two egg yolks in my fridge I needed to use. So I did 1/3 of this recipe. And it turned out AMAZING! I wish I made the full recipe. Super creamy, awesome caramel flavour. Will absolutely be making this again. Thanks for sharing!
YAY! So glad it was a hit! 🙂 This ice cream also makes for a great ice cream sandwich with this cookie 🙂
I tried this recipe, WOW! The first time I had trouble getting the custard to freeze; my fault not the recipe. The second try, came out perfect. The flavor balance is beautiful. It is a perfect blend of salty, caramel and smooth custard. Don’t be afraid of making the caramel. However, I do recommend that you have the proper tools, .i.e., sauce pan, stainless steel Calphalon, and a plethora of patience. You can’t rush the caramel and do not attempt to multi-task. It’s worth making the caramel yourself. A beautiful ice cream full of flavor, worth every effort.